Manage Teams and Access
This page outlines how you can organize users into teams and manage permissions to key data in order to simplify your user onboarding and improve access control. Teams are groups of Etleap users that can collaborate on pipelines and connections. Users can belong to zero or as many Teams as needed. Using this feature is optional if you’d like to maintain more granular control over entity access at your company.
User Access Levels
Every user in Etleap has one of three access levels. Access levels determine what a user can see and do across the application.
| Access Level | Description |
|---|---|
| Org Admin | Full access to all features. Can manage users, teams, connections, pipelines, and dbt schedules. Can access the Admin Console. |
| Standard | Can create and manage pipelines and connections that are shared with them. Cannot access the Admin Console or manage other users. |
| Pipeline Viewer | Read-only access to shared pipelines and the dashboard. Cannot create, edit, or delete any resources. Intended for stakeholders who need visibility into pipeline status and health. |
Pipeline Viewer
Pipeline Viewer is a restricted access level designed for users who need to monitor pipeline status without the ability to modify any resources.
Pipeline Viewer users can:
- View the Dashboard, including pipeline status and pipeline-related notifications.
- View the Pipeline List for pipelines shared with them.
- View Pipeline Pages, including settings and audit logs, in read-only mode.
- Open the Wrangler for shared pipelines to inspect data.
Pipeline Viewer users cannot:
- Create, edit, or delete pipelines, connections, or dbt schedules.
- Edit a pipeline’s label.
- Save changes to the Wrangler script for a pipeline.
- Access connection detail pages, even if a connection is shared with them via a team.
- Dismiss notifications.
- Access support tickets associated with a pipeline.
- View which other users and teams have access to a pipeline.
- View or manage other users.
- Access the Admin Console.
Manage Teams
Org Admins can manage teams with enhanced administrative and security features in their admin console. Within the console, they can create teams, view and manage member access, and delete teams if necessary. Please note that deleting a team is an irreversible action. For guidance on creating teams and adding members, please follow the steps below.
Step 1. Create Teams
- Log in to your Admin Console.
- Select the Teams tab.
- Click +Add Team.
- Enter a Name and Description for your new Team.
- Click Add Team.
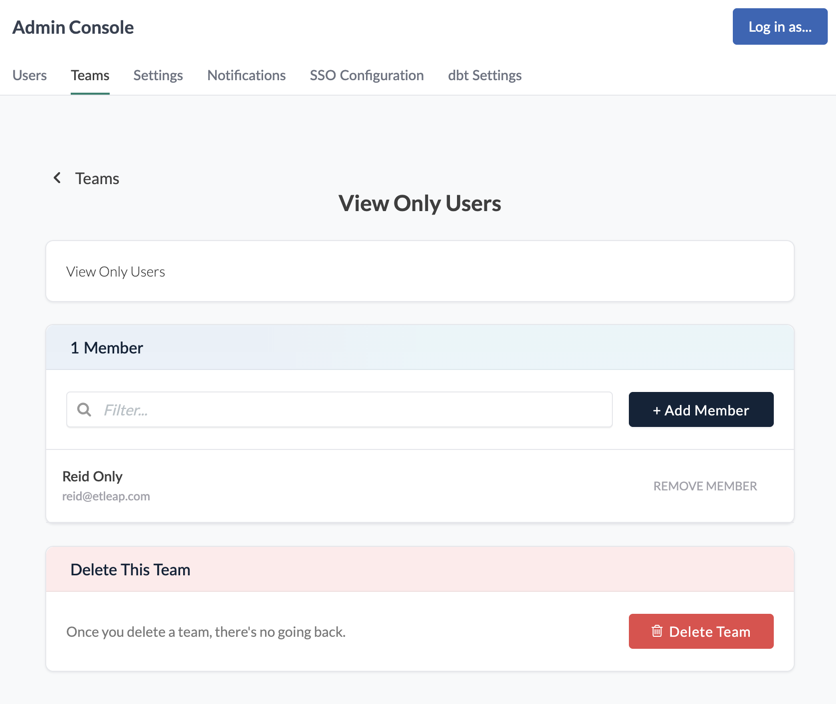
Step 2. Add Members
- Navigate to your Teams tab in the Admin Console.
- Select the team you want to edit.
- Click +Add Member.
- Scroll or type to search for users that are not part of the team currently.
- Select the user(s) you’d like to add. You can select multiple users to add to a team at once.
- Click Add Member to Team.
Adding Users
Org Admins can add new users from the Users tab in the Admin Console. When creating a user, the Org Admin must select an access level: Org Admin, Standard, or Pipeline Viewer.
Manage Access
Pipelines and connections can be shared across users and teams from an entity’s access tab. Within this tab, Org Admins can grant entity access, view a list of existing collaborators and set permission levels for connections only. Org Admin and Standard users with access to pipelines can create, update, and delete them. Pipeline Viewer users have read-only access. For connections, users can have one of two access types:
| Permission | Description |
|---|---|
| Use | You can use the connection to create pipelines. |
| Edit | You can use the connection to create pipelines, plus view and edit the connection properties (e.g., addresses, passwords, etc.) |
Connection permissions only apply to Org Admin and Standard users. Pipeline Viewer users cannot access connection detail pages, even if a connection is shared with them.
Users can receive permissions via one of the following scenarios:
- Granted individual access by their Org Admin or the owner of the respective pipeline or connection.
- Automatically inheriting access granted to a Team they are a member of.
- Creating the pipeline themselves, making them the owner.
When a user is a member of multiple teams and a connection is granted to more than one of those teams, the user will receive the highest connection privilege.
For guidance on granting pipeline access and managing connection permissions, please follow the steps below.
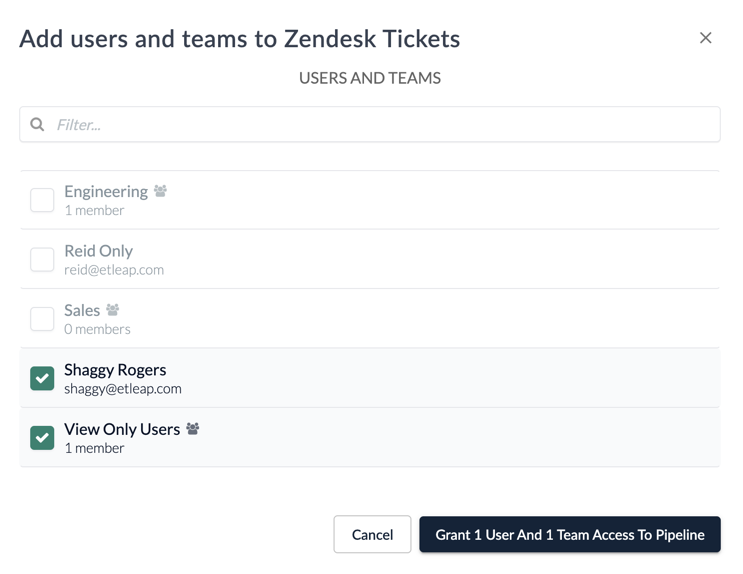
Grant Access
- Select the pipeline you want to edit.
- Navigate to the Access tab.
- Click +Add User or Team.
- Scroll or type to search for users and teams that do not have access currently.
- Select the team(s) to grant access.
- Click Grant User or Team Access to Pipeline.
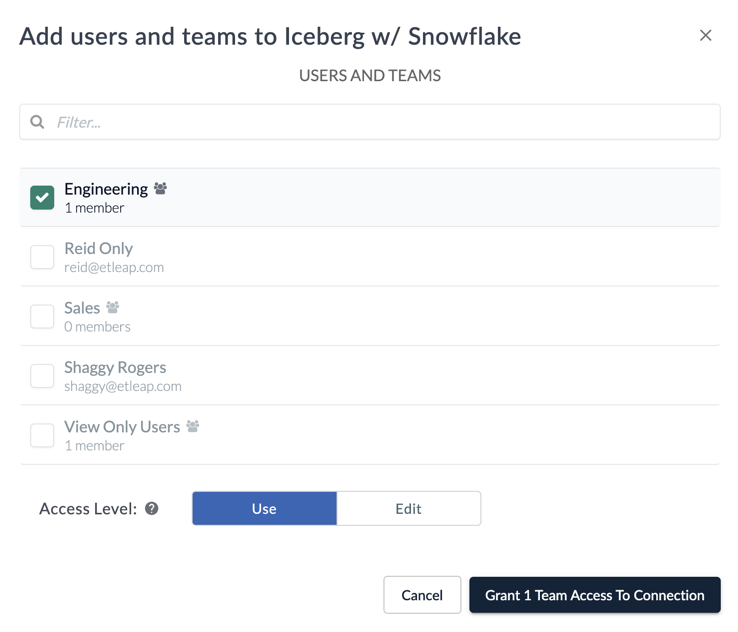
Set Permissions (Connections Only)
- Navigate to the connection’s Access tab.
- Click the role dropdown next to the user or team you’d like to edit.
- Choose the desired access level (Use or Edit).
- Click Grant User or Team Access to Pipeline.
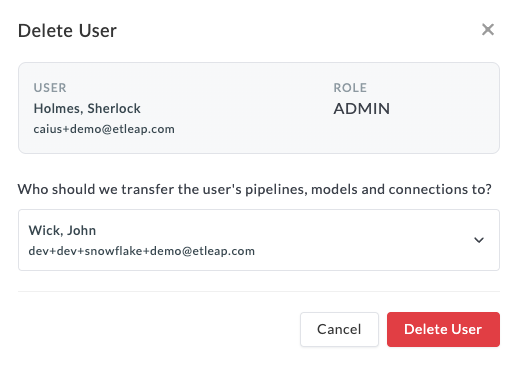
Removing Users
Removing a user also allows for pipeline and connection ownership to be transferred from one user to another.
- Log in to your Admin Console.
- Select the Users tab.
- Click the trash can symbol.
- Select which user you’d like to transfer ownership of any connections and pipelines to.