Create a dbt Schedule
This document explains how you can use dbt Schedules to model data in your warehouse and create end-to-end data pipelines with Etleap. It will include how to set up a dbt project for dbt Schedules and how to create a dbt Schedule in Etleap. For more information on what a dbt Schedule is, see dbt Schedules.
Prerequisites
To set up a dbt Schedule, you’re going to need:
- An existing data warehouse connection in Etleap. You can use Redshift, Snowflake and Databricks connections.
- Dbt Core and the dbt adapter for your data warehouse. Follow the installation instructions for Redshift , Snowflake or Databricks .
- A GitHub account and repository.
Set up a dbt Project
This guide will describe how to set up your first dbt project. If you already have a project jump ahead to step 3.
Step 1: Create a dbt Project
Follow the steps below to set up a new dbt project and check in the project to GitHub.
To create a dbt project, run the following command:
dbt init <project_name>During the set up you might need to provide connection details to your data warehouse. These details are only required to run dbt locally.
The init command will create a new dbt project template.
You can see the first dbt models in the models/ directory.
This is where you can write the models that will be run on your data warehouse.
You can create and edit these models within the Etleap dbt Edtior, or a local development environment.
To use your dbt project with Etleap’s dbt Schedules you will need to check in the project to GitHub. Create a new GitHub repository and check it in to GitHub.
Step 2: Connect Your dbt Project to Etleap
Allow Etleap to access your dbt project by completing the dbt setup steps here.
Step 3: Develop and Validate Models
Before you can create a dbt Schedule, you’ll first need to create and validate your models either in the dbt Editor or a local development environment.
In the dbt Editor
The dbt Editor provides a simplified workflow for creating dbt models. The dbt Editor allows you to bypass the need for a local development environment when creating, editing, and previewing dbt models.
In a Local Development Environment
You will need to connect dbt to your data warehouse to run your project locally.
By default, dbt uses a profiles.yml file in the ~/.dbt/ dircetory to set up a connection to your warehouse.
Find out more about dbt connection profiles here .
Run the following command to build the specifed models in your data warehouse:
dbt buildEtleap’s dbt Schedules use dbt Selectors to reference models that should be bundled in one run.
Set up your own selectors by creating a top level selectors.yml file in your dbt project and reference the models to be run with the selector.
Find out more about dbt YAML selectors here .
To confirm the build selected by the selector works, locally run:
dbt build --selector <selector_name>When you are happy with your models and dbt runs locally, push the latest version of your dbt project to GitHub.
Step 4: Setup dbt Sources for Your Etleap Pipelines
You can use dbt sources to reference destination tables from Etleap pipelines in your dbt models. Dbt sources define tables or views in your data warehouse that have not been created by dbt.
In the dbt Editor
Etleap automatically creates an _etleap_sources.yml file for you which contains all eligible pipeline sources that Etleap has context of.
More information on how the dbt Editor manages sources files can be found here.
If there are source tables in the warehouse that an Etleap pipeline does not load to, these can be configured in a separate sources file following the local development environment directions below.
In a Local Development Environment
You specify your sources in a .yml file in the models/ directory.
See the structure of a source definition here .
To reference the destination table of an Etleap pipeline, the schema and table name specified in the dbt source must match the destination table. You can also specify a database, if you want the dbt models to be built in different database than the pipelines are ingesting into. A source specification can look like this:
sources:
  - name: source_destination_schema
    database: <connection_database_name>
    schema: <table_schema>
    tables:
      - name: <table_name>
      - name: <table_name>
The schema and tables names need to match the pipelines destination schema and table to match.
You can find out more about matching dbt sources to Etleap pipelines here.
Set up a dbt Schedule in Etleap
Step 1: Choose the Target Connection to Build the dbt Models in
- Click on +Create button at the top right of the nav bar.
- Select dbt Schedule in the drop-down menu.
- Select a Redshift, Snowflake or Databricks connection as the source.
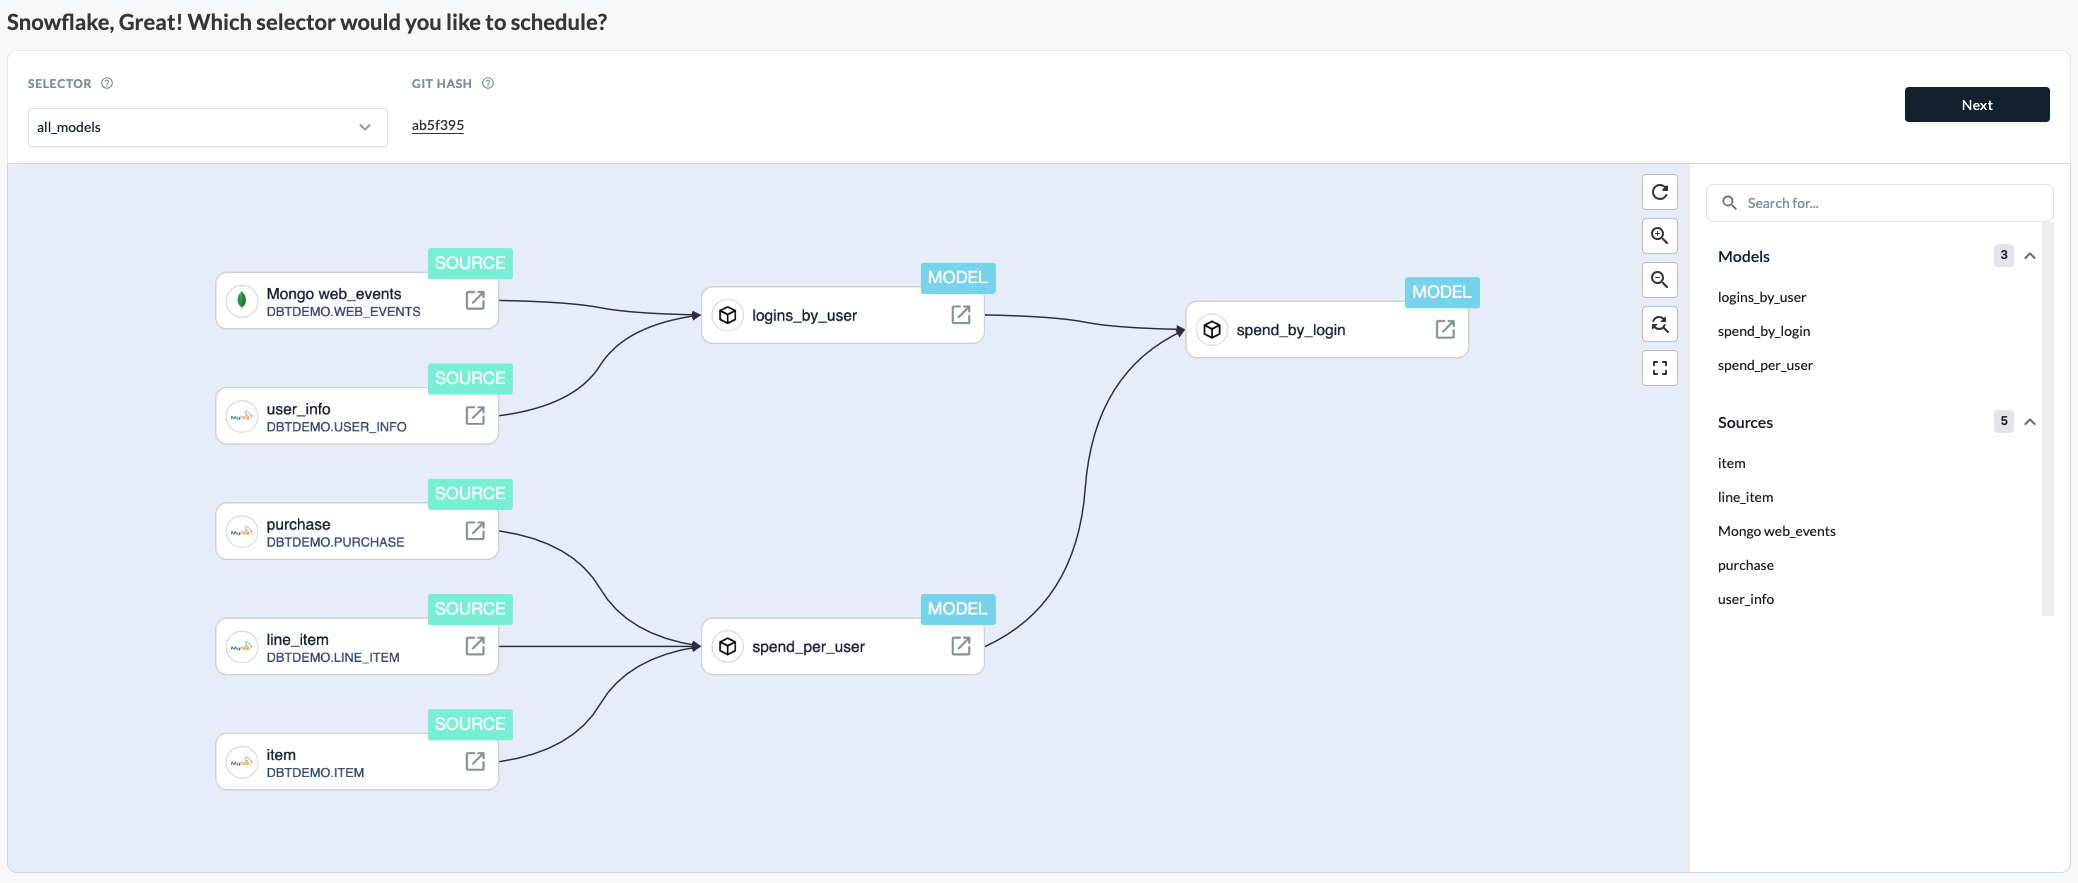
Step 2: Choose a dbt Selector
Choose one of the selectors from your dbt project in the drop-down menu. The selectors are parsed from the dbt project that is connected to Etleap and reference which models and tests will be run by the dbt Schedule in Etleap. Etleap shows all the dbt models that are included by the current dbt selector in the Models list.
Furthermore, you can click on each dbt model to see which dbt sources are referenced by the model. When an Etleap pipeline matches a dbt source, the pipeline is displayed next to the source. You can find out more about how Etleap matches sources to pipelines here.
Step 3: Specify dbt Schedule Settings
You can specify the following settings in this step:
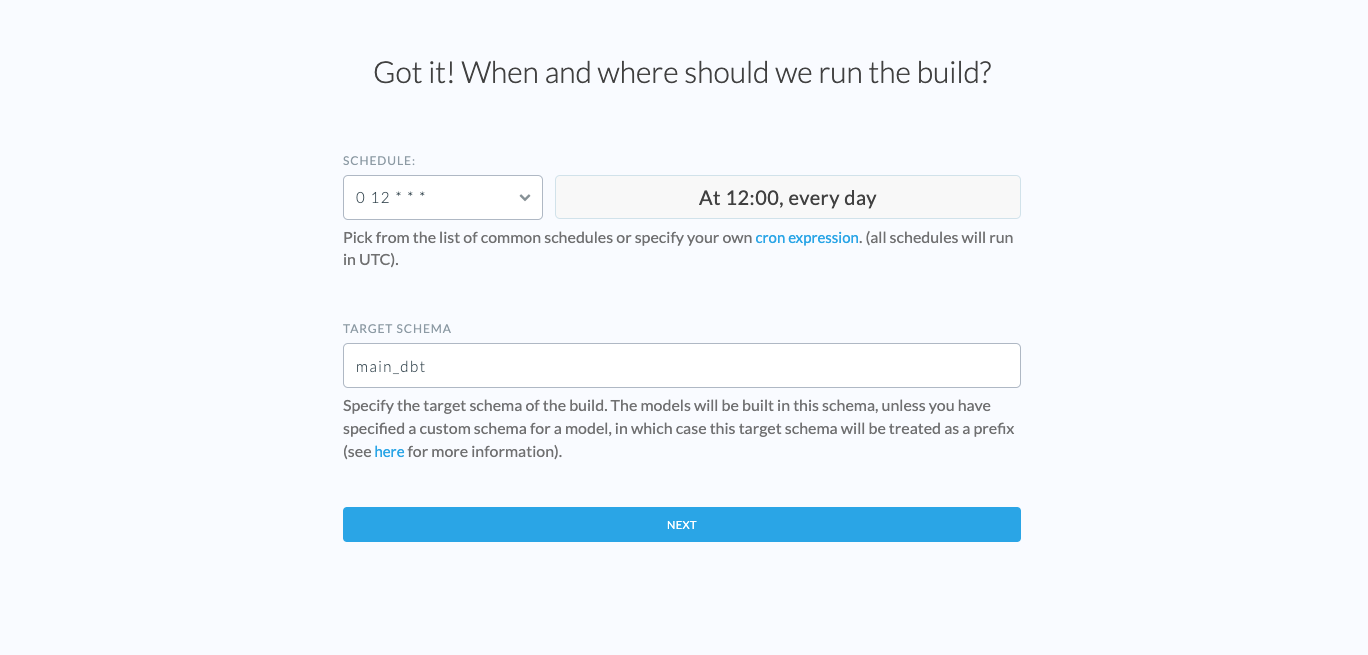
Schedule
Specify how often Etleap should run your dbt build. Use the dropdown input to pick from a list of common schedules or specify a custom one. Etleap’s dbt Schedules use cron expressions . All schedules are set in UTC.
Etleap does not support seconds or years in the dbt Schedule cron expressions. Please specify a valid 5-part cron expression.
Target Schema
Specify the target schema of the build in your selected data warehouse. The dbt models will be built in this schema. If you specified a custom schema in your dbt project, the target schema name will be used as a schema prefix. You can find out more about dbt model schemas here .
Step 4: Review
This page gives you an overview of the dbt Schedule settings you specified. You can confirm your setup and also specify the following:
Schedule Name
Specify the dbt Schedule display name in Etleap. This name has to be unique per Etleap user.
Skipping Builds Without Data
Etleap lists all the pipelines that will be run as part of this dbt Schedule. When a new run is triggered, the dbt Schedule will wait for all the pipeline to finish loading if there is new data. This will override the existing Update Schedule of the pipelines. If you select the checkbox, Etleap skips dbt builds when there is no new source data in the dependent pipelines.
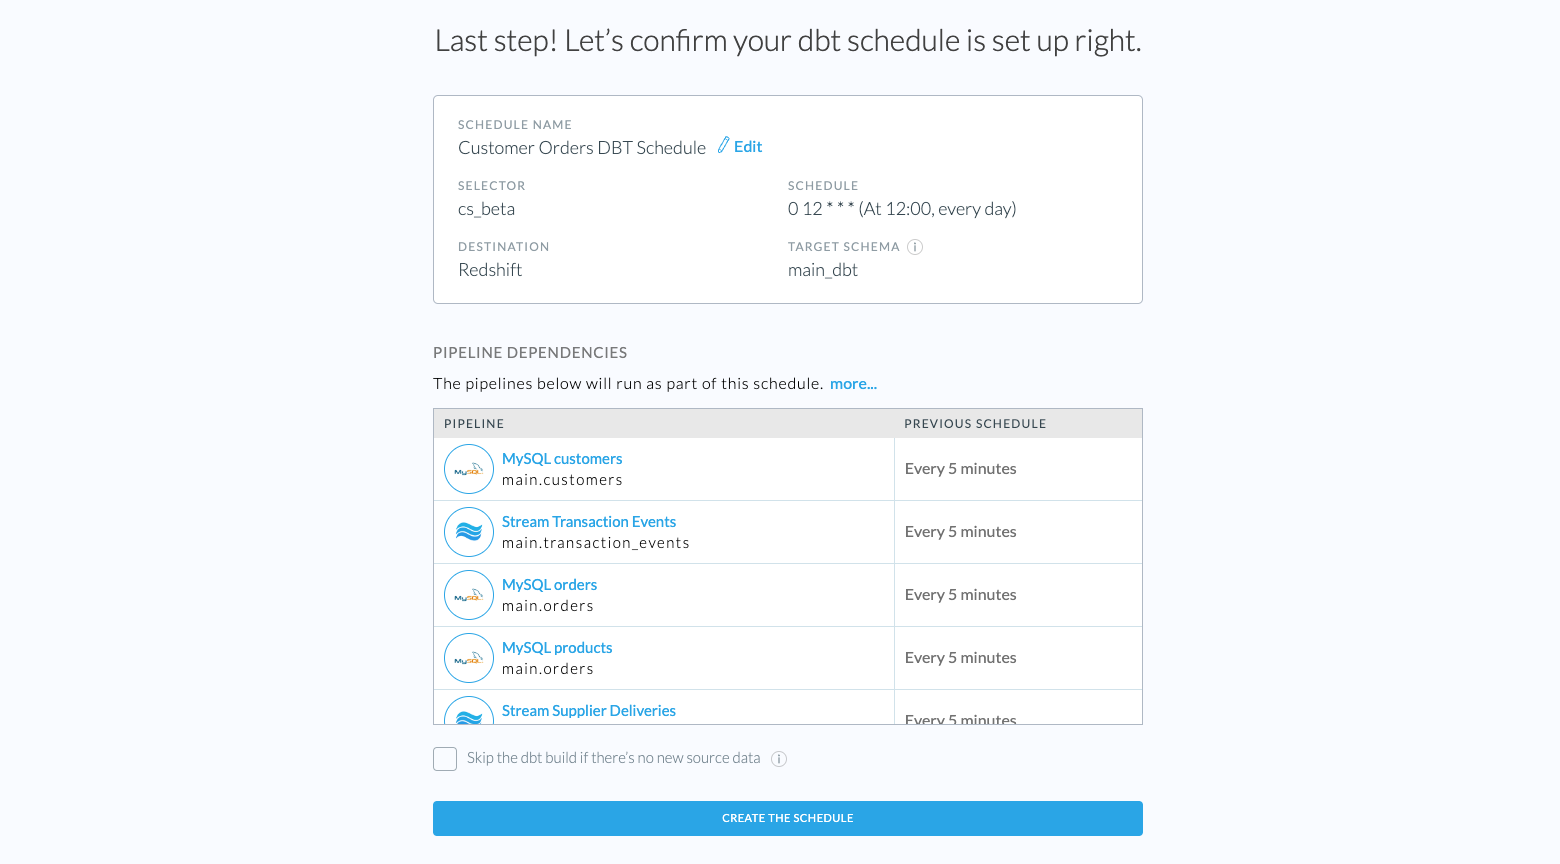
Finally, click Create the schedule to finish the dbt Schedule setup. You now have a dbt Schedule that will trigger at the given time based on the cron schedule, starts its pipelines ETL activities and run a dbt build afterwards.
To understand the state of your newly built dbt Schedule, check out this guide.