Create a Pipeline
What is a Data Pipeline in Etleap?
Data pipelines fetch data from a source and feed it into a destination warehouse or data lake, where you can later access it for analysis, e.g. using a BI tool. Not only does the pipeline transfer the data, but it can also transform the data to make it better fit with your needs.
An Important Prerequisite
Before you can set up a pipeline, you must first set up a source and a destination.
Step-by-step Tutorial
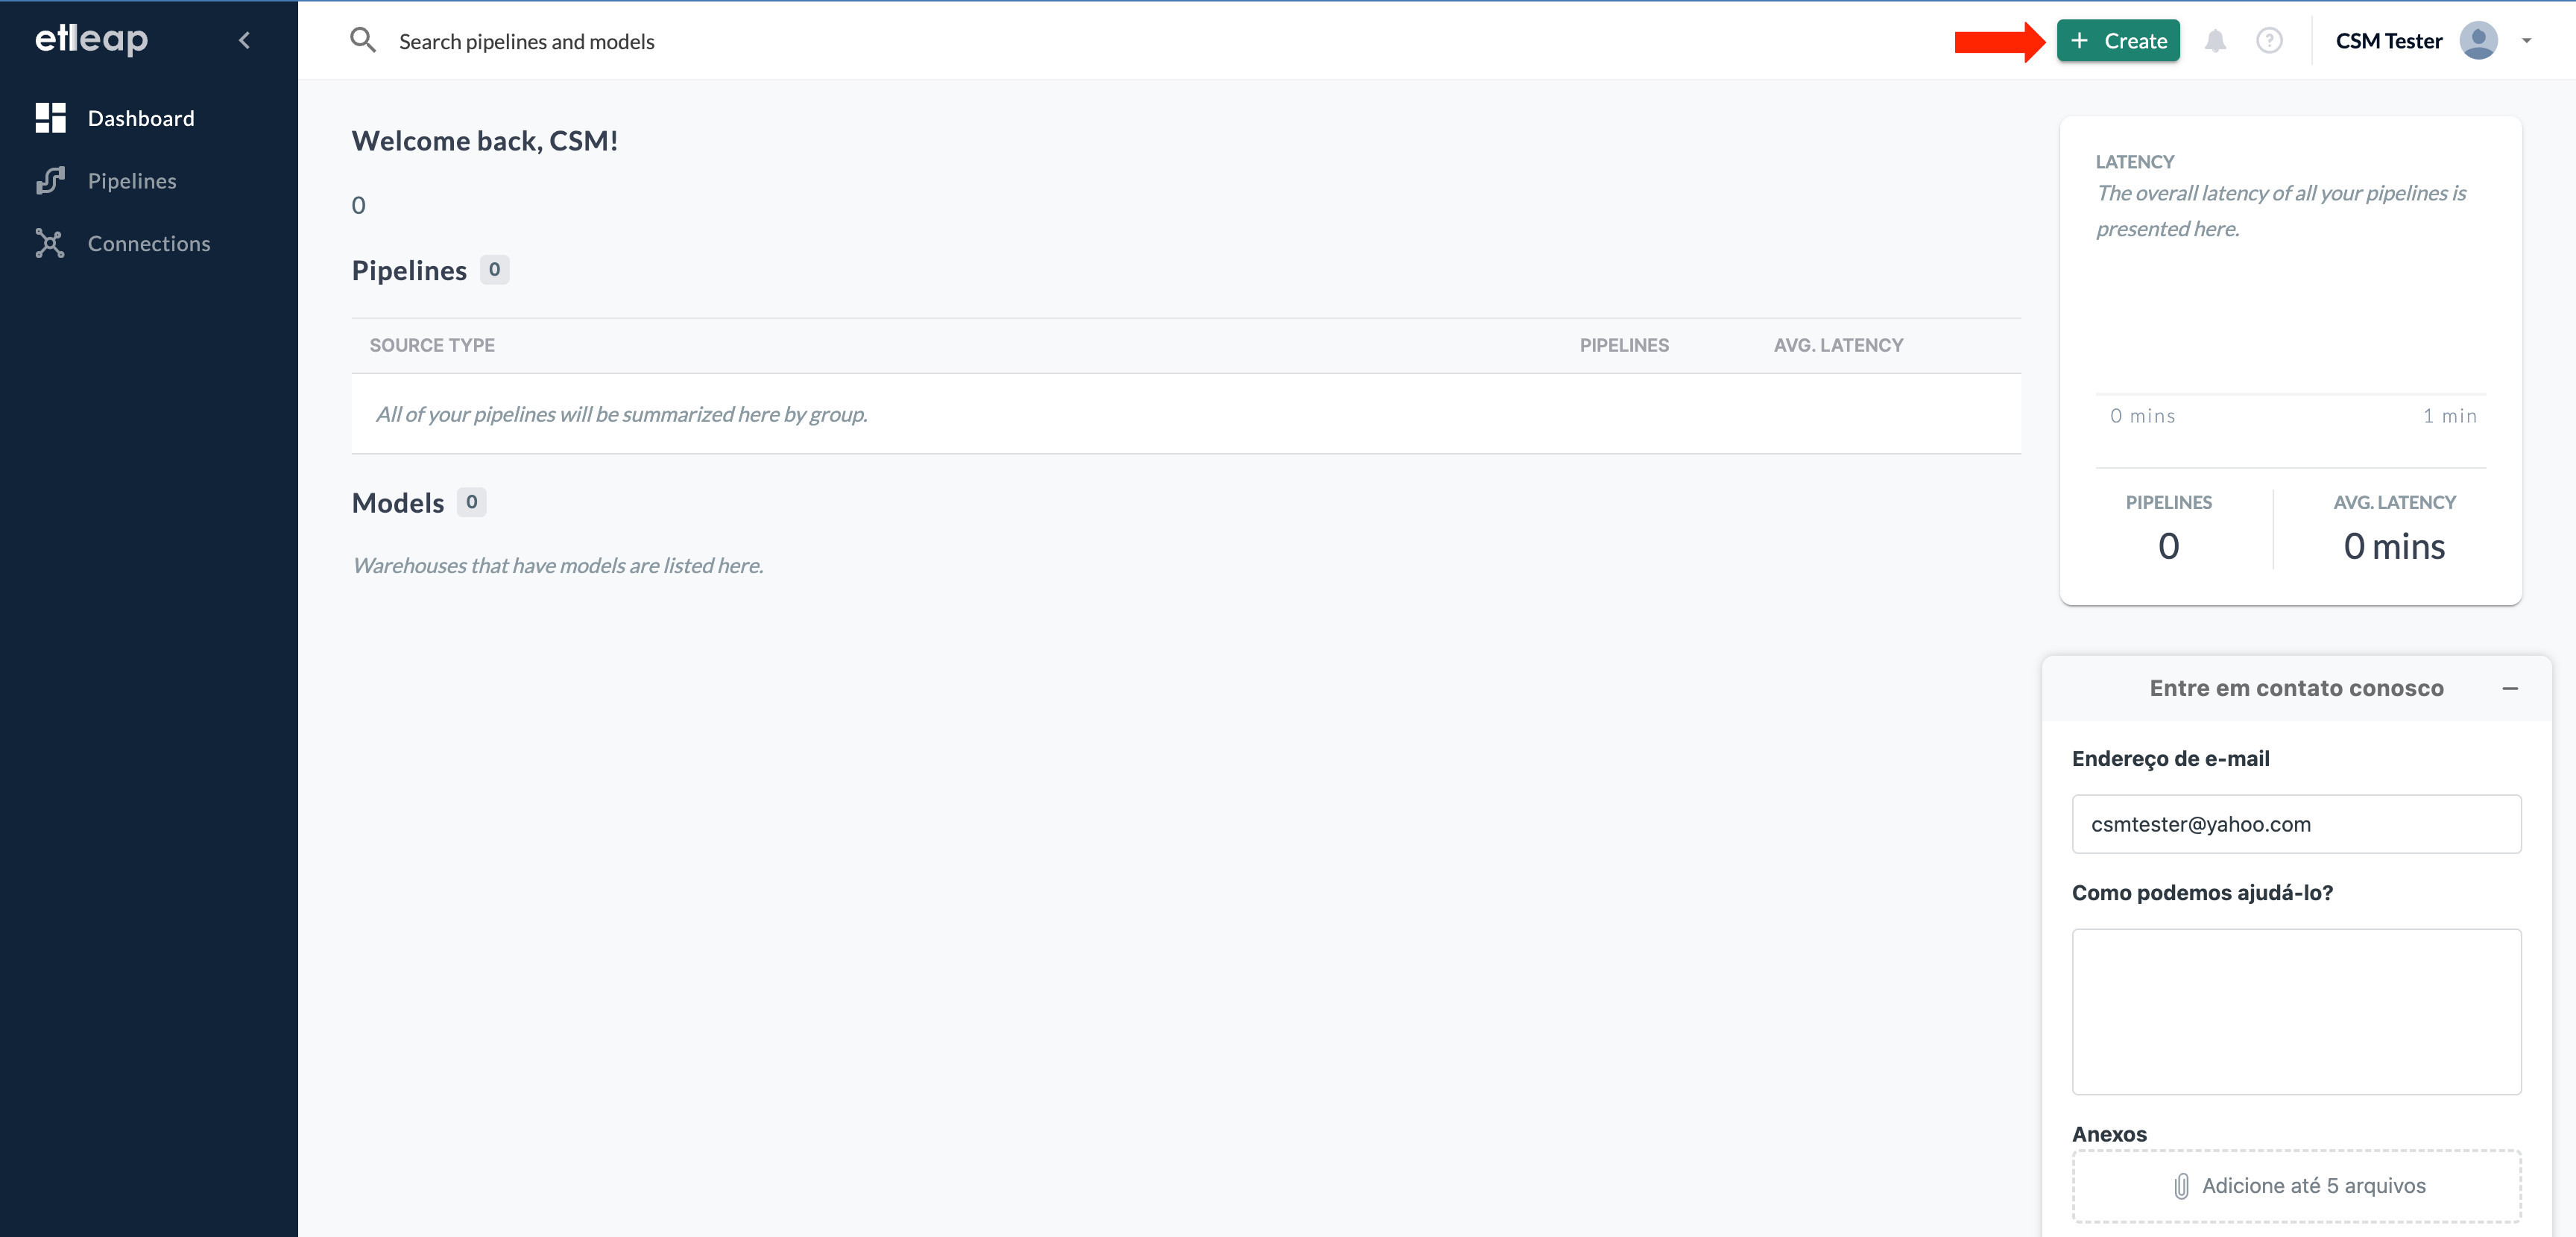
First of all, sign in into your Etleap account. To create a pipeline, you can use the “+Create” button in the top panel.
Selecting the Source
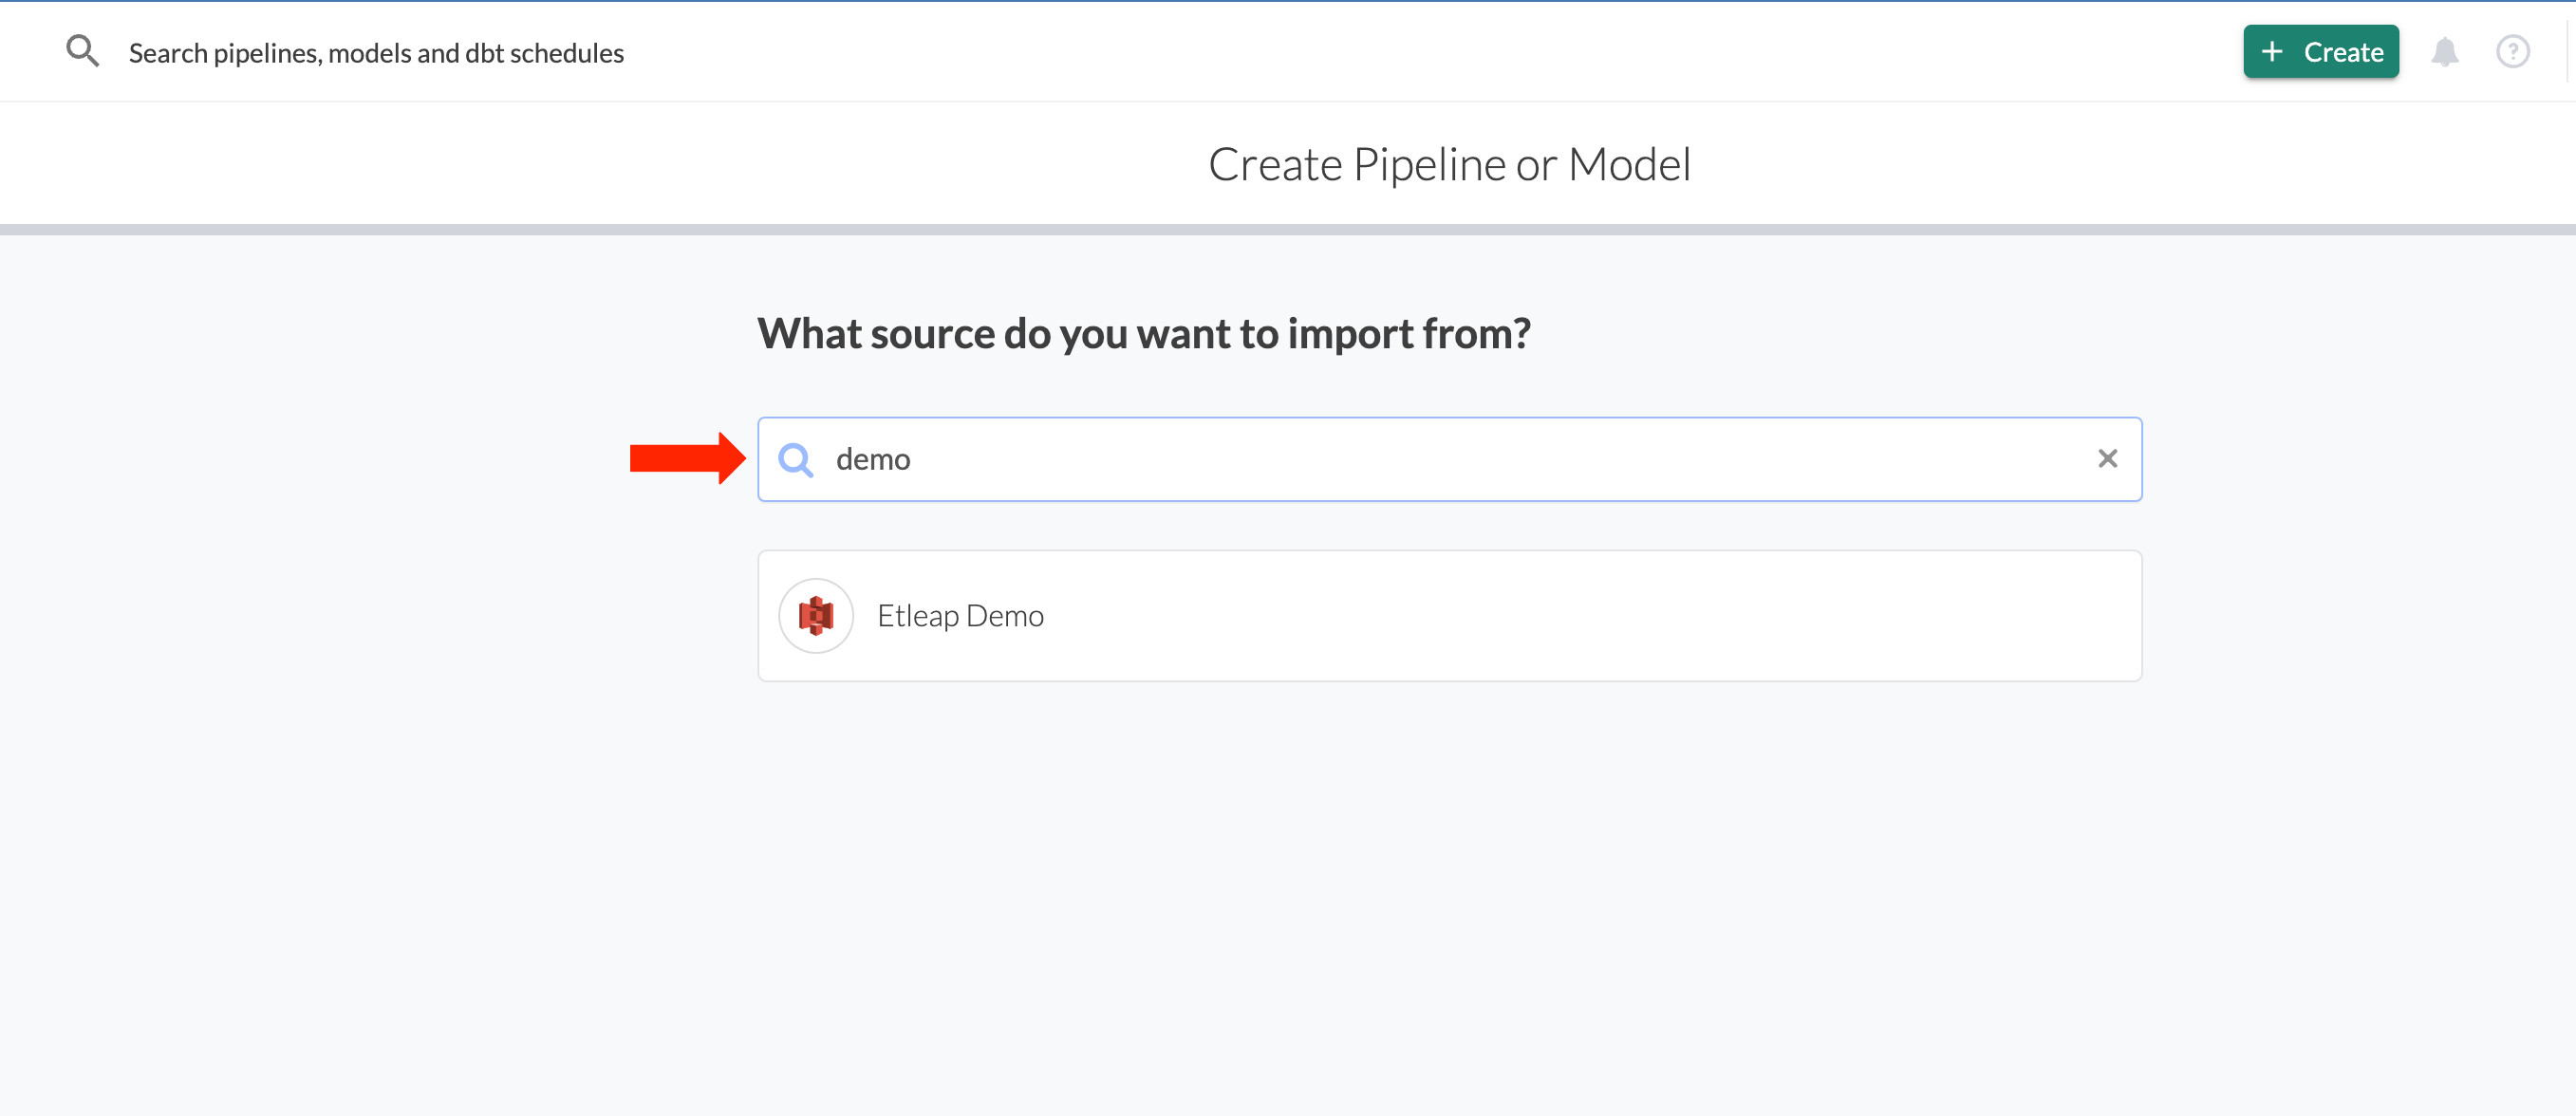
When you click on ”+ Create,” the interface will prompt you to select one of the available sources.
Once you’ve picked your source, the import dialogue will show you all available files or entities in the source. Here you have a few filtering options:
- The basic filter where you can type a simple string to search for a filename (1) once.
- The checkbox (3) that you can tick to select all files and folders in the current directory.
- The refresh button that you can use if you do not see files you’ve uploaded to the source recently (2).
- The filename filter where you can use a regular expression (4).
Difference Between the Search and Filename Filters
The search filter allows for filtering of the files prior to manually selecting the files of interest. The pipeline will only fetch the specific files you have selected. When you add new files to the source later, the pipeline won’t fetch them.
The filename filter automatically selects files that match to a specified regex or glob pattern. The pipeline will then automatically fetch any new files with names that satisfy the defined patterns.
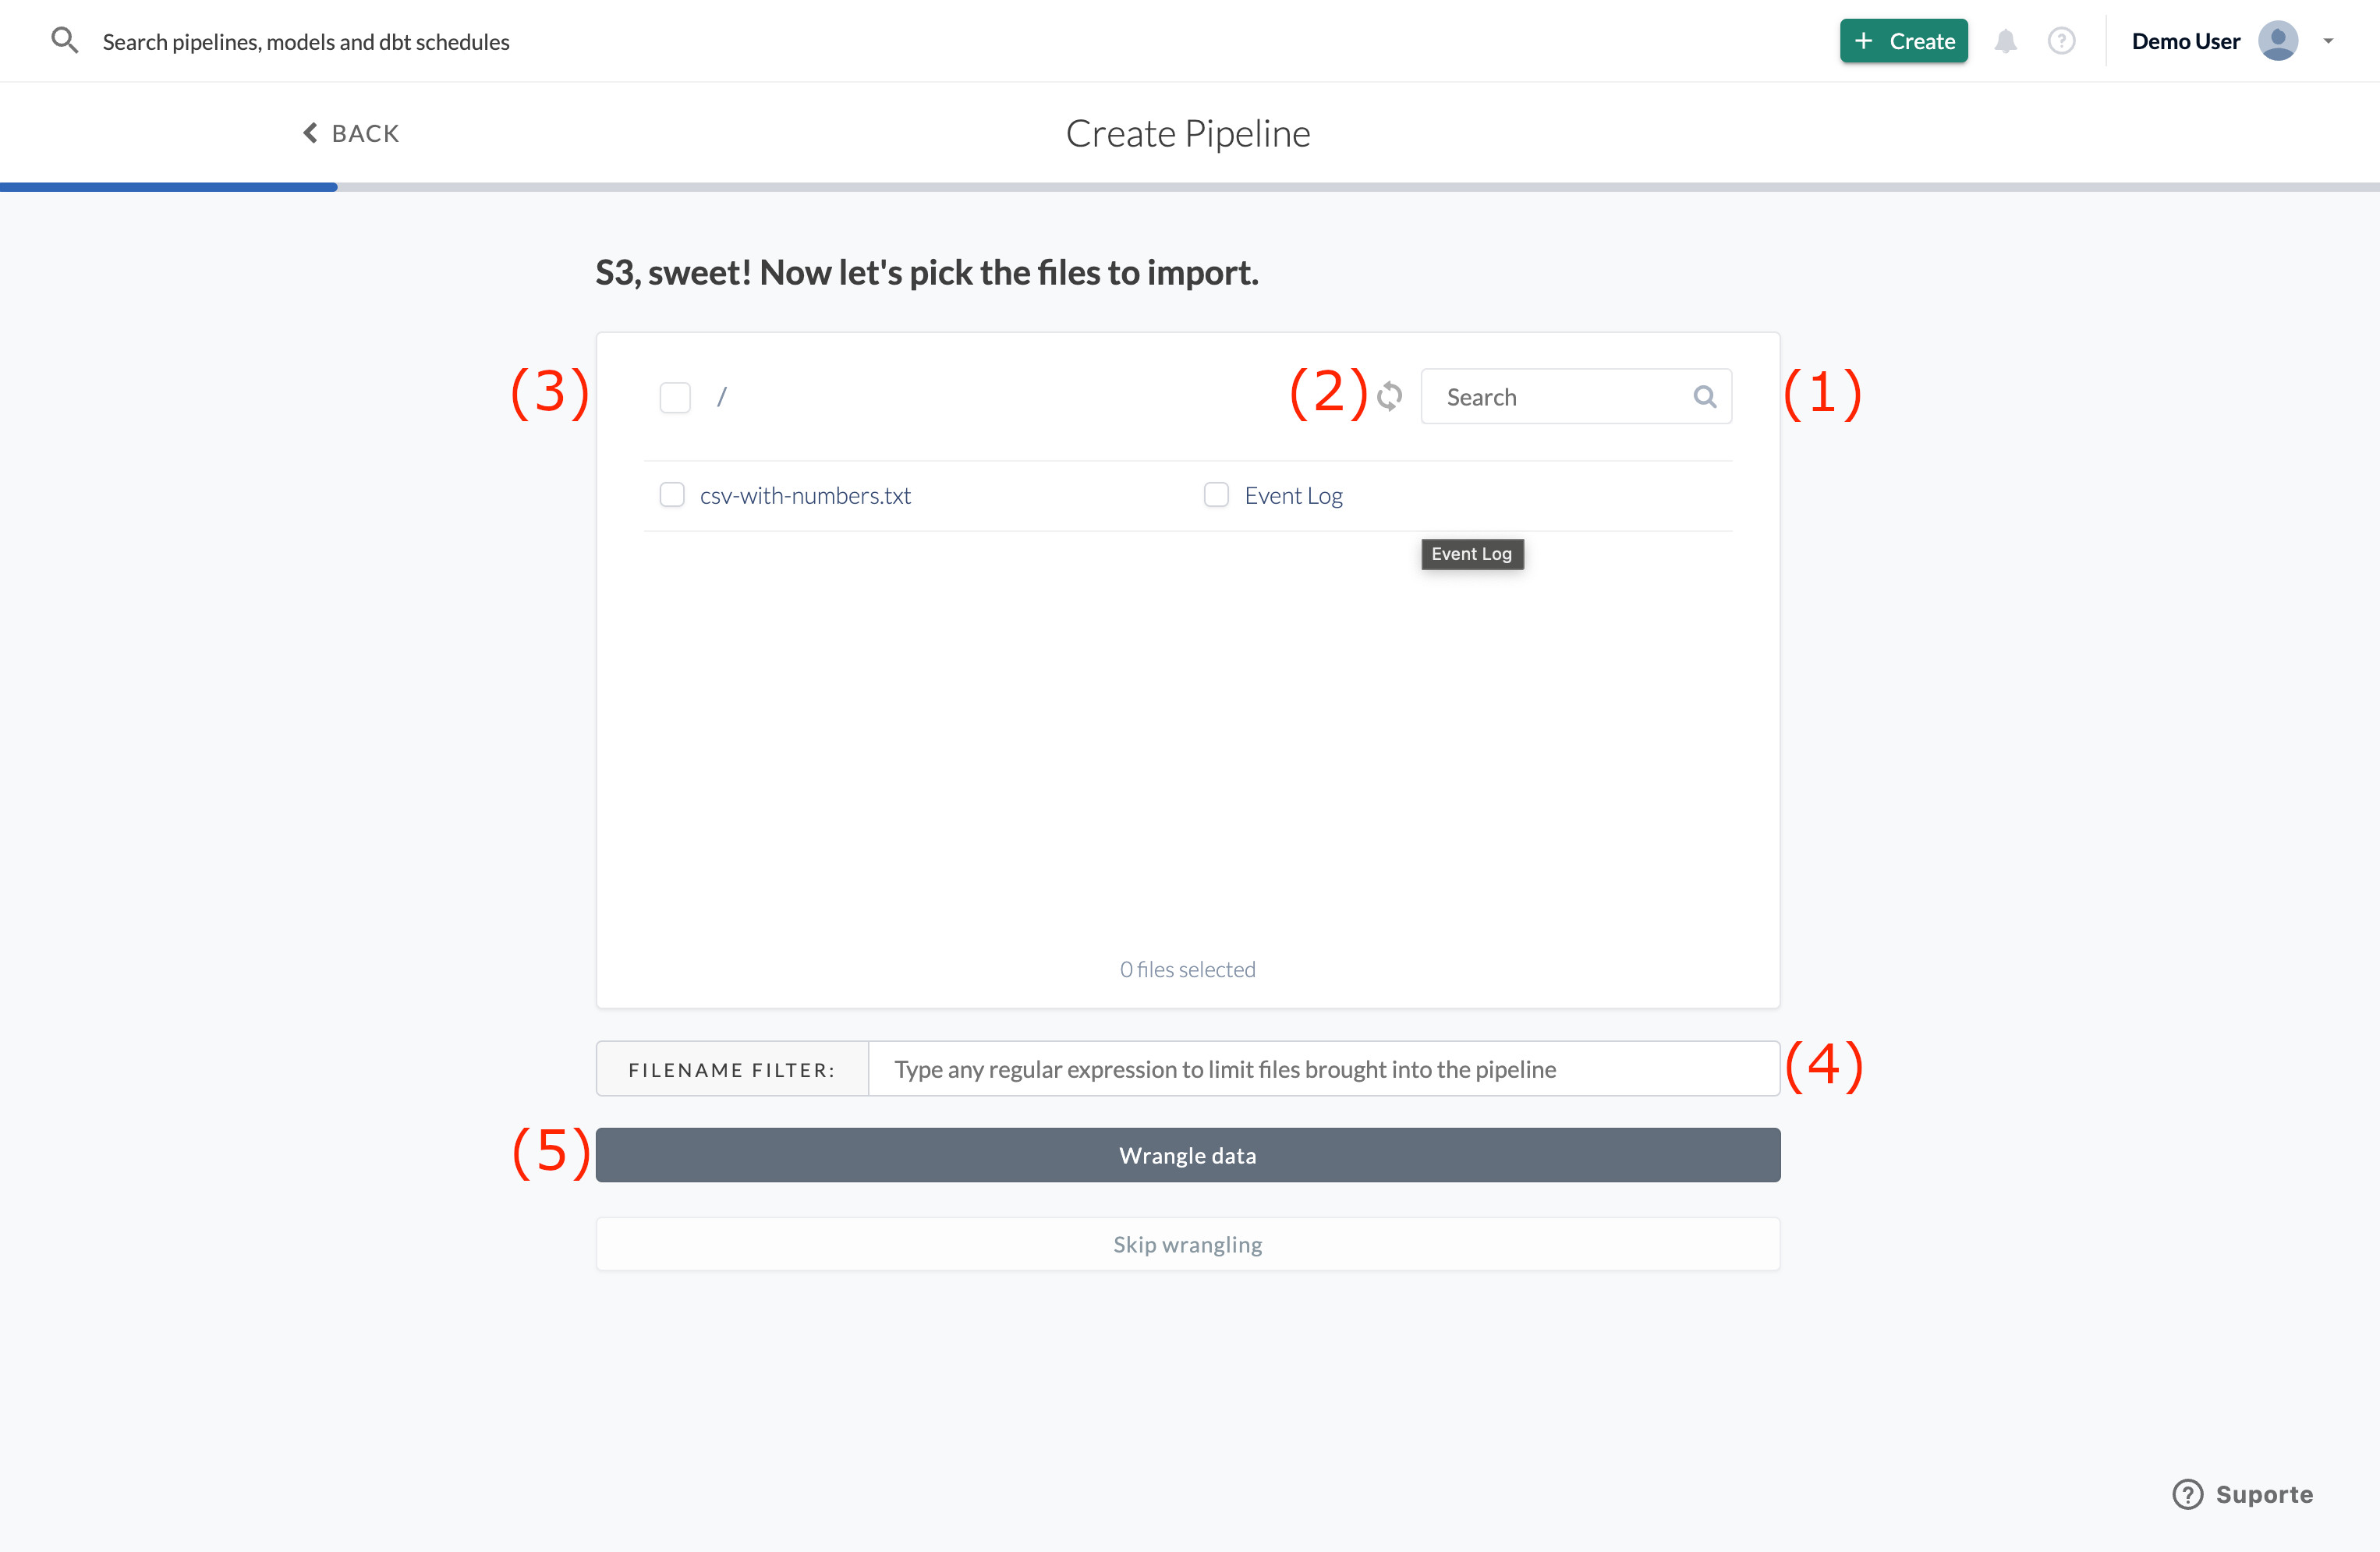
If you click on “Wrangle Data” (5), you will be redirected to the Wrangler.
Data Wrangling
The Wrangler shows you a sample of your data and invites you to transform it. On the left, the preview shows first rows of your raw data. On the right, you have the editor where you can add steps that modify your data.
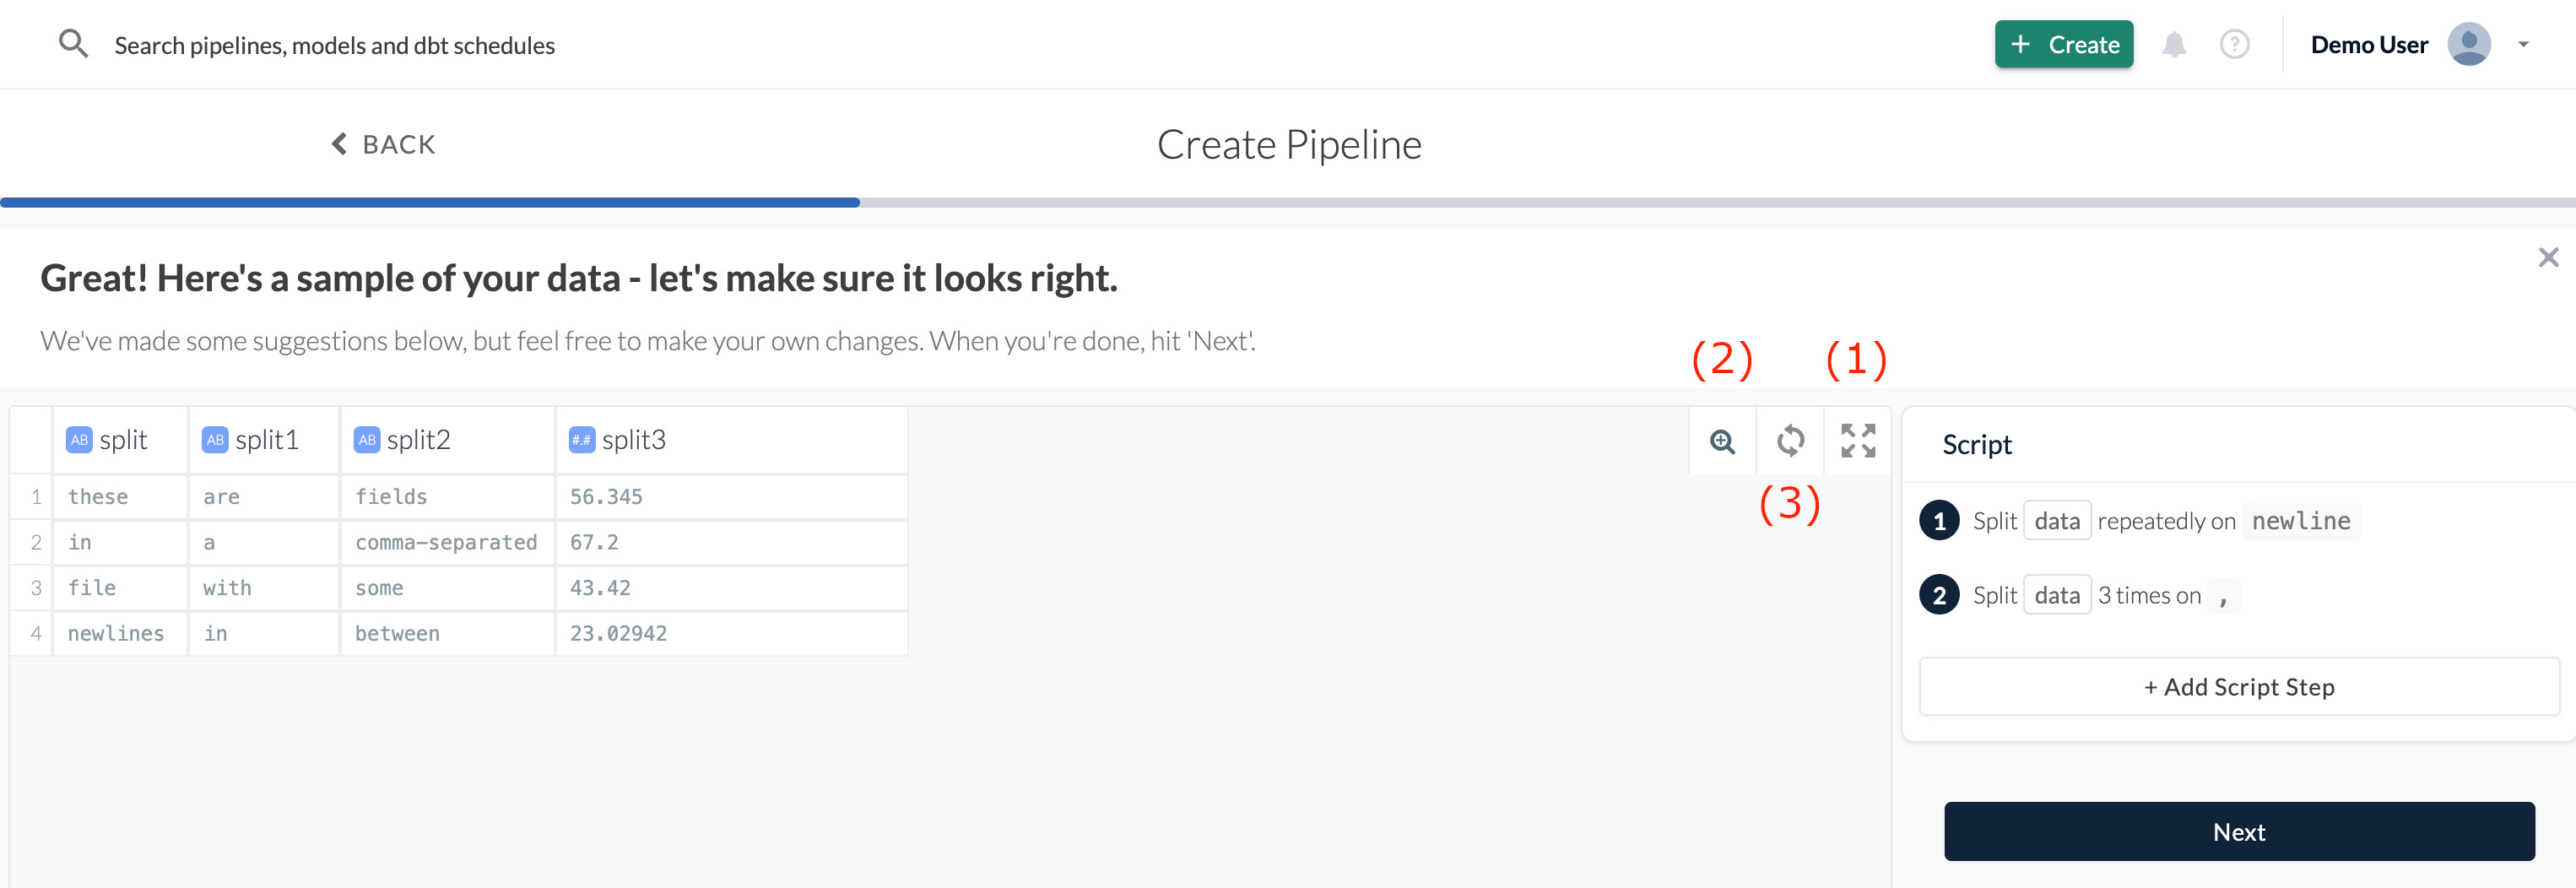
By clicking on (1), you can enter or exit a full-screen mode. If you have a lot of columns, you can jump to any of them quickly by using the magnifier (2) and typing in the column name. The Refresh Sample button (3) fetches a new sample.
Advanced Column Preview
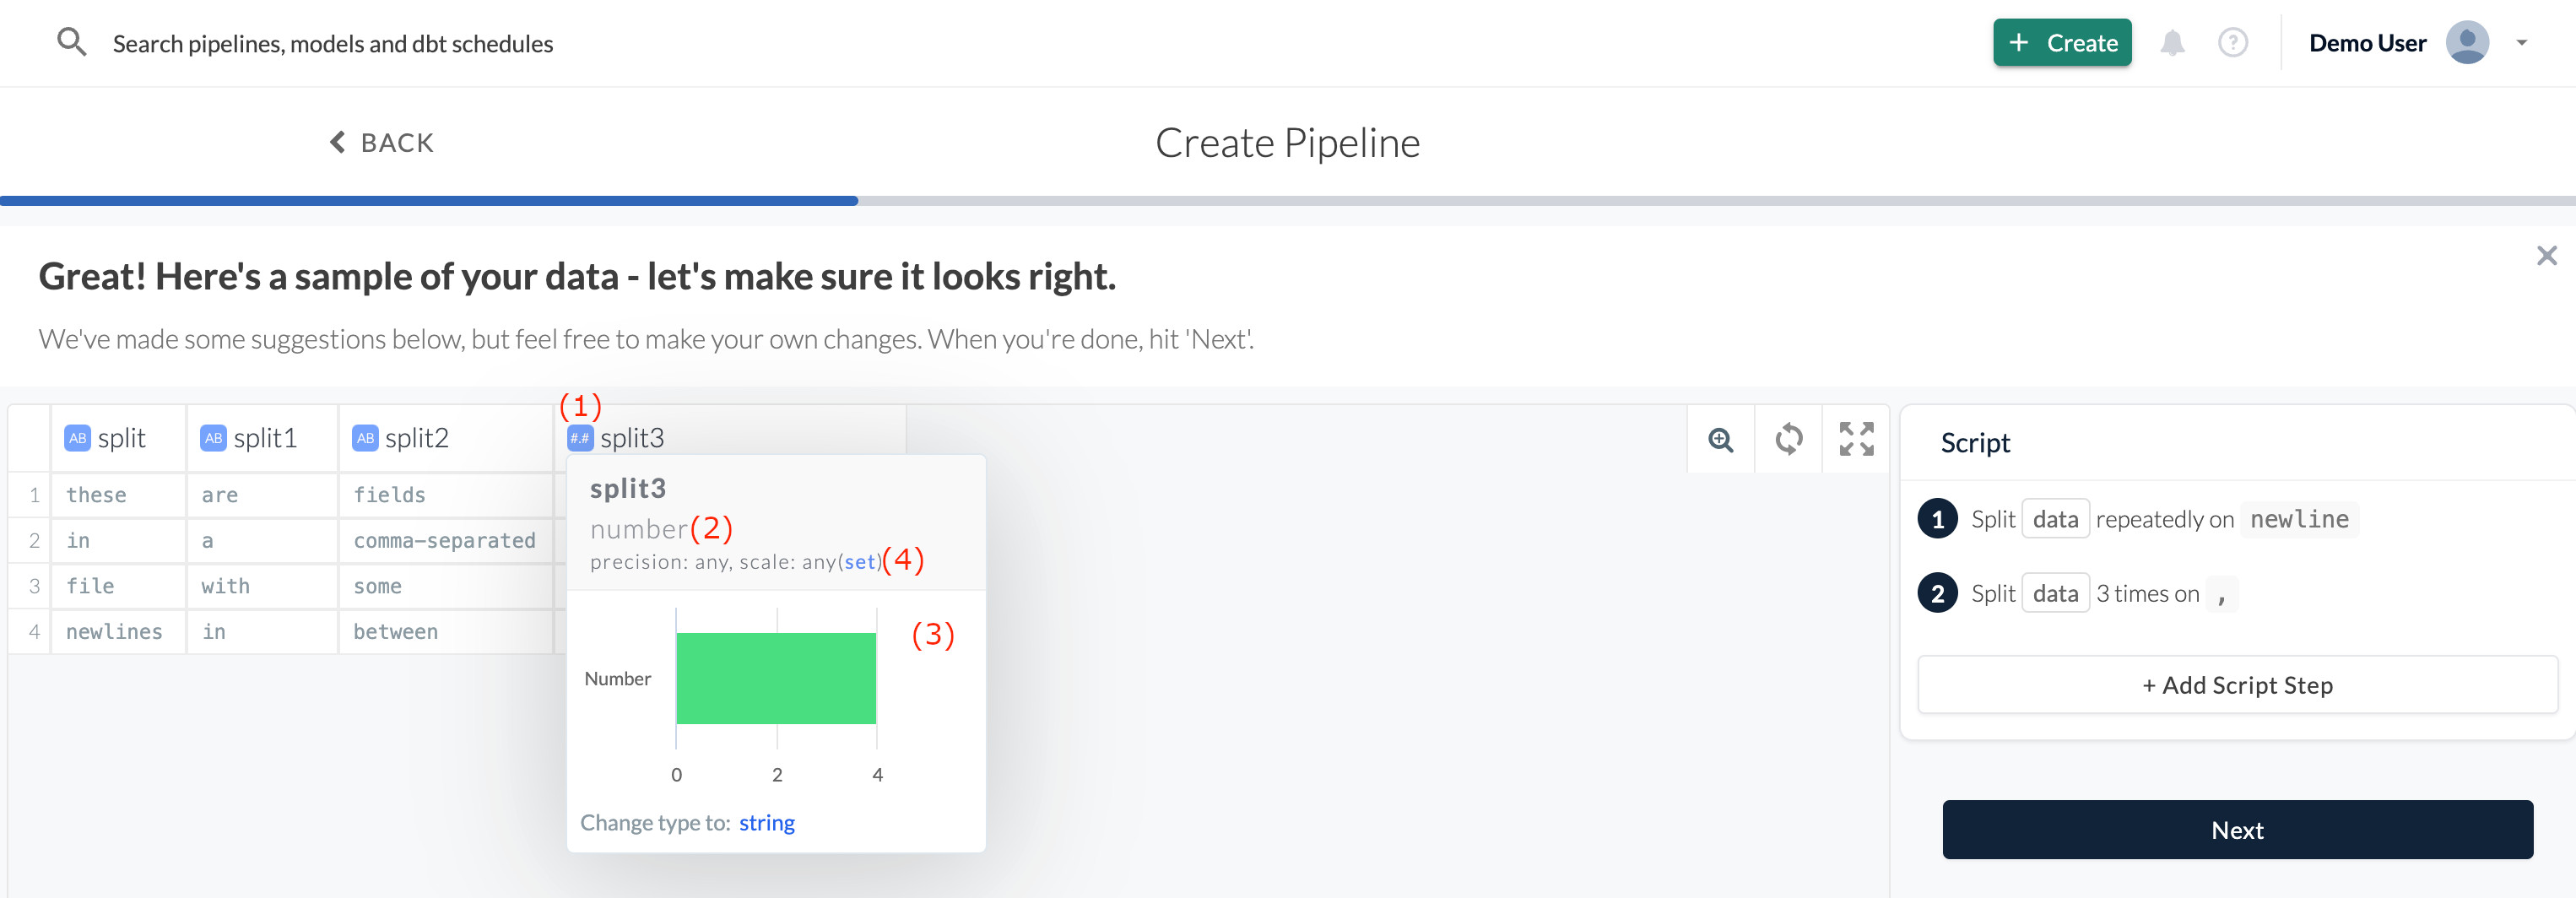
When you click on the icon in the column header (1), you’ll see the current data type (2). It will also show you other potential types, with charts showing how many rows cannot be converted to that type (3), and an option to change the maximum length of the column (for string or numeric types) (4).
Transforms
Etleap will automatically add initial transformations based on the data sample. Later, you can practice with advanced data wrangling described in the Wrangler section of the documentation.
When you are finished with wrangling your data, click “Next”.
Selecting the Destination
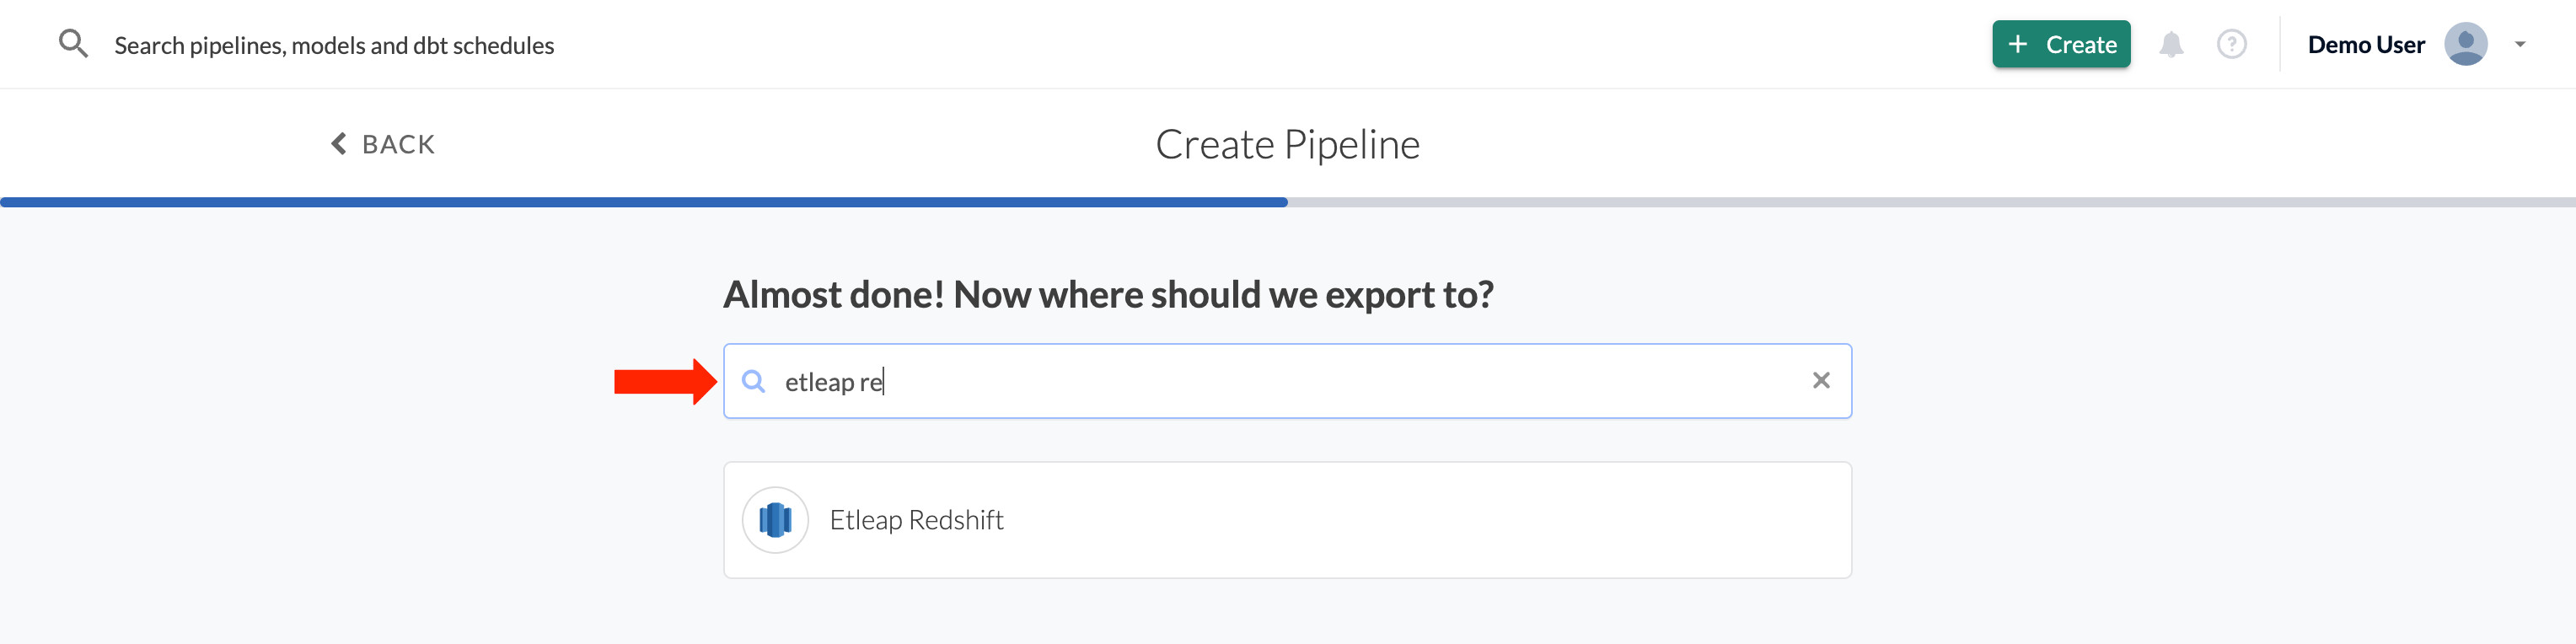
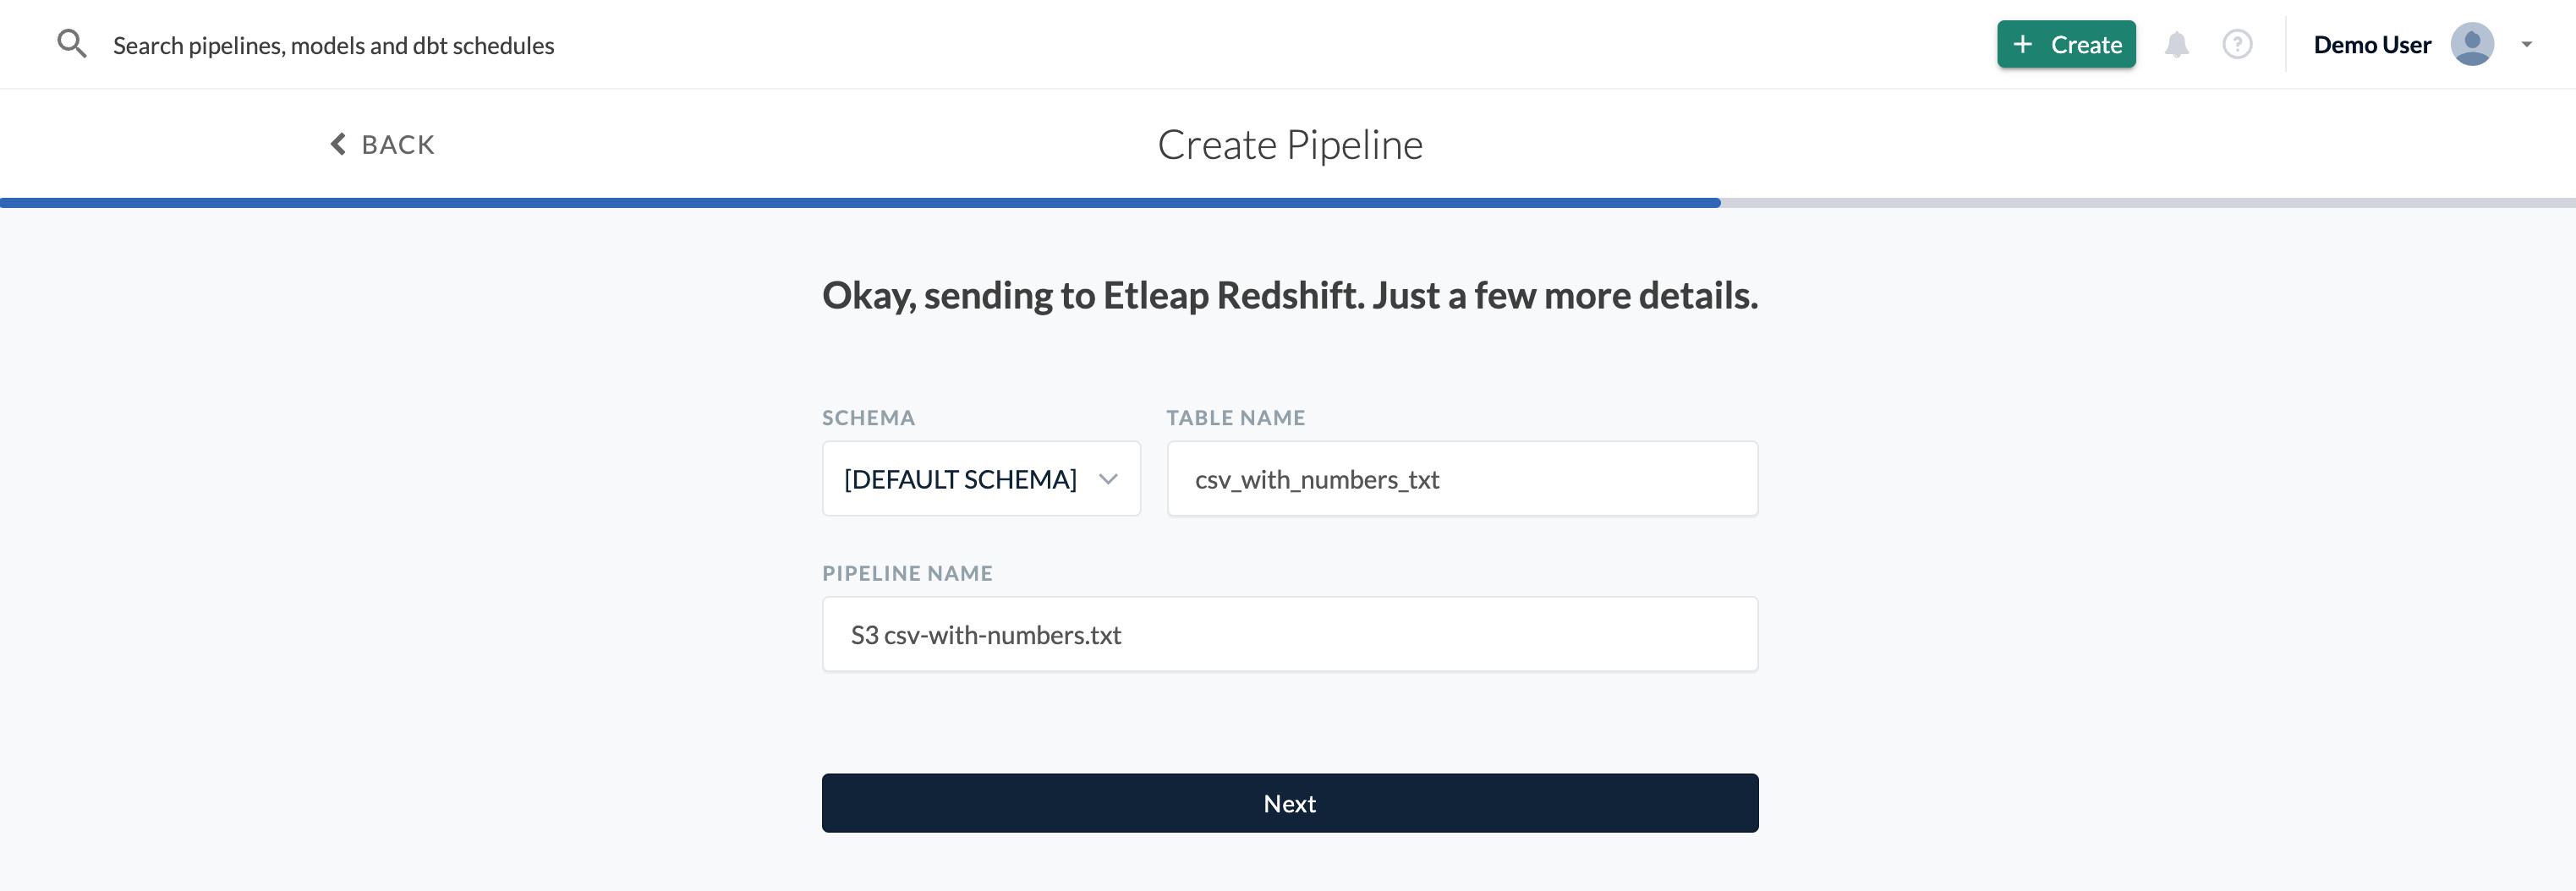
You’ll be shown a list of destinations you can export your data to. Then, select the schema, choose the table name and a memorable pipeline name.
Source and Destination Additional Configurations
Optional: The default source and destination configurations are usually fine, but you can also change the source or destination settings manually.
Hit “Start ETL’ing”!
Your pipeline is now ready to go and will begin ingesting your data! To learn more about pipeline execution statuses, see Understanding the State of a Pipeline.