JSON Parsing
Etleap allows converting JSON data into multiple columns or rows for improved usability.
Flatten JSON Objects
The Flatten nested JSON object step can be used to split a JSON object into multiple columns, one for each property in the object tree. Here’s how to add it to your script:
-
In the Wrangler sample, select the header of the column that contains the JSON data. Select the Flatten nested JSON object step from the suggestions list.
-
The Output Column Prefix field prefixes the name of each new column with a specific value. This defaults to the name of the parsed column, this can be changed or deleted entirely.

Parsing JSON data automatically -
Leave Include Full Path checked to prefix the names of any nested properties with the path from the root of the JSON object, or uncheck to use the name of the property only.
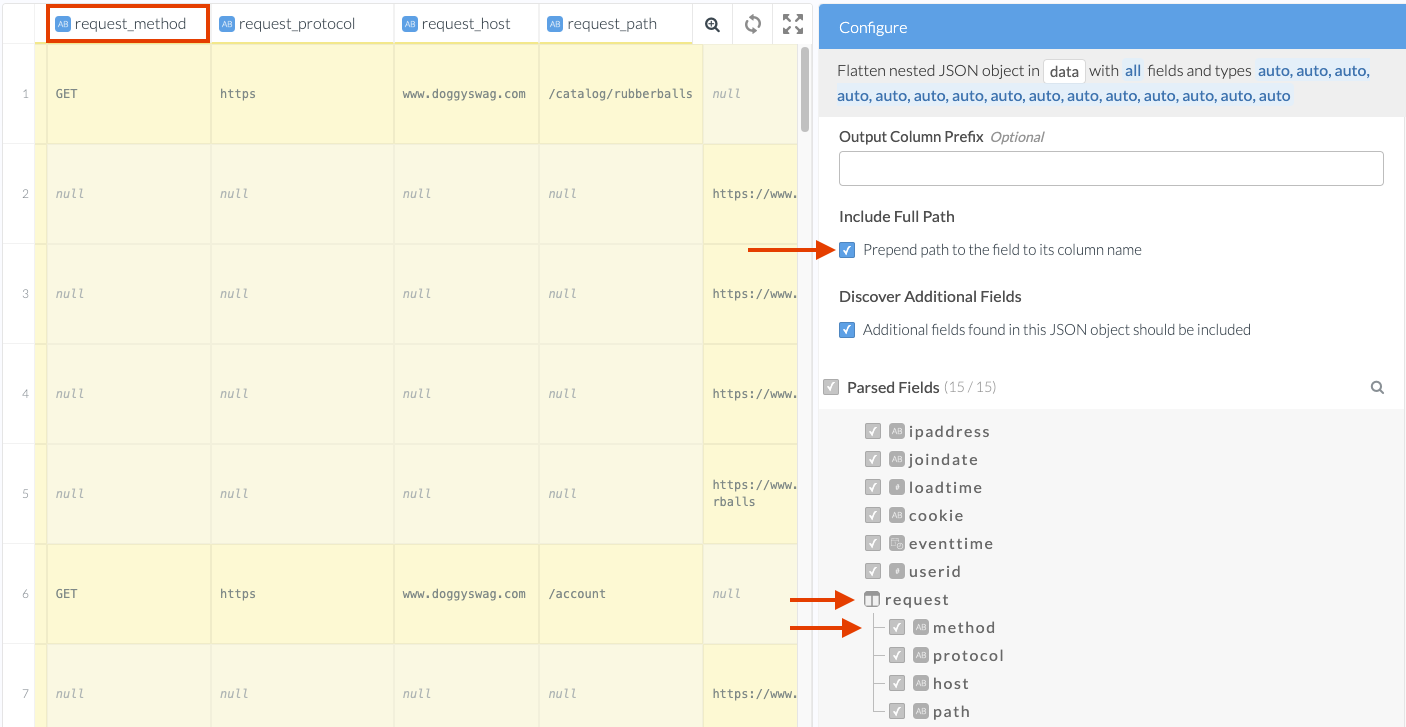
Including the full path for nested properties -
The Discover Additional Fields option automatically adds any new leaf JSON properties discovered during transformations. If you want to exclude any specific fields or ignore any new fields, uncheck this option. Find more information on this in the transform reference.
-
To change the type of a field, click on the type icon next to the field name to reveal a dropdown. Only types that fit the data in the sample will be shown.
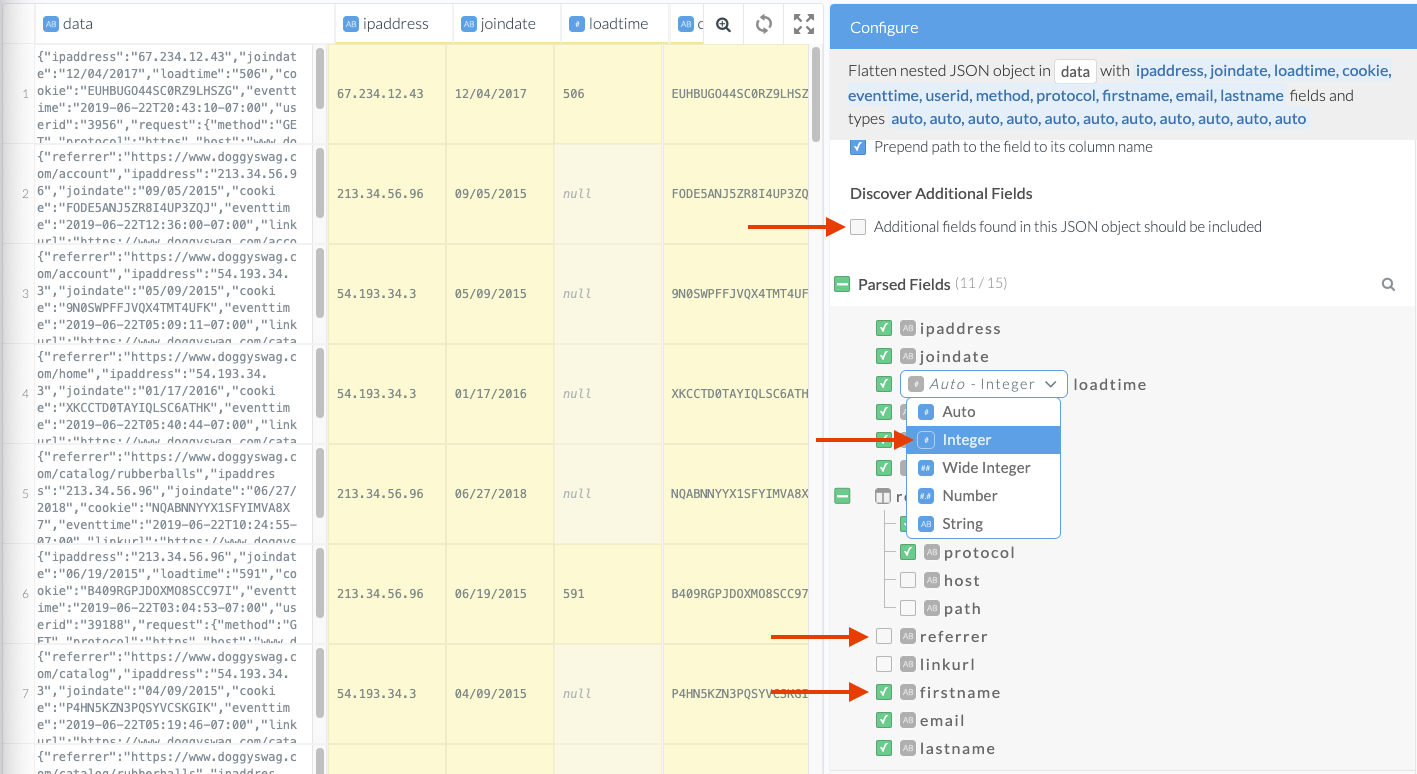
Choosing which JSON fields to include and setting their types -
To add additional fields that are not present in the sample data, hover over the Parsed Fields header or the name of any object in the tree, and click on + Add Field.
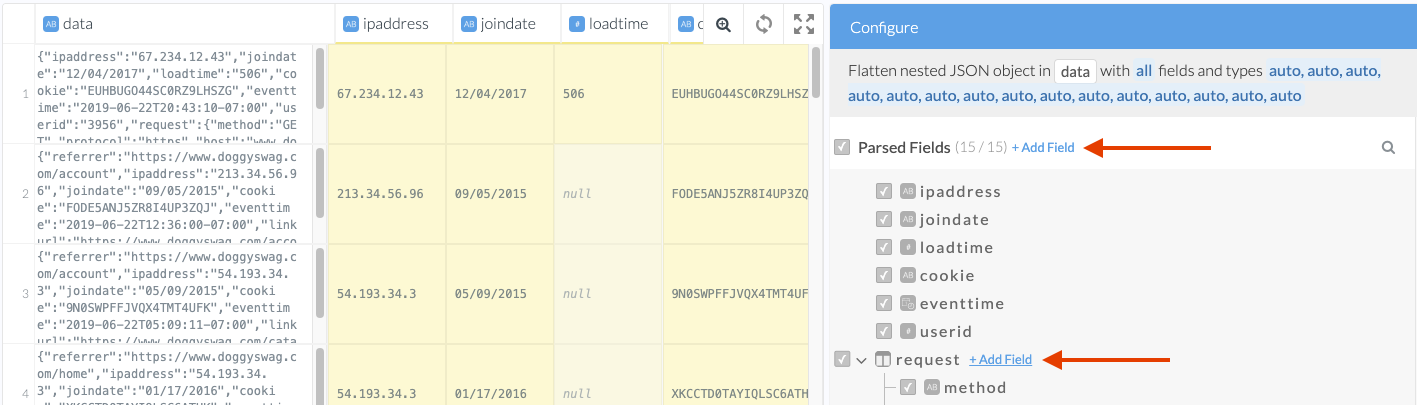
Adding additional JSON fields -
Click the “Add” button to finish the JSON parsing step.
Handpick JSON values With JMESPath Queries
JMESPath provides a convenient way to retrieve a single value from within a JSON object or array. You can write queries using the names of the keys in a JSON object or apply slicing using indexes to grab a value from a JSON array. A complete JMESPath documentation is available here . Let’s query this JSON data:
To create your query:
- Click +Add Script Step. Search for jmes and select Extract from JSON object in columns using a JMESPath query.
- Select the column you want to parse data from.
- Type in your query. Click the icon to see the JMESPath tutorial
- Optionally, add a where clause if you only want to fetch data in particular cases.
- Look at the preview on the left to check if the result fits with your expectations.
- Click ”Add”.
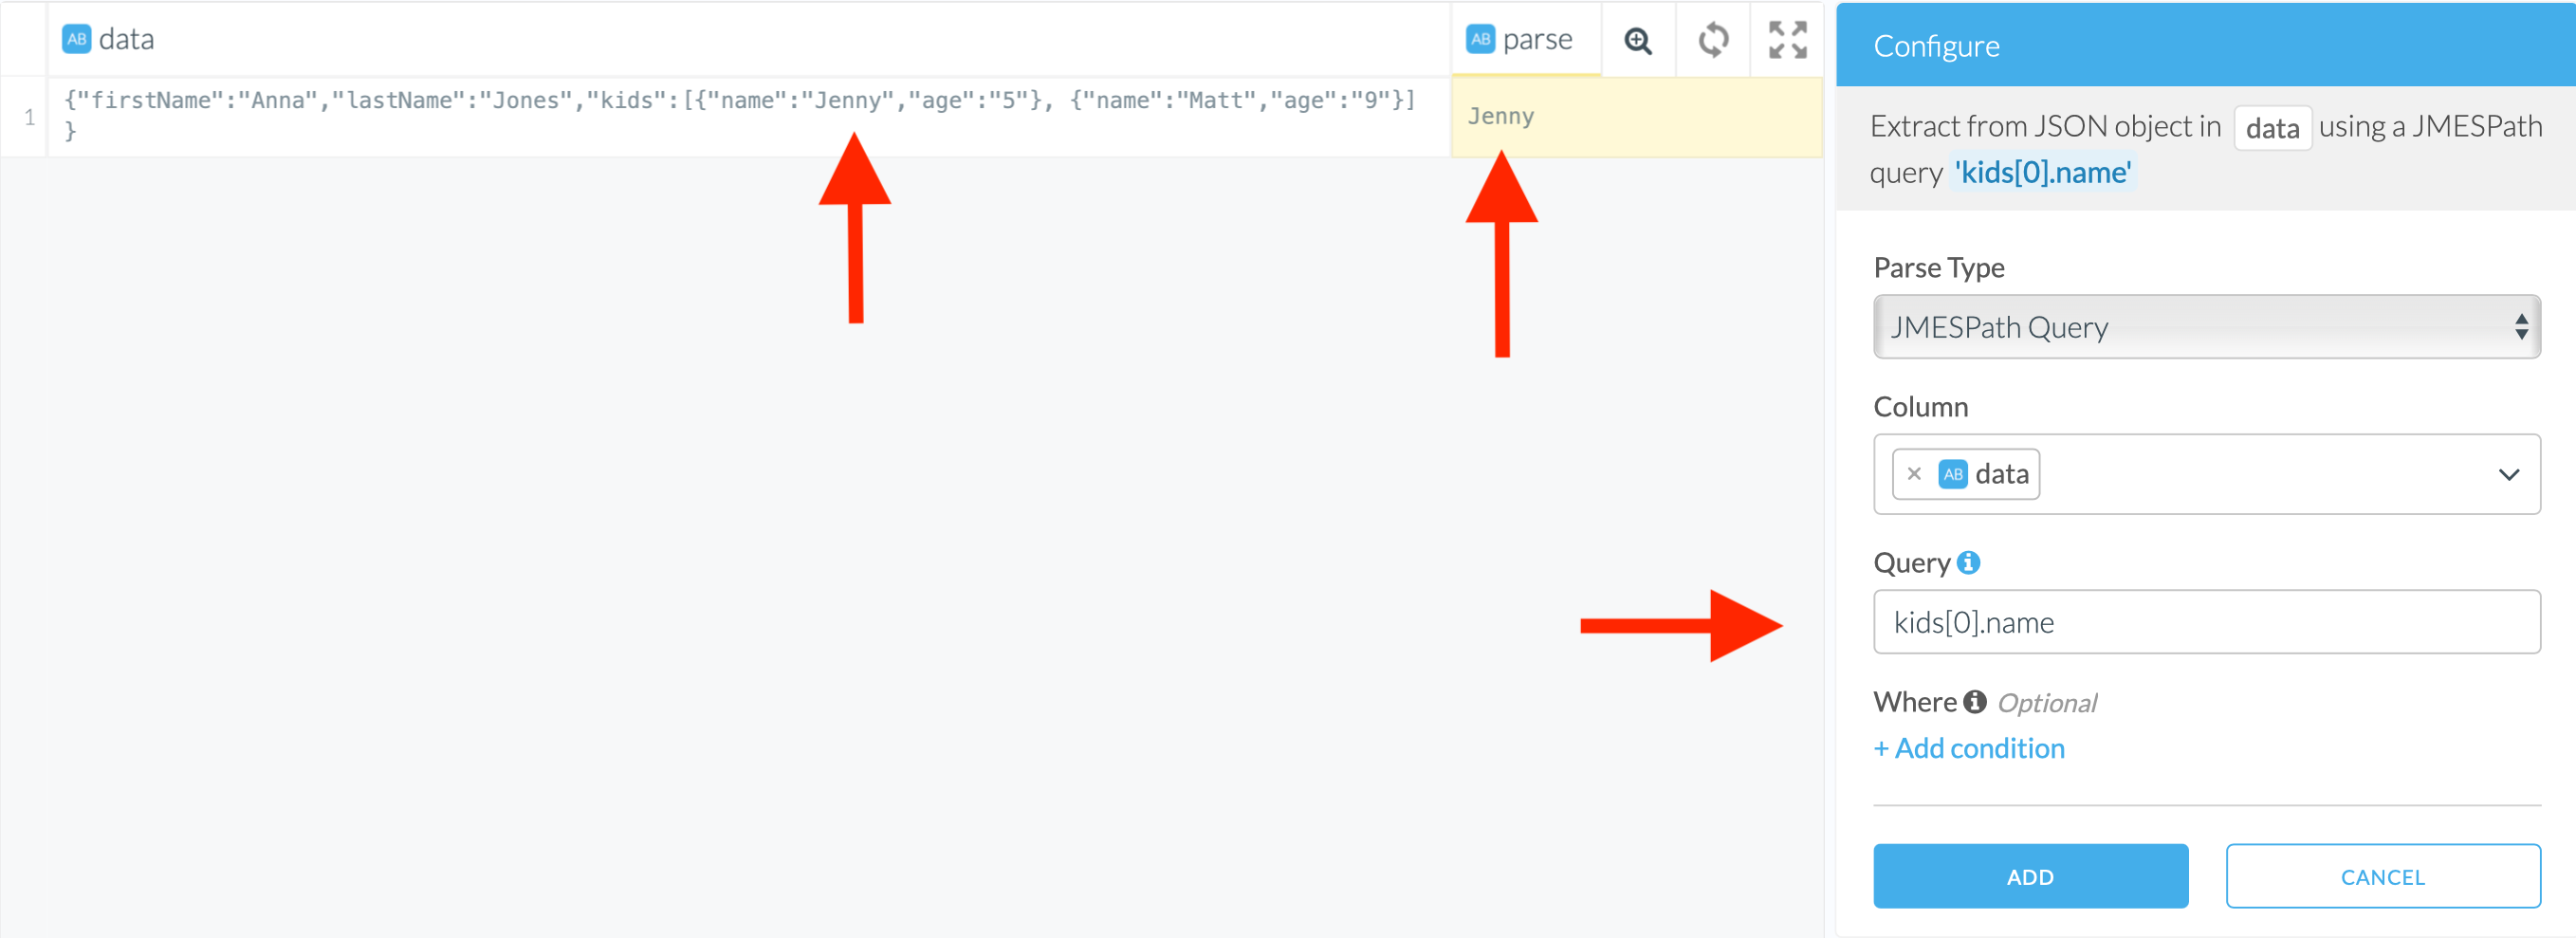
For example, let’s query this JSON data:
{
  "firstName": "Anna",
  "lastName": "Jones",
  "kids": [
    {
      "name": "Jenny",
      "age": "5"
    },
    {
      "name": "Matt",
      "age": "9"
    }
  ]
}
To fetch the name of the first kid, use kids[0].name
Dealing With JSON Arrays
Etleap provides different options for parsing JSON Arrays.
1. Use JMESPath for selecting certain elements based on index or filter. This works well if arrays have consistent size or you know in advance which particular parts of the array you want to keep. See the previous section for details on JMESPath.
2. Use subtables to store the array values in another table. The main table and subtables can be joined using the primary key of the main table. This is the recommended approach when dealing with arrays that can vary in size. See the next section for details.
3. Use Flatten JSON Array to split the values into multiple rows in the same table. The rows are identical except the JSON array column is replaced with “index” and “parse” which contains the index of the array element and the element that was extracted, respectively. For the reasons stated in the section Split JSON Arrays into Rows, the only recommended use case for this is if there is only one JSON array in the table and the remaining columns are just the primary key or other data that won’t be aggregated.
Store JSON Arrays as Subtables
Converting an array into a subtable is often a good way to allow a more natural way of querying array data. The transformation will move the array column out of the main table and into a new “subtable”. The subtable will contain the following columns:
- a primary key column which can be used for joining this subtable back to the original record from the main table
- a column with a single value of the array. If there were multiple elements of the array, then each element is on another row with the same primary key.

Steps
To proceed with subtables:
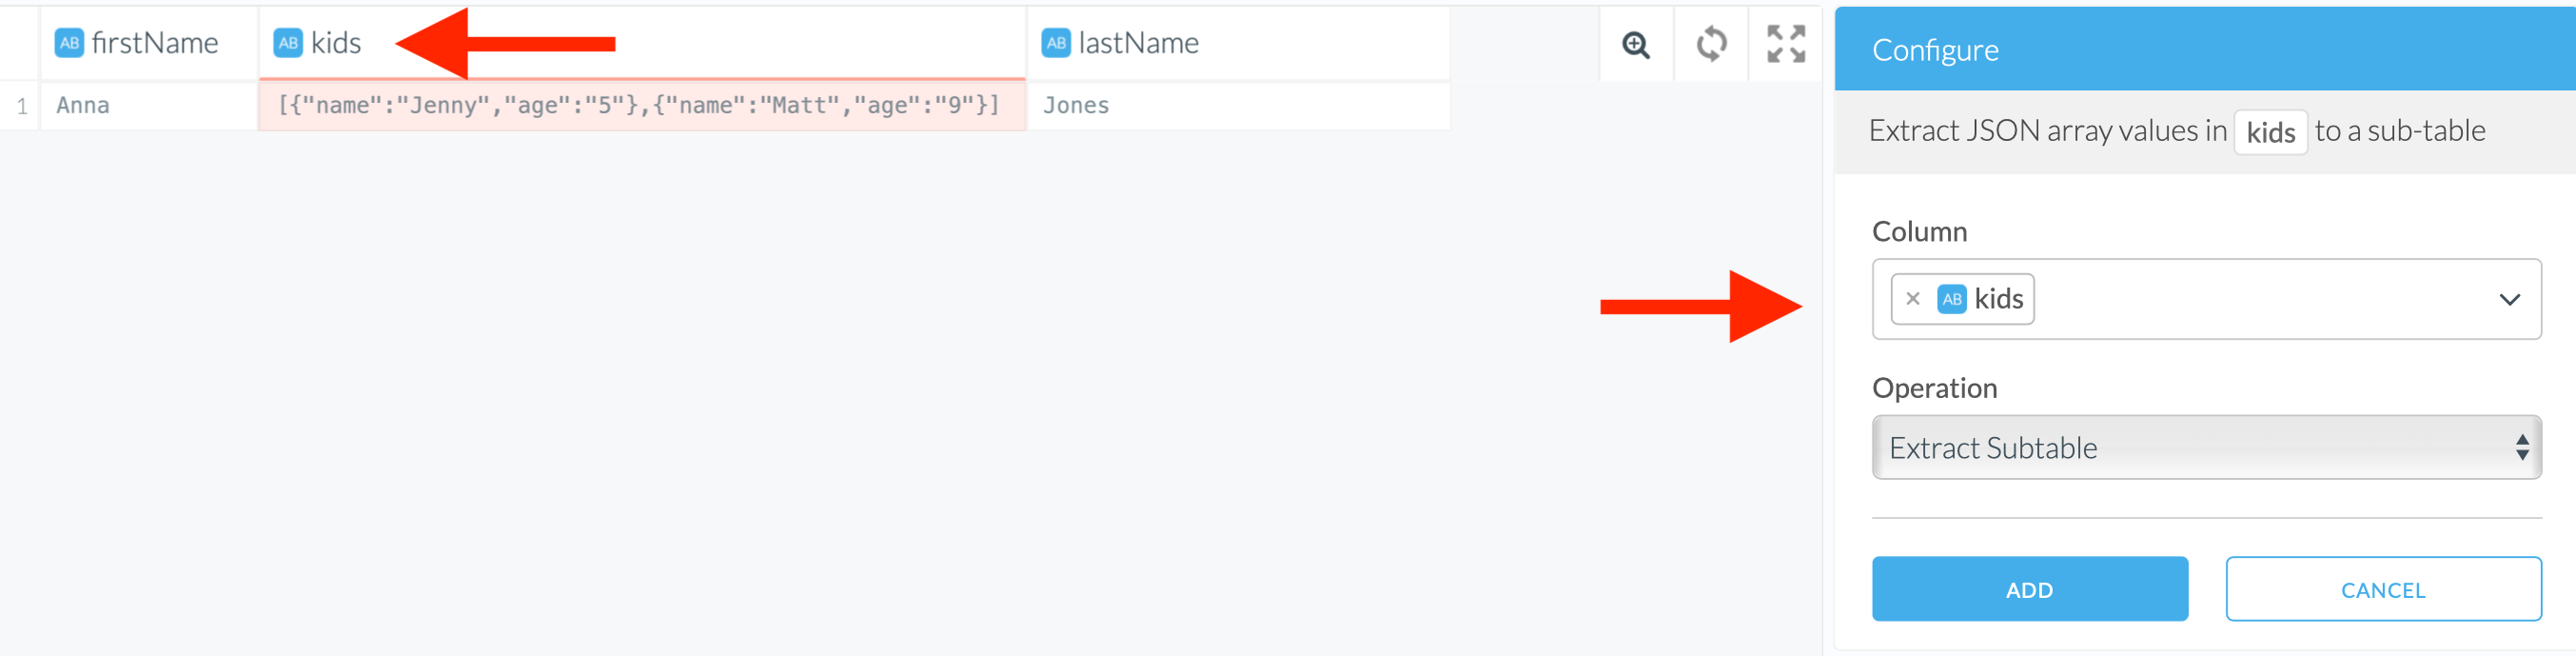
- Search for array in the script editor and select Extract JSON array values in columns to a sub-table.
- Select a column you want you want to parse data from.
- Click ”Add”.
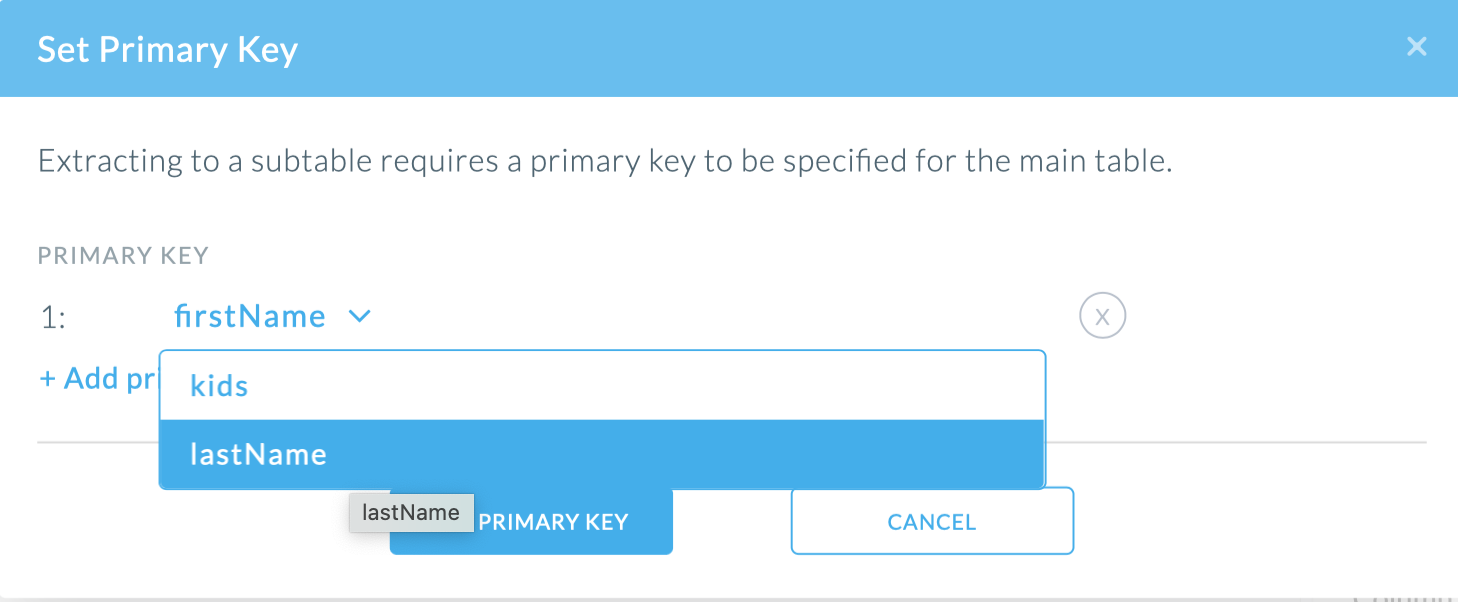
- In the new dialogue window, add a primary key that will be used to relate your new subtable to the main table.
- The new subtable appears as a tab at the bottom next to the main table.
- You can either continue wrangling the main table or finish the script and run the pipeline’s initial load.
- To continue wrangling data in the subtables, you will need to create a new pipeline and use the subtable destination as the source.
Split JSON Arrays into Rows
Use the Split JSON Arrays into Rows step if you want to keep the array values in the main table, rather than creating a subtable. The values will separated into different rows, with the remaining data in the records duplicated across these rows. This can be more convenient than a subtable if this JSON Array represents most of the data for this source. See the warnings below for when to use subtables instead.
Steps
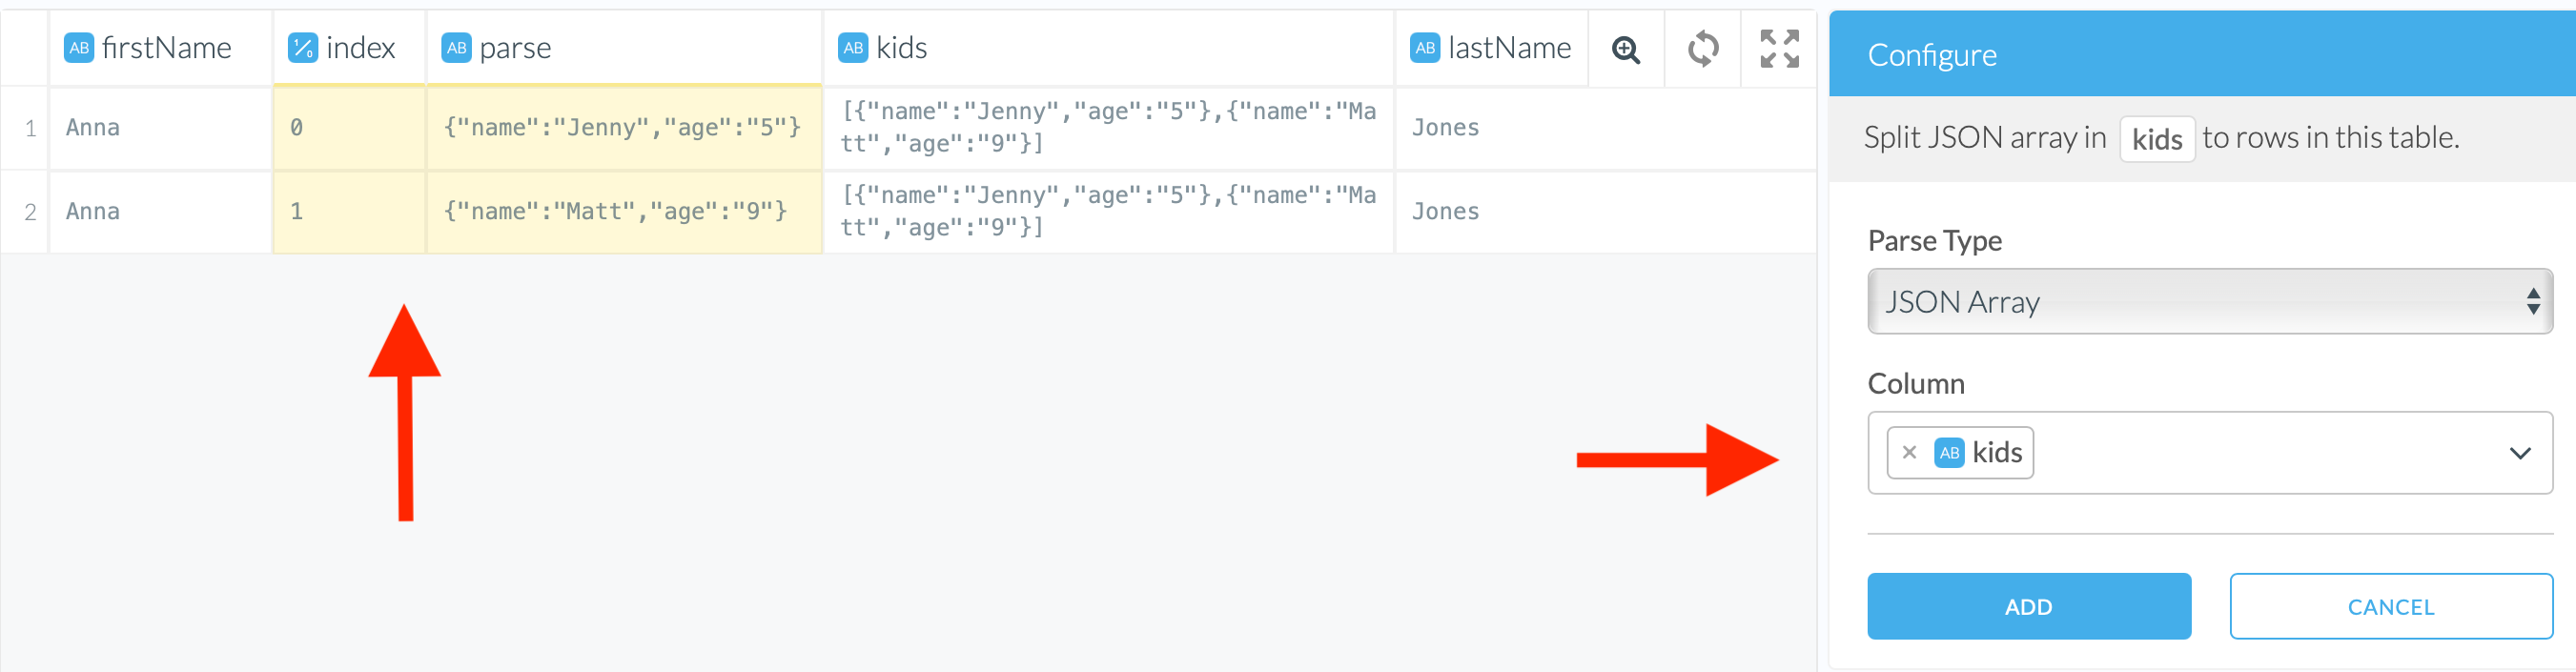
- Search for array in the script editor and select Split JSON array in columns to rows in this table.
- Select a column you want you want to parse data from.
- Click Add.
The original column with the array is removed and two new columns will be added to the table:
- index: the position of the element within the array
- parse: the content of the element in the array
Note that for each element of the array, the other columns are duplicated across multiple rows.
Warnings when using Split JSON Array
- If the column is
nullor the JSON Array is empty, then the entire row will be dropped (see mitigation steps below). - The duplicate rows can be confusing when querying (aggregation results might not be correct if the duplicates are not taken into account).
- If you use this step multiple times for the same pipeline, then you may get an explosion of data (as the duplicates from one split step each get their own duplicates with another split step).
Keeping Rows with Null Values when Splitting JSON Arrays
If you would like to use Split JSON Array and wish to keep rows with null values or empty arrays (’[]’) in the original JSON array column, use the following steps to prevent the entire row from being dropped.
- Replace the content of ARRAY_COLUMN where ARRAY_COLUMN is
emptywith ‘[null]’. - Replace the content of ARRAY_COLUMN where ARRAY_COLUMN = ’[]’ with ‘[null]`.
- Split JSON array in ARRAY_COLUMN to rows in this table. The resulting rows will contain
nullfor the newly created column.