Microsoft SQL Server
There are two methods Etleap uses to extract data from a Microsoft SQL Server source connection: Query-based extractions and Change Data Capture (CDC). With CDC, Etleap will take an initial snapshot of the table using SQL queries and capture incremental changes from the Active Transaction Log and Log Backup Files. With Query-based extractions, all data is extracted with SQL queries.
Source Setup
This setup guide should be followed regardless of whether query-based extractions or CDC will be used to extract the data. To configure the source instance for CDC, complete the steps below, and then follow the guide under Change Data Capture (CDC) Setup .
Step 1. Create a Database User
To extract data from the database, you’ll need to create a new SQL Server user with the minimal permissions to read from the schema you would like Etleap to access. You can complete set up through SQL Server Management Studio (SSMS) or by running SQL queries directly against the source instance.
via SSMS
Create a New User
- In the SQL Server Management Studio, open Object Explorer.
- Click
<instance_name>→ Security → Logins. - Right-click Logins and select New Login.
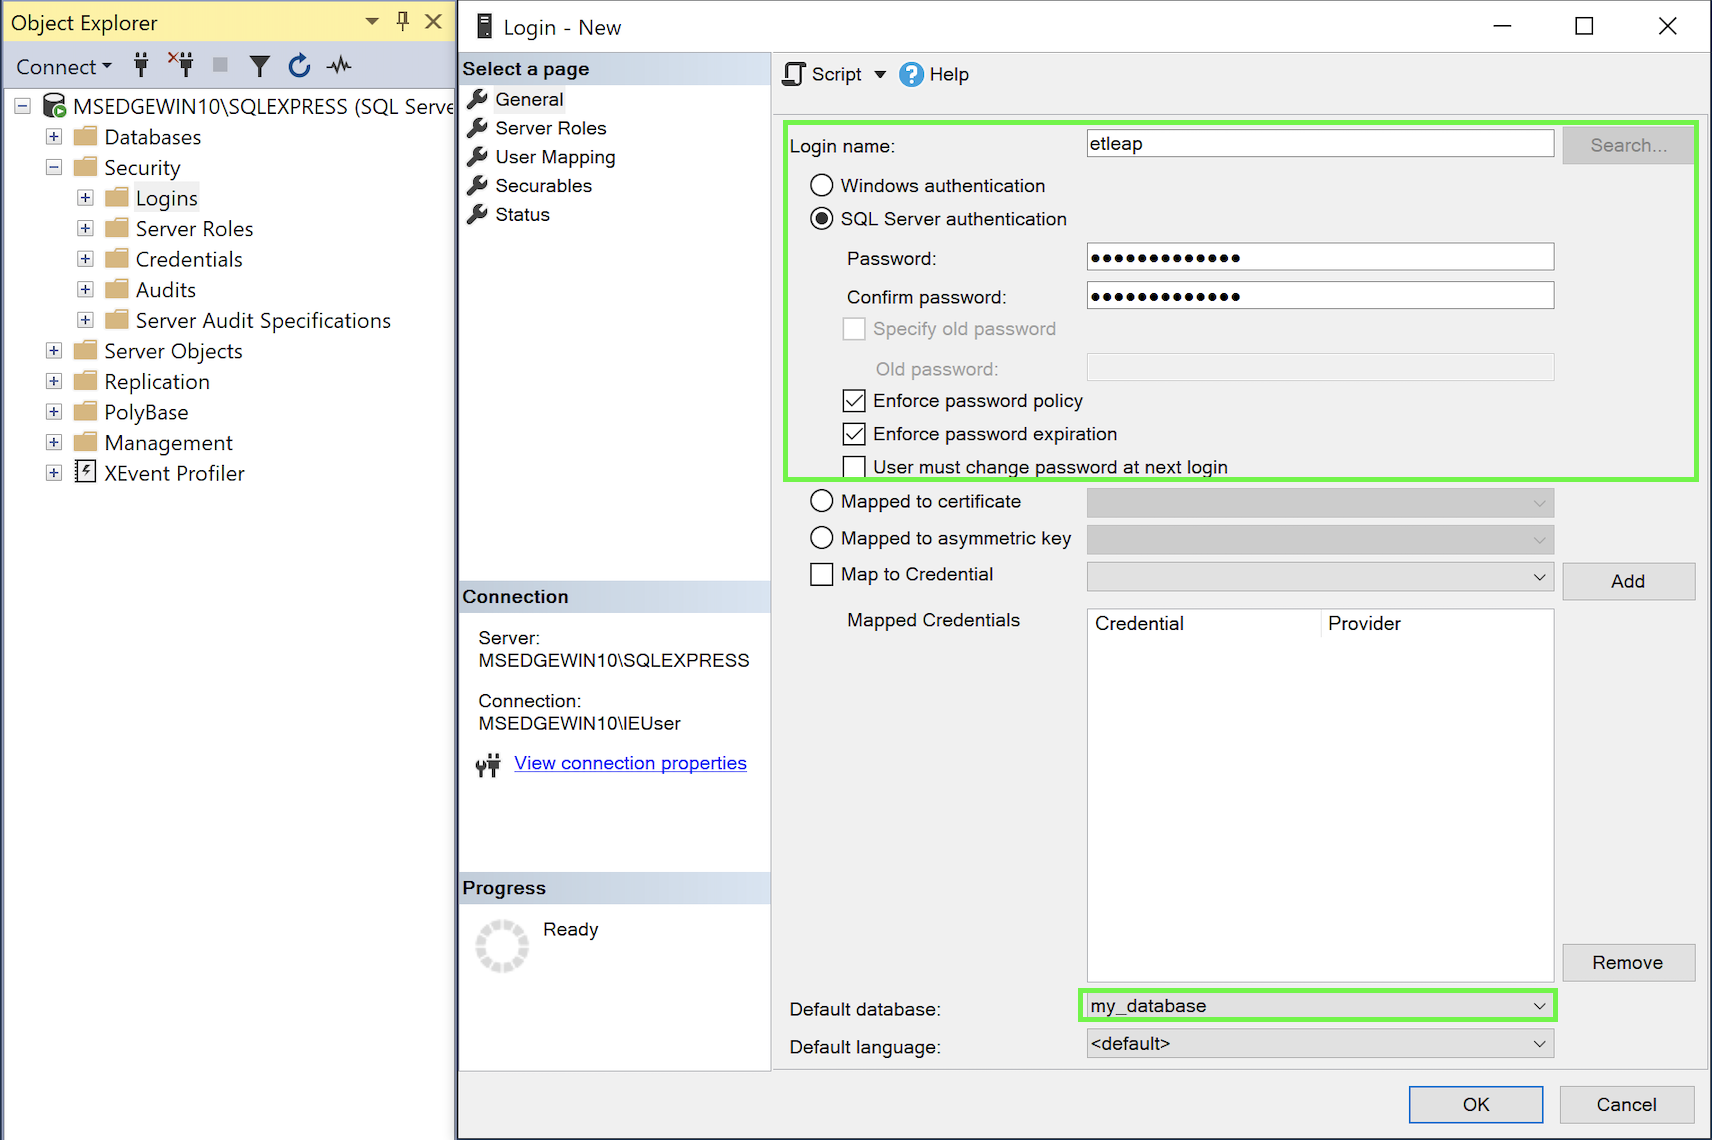
- On the General page, in the Login name field, type the name for your new user.
- Select SQL Server authentication.
- Type a password for the user in the Password and Confirm password field.
- Make sure User must change password at next login is unchecked.
- For Default database, select the database containing the tables to extract.
-
On the Securables page click the Search button, select The server <server name>, and click OK.
-
Select the server in the Securables pane.
-
Open the Explicit tab in the Permissions for <server name> pane.
-
Ensure the Connect SQL boxes are checked under the Grant column.

Apply the Connect SQL permissions to the new user -
On the User Mapping page, select the database that contains the tables to be extracted.
-
The
publicrole should be automatically enabled.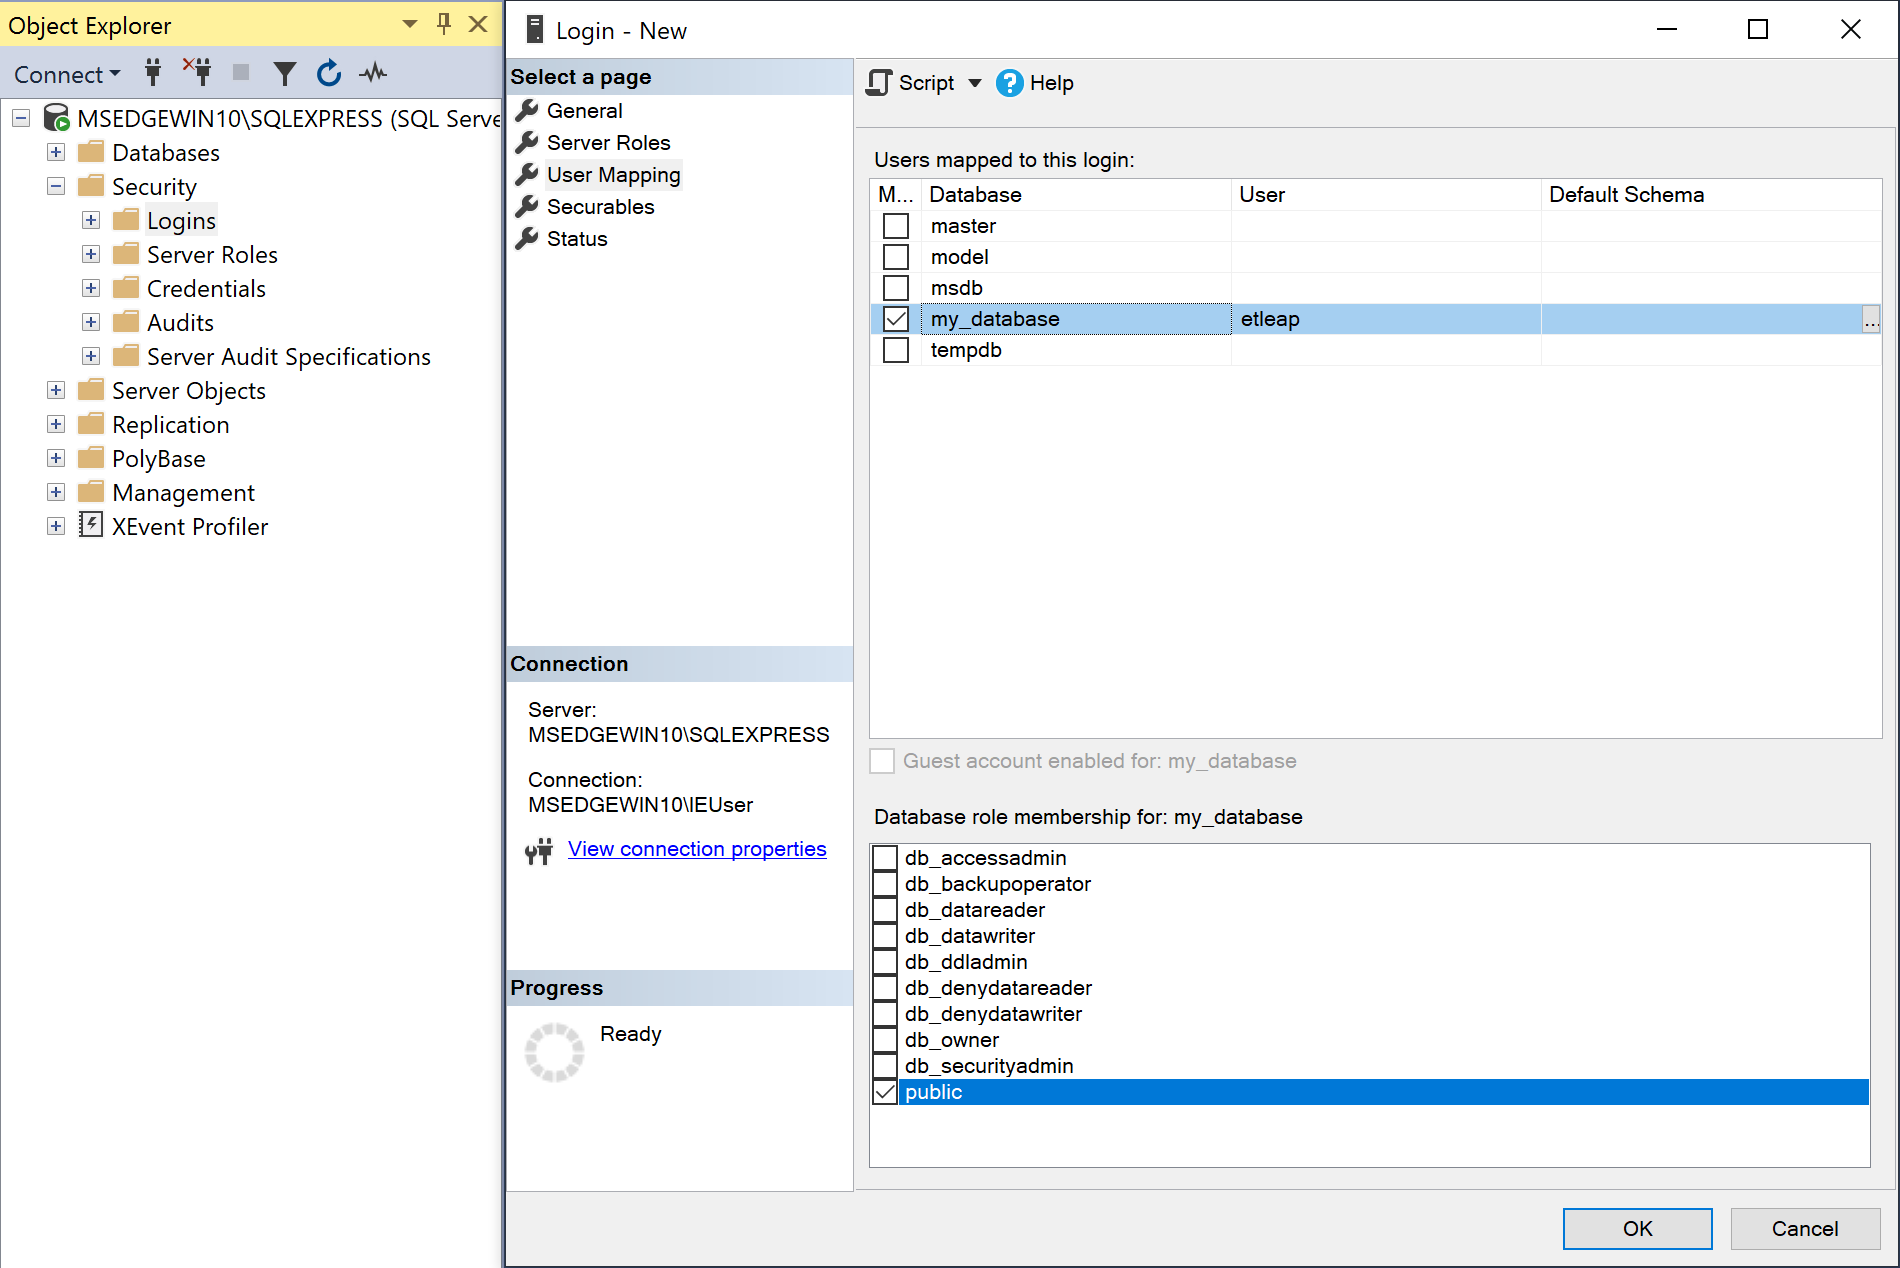
Map the new user to the database to replicate -
Click OK.
Grant Access to the User
- In the SQL Server Management Studio, open Object Explorer.
- Open <Instance name> → Databases → <database name> → Security → Schemas → <schema name>.
- Right-click on the schema to be accessed by Etleap and click Properties.
- On the Permissions page, click the Search button.
- Click the Browse button, select the newly created user, and click OK.
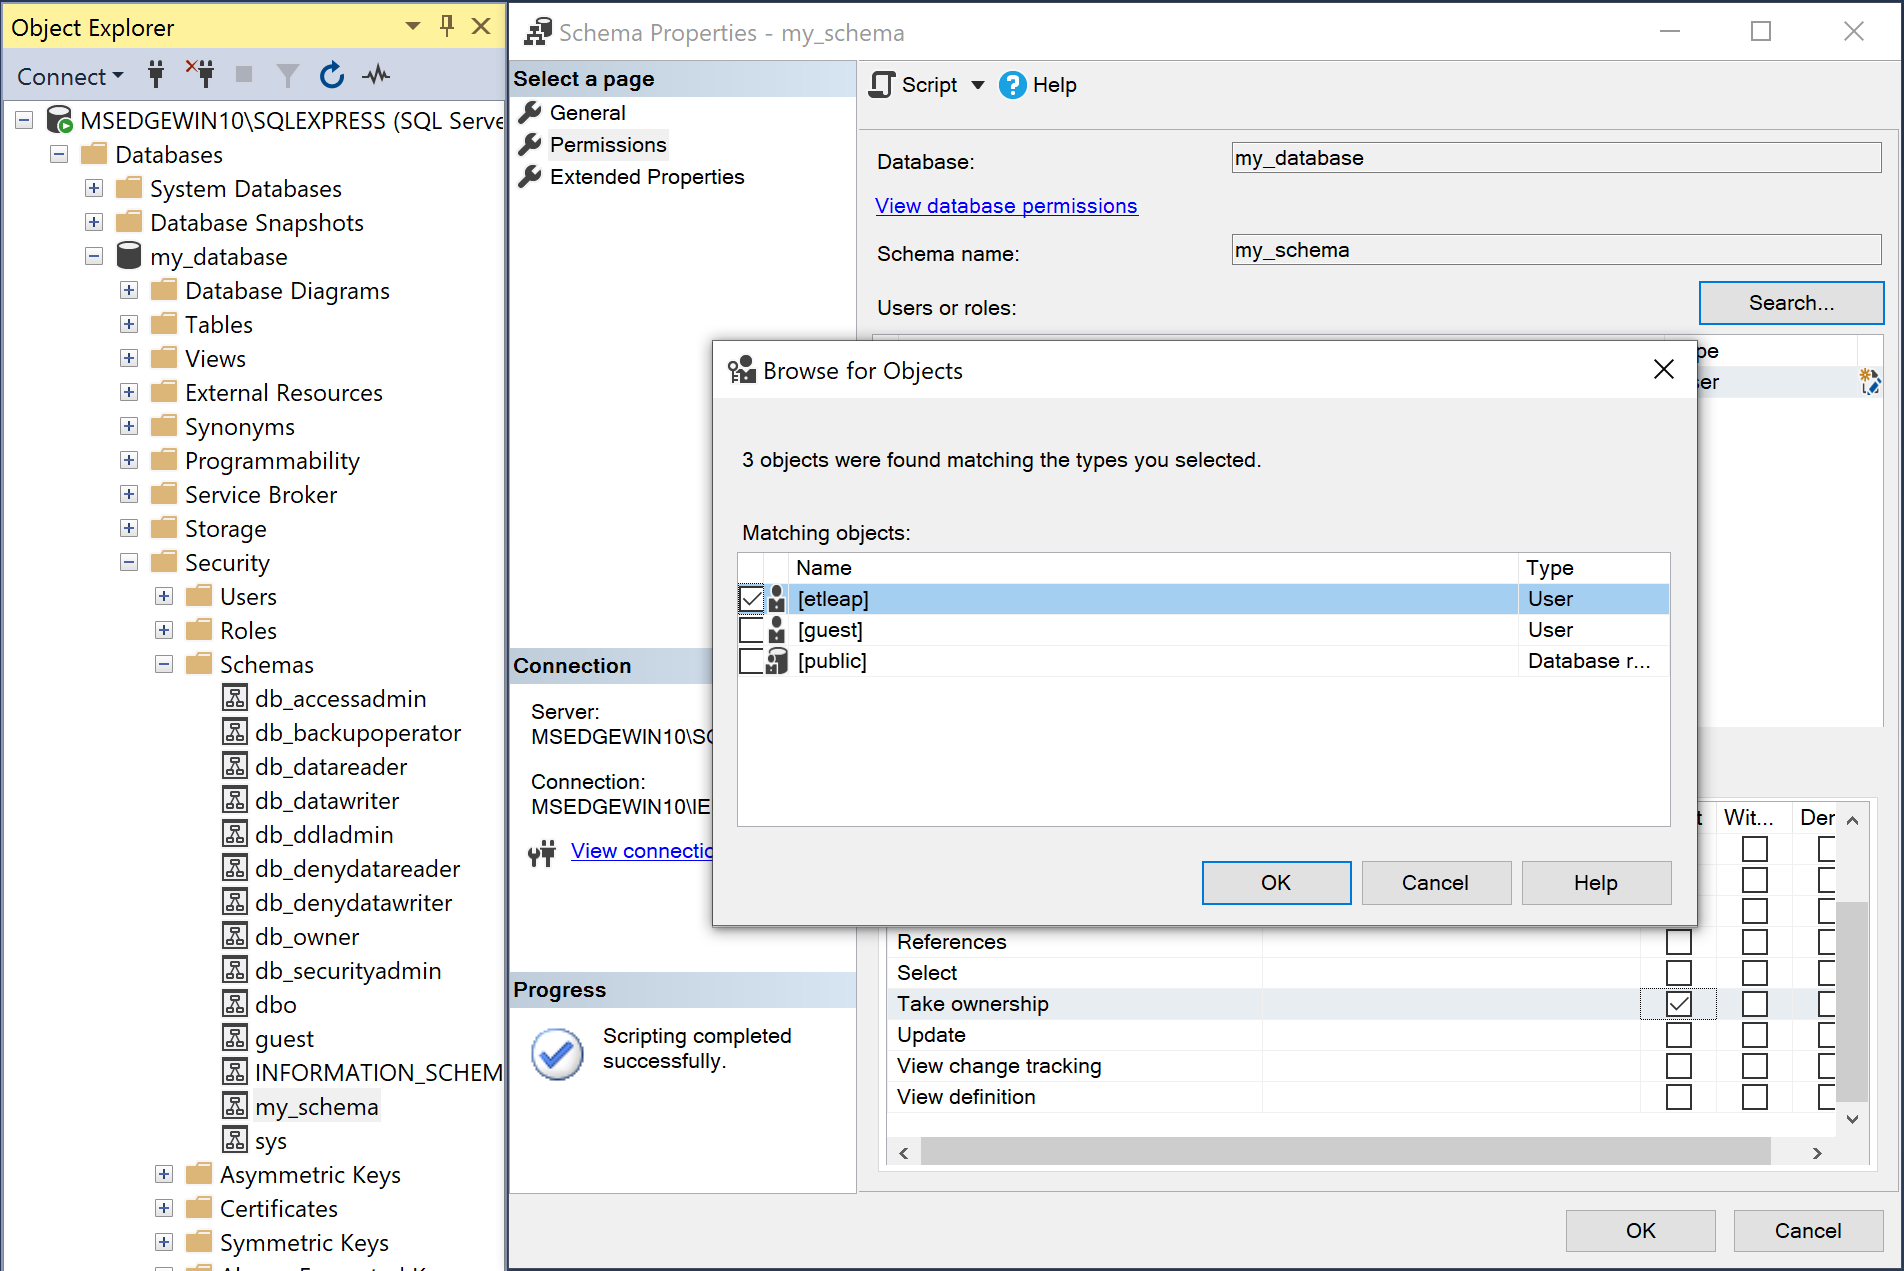
- Click OK on the search window.
- Select the user in the Users or roles pane.
- In the Permissions for <user name> pane, open the Explicit tab.
- Check the box for Select in the Grant column.
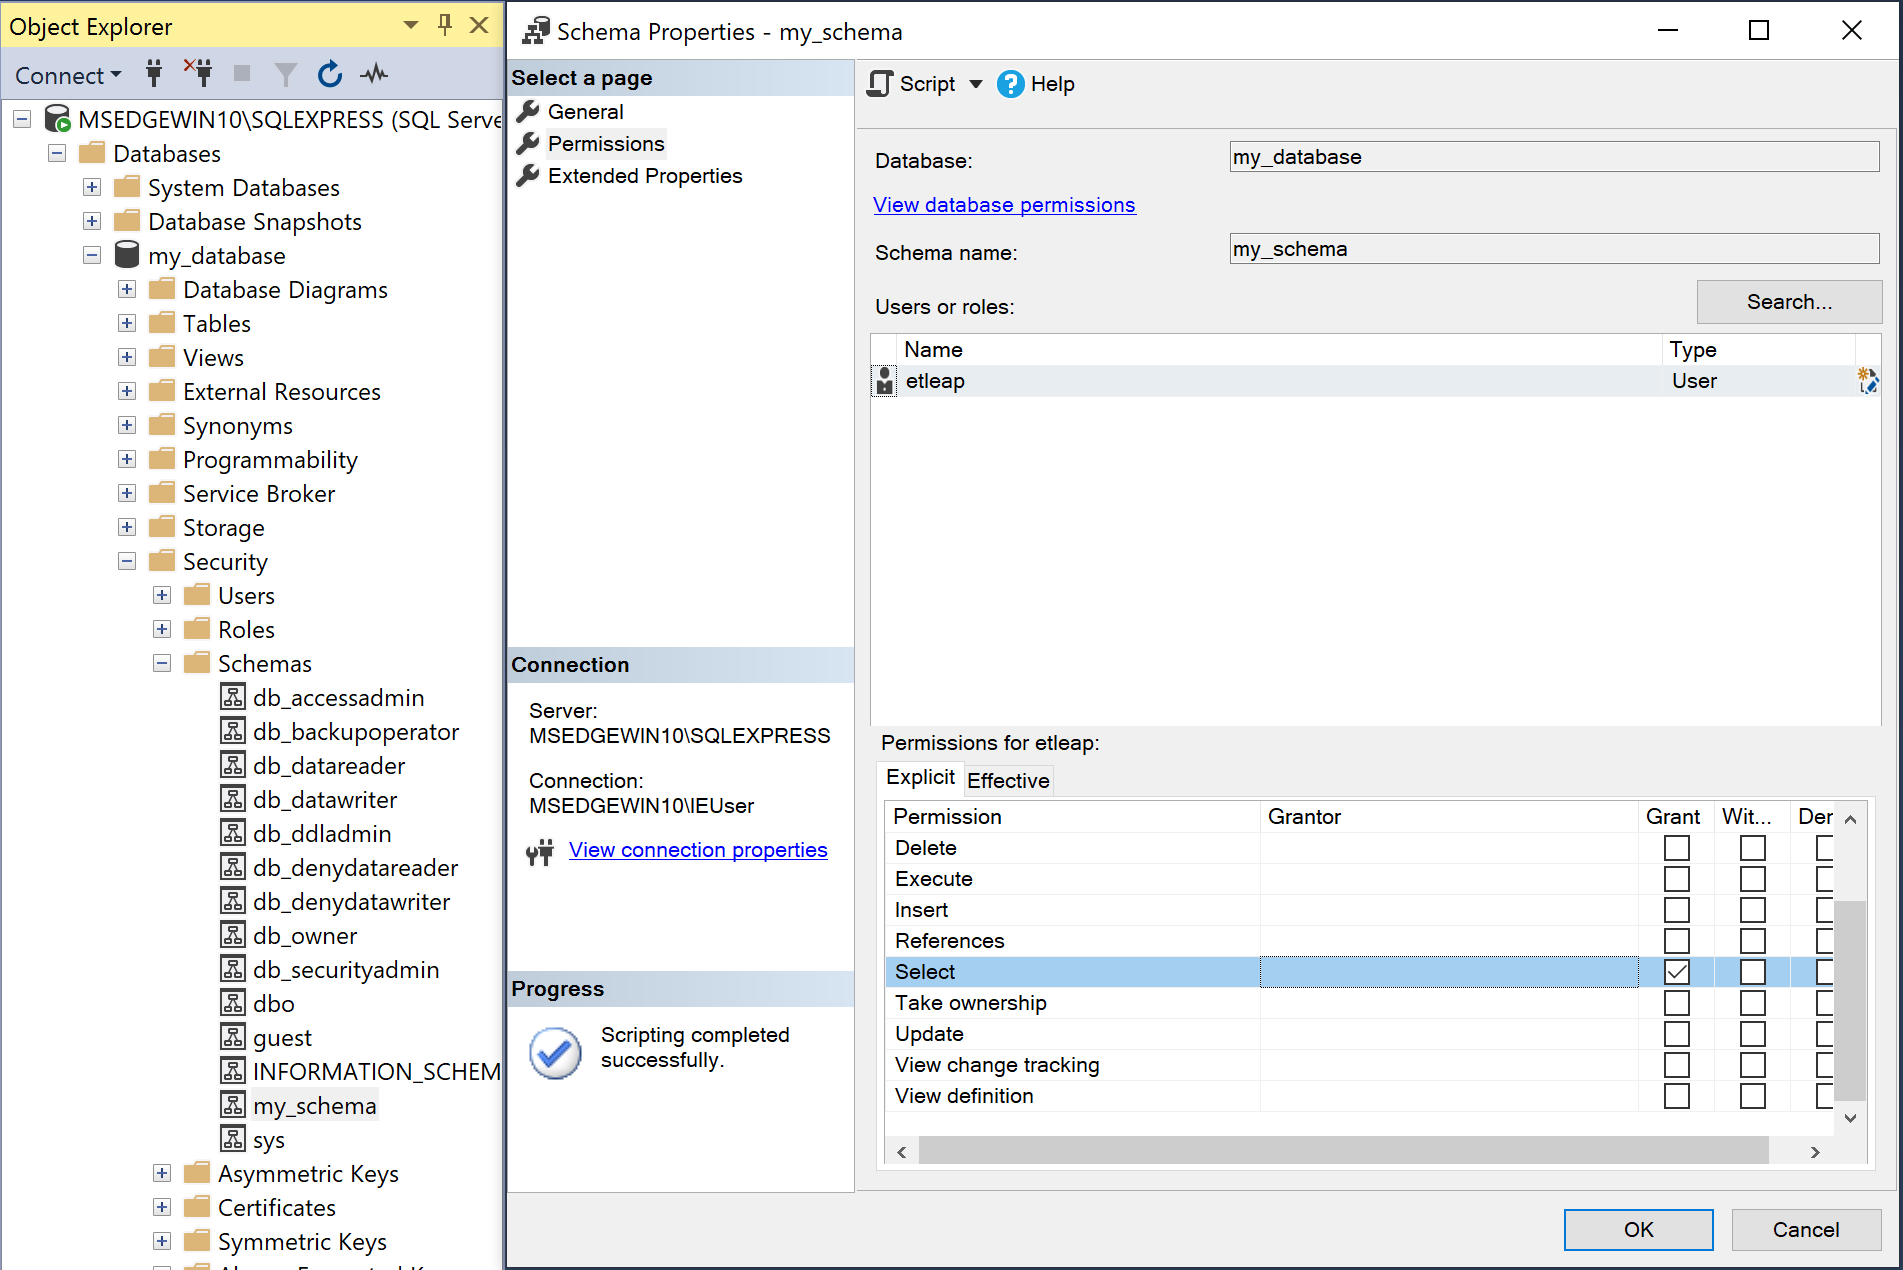
-
Click OK.
-
You can now use this new user to create a SQL Server connection in Etleap.
Step 2. Whitelist Etleap’s IP Addresses
Etleap’s IP addresses must be whitelisted in SQL Server. There are different addresses to whitelist depending on your deployment model. Review the IP Whitelisting article for more information on which to use.
Follow the steps below to whitelist the necessary IP addresses on a Windows Server:
-
Open the Windows Control Panel.
-
Go to Administrative Tools → Windows Defender Firewall with Advanced Security.
-
On the Inbound Rules page look for a rule named
MS SQL ServerorMicrosoft SQL Server.- If you cannot find a rule for SQL Server, add one by clicking New Rule in the right pane.
- Select Program, and click Next.
- Specify the path to SQL Server executable on the Windows server and click Next.
- Select Allow the connection and choose Next.
- Select all three of Domain, Private, and Public and choose Next.
- Name the rule
MS SQL Server.
-
Select the rule and click Properties in the right pane.
-
Open the Scope tab.
-
Under Remote IP Addresses select These IP addresses.
-
For each IP address to allow, click Add, enter the address, and click OK.
-
Click Apply and OK.
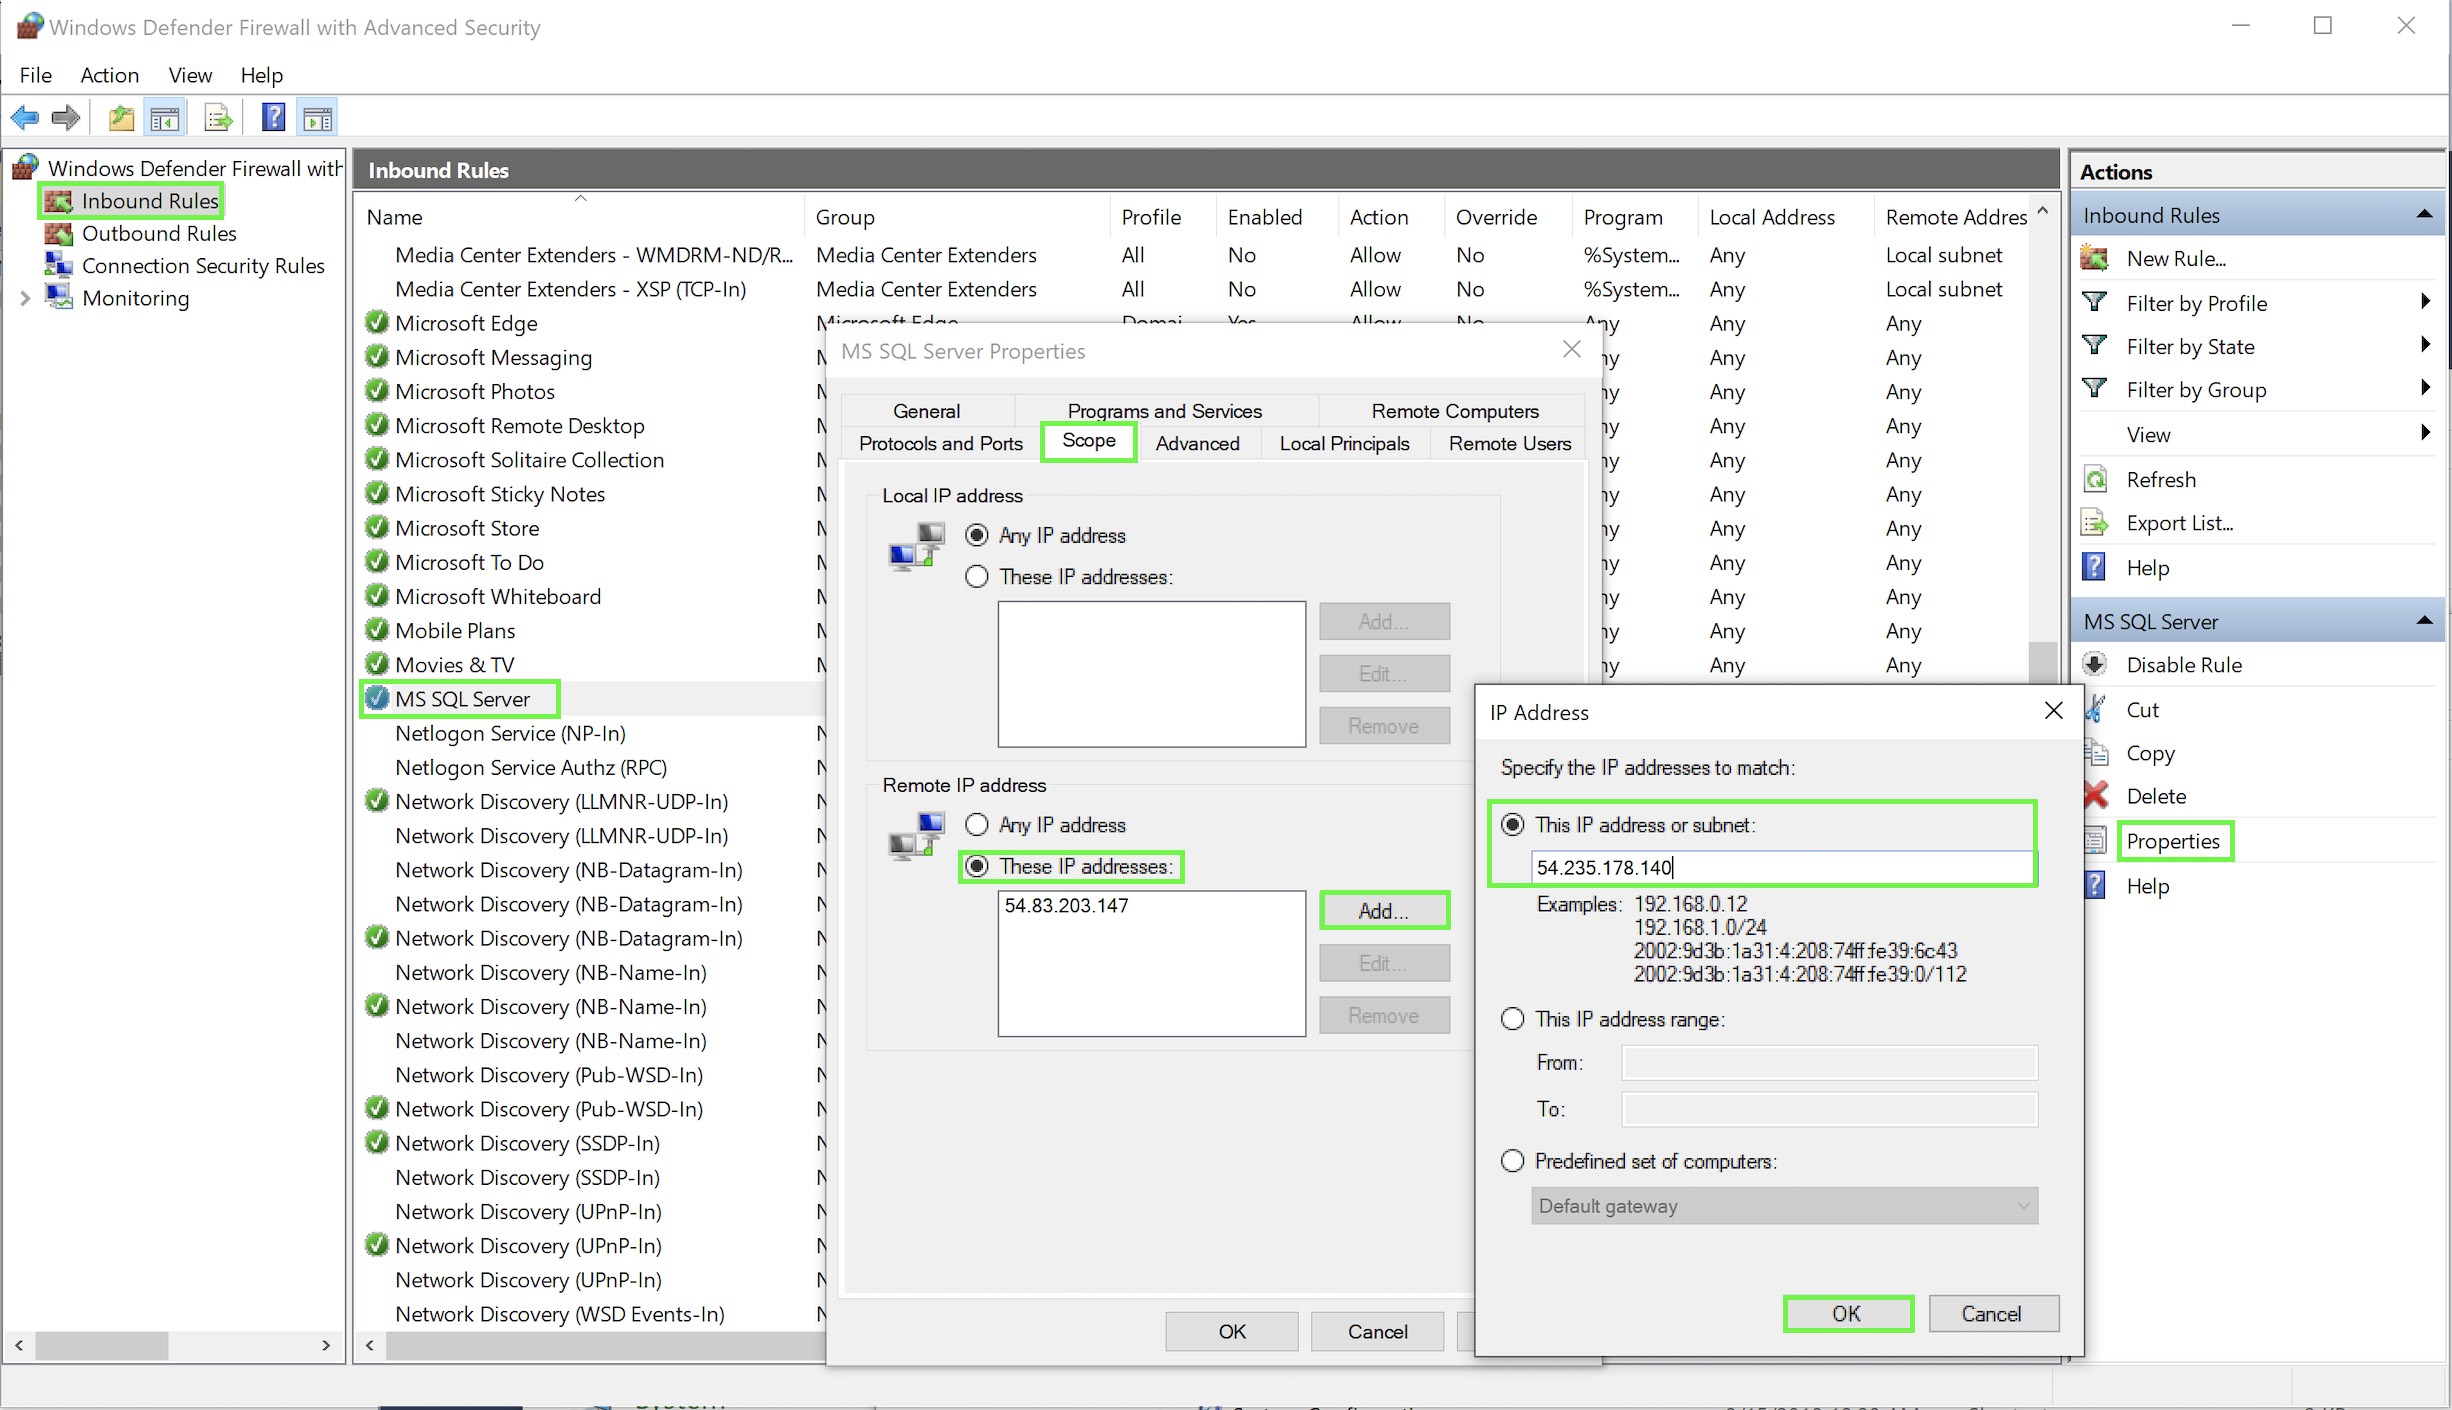
Allowing IP addresses in Windows Defender
Prefer using an API? Go here and select SQL Server under the Body header to create your connection via API.
Change Data Capture (CDC) Setup
This setup guide should be followed before creating a connection in Etleap with the CDC option enabled. The setup steps for both self-managed SQL Server instances and cloud-hosted instances, such as RDS, are detailed below. Ensure the Source Setup steps have been completed first.
Add User Permissions for CDC
The database user requires additional permissions for CDC to work. Follow the steps below to grant the necessary permissions.
via SSMS
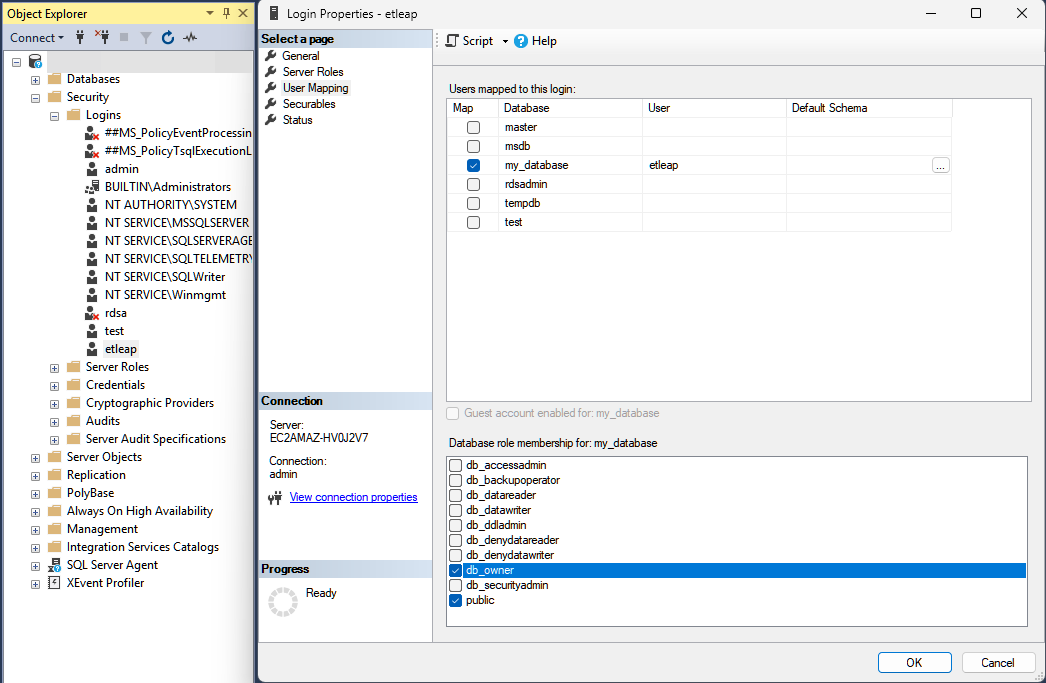
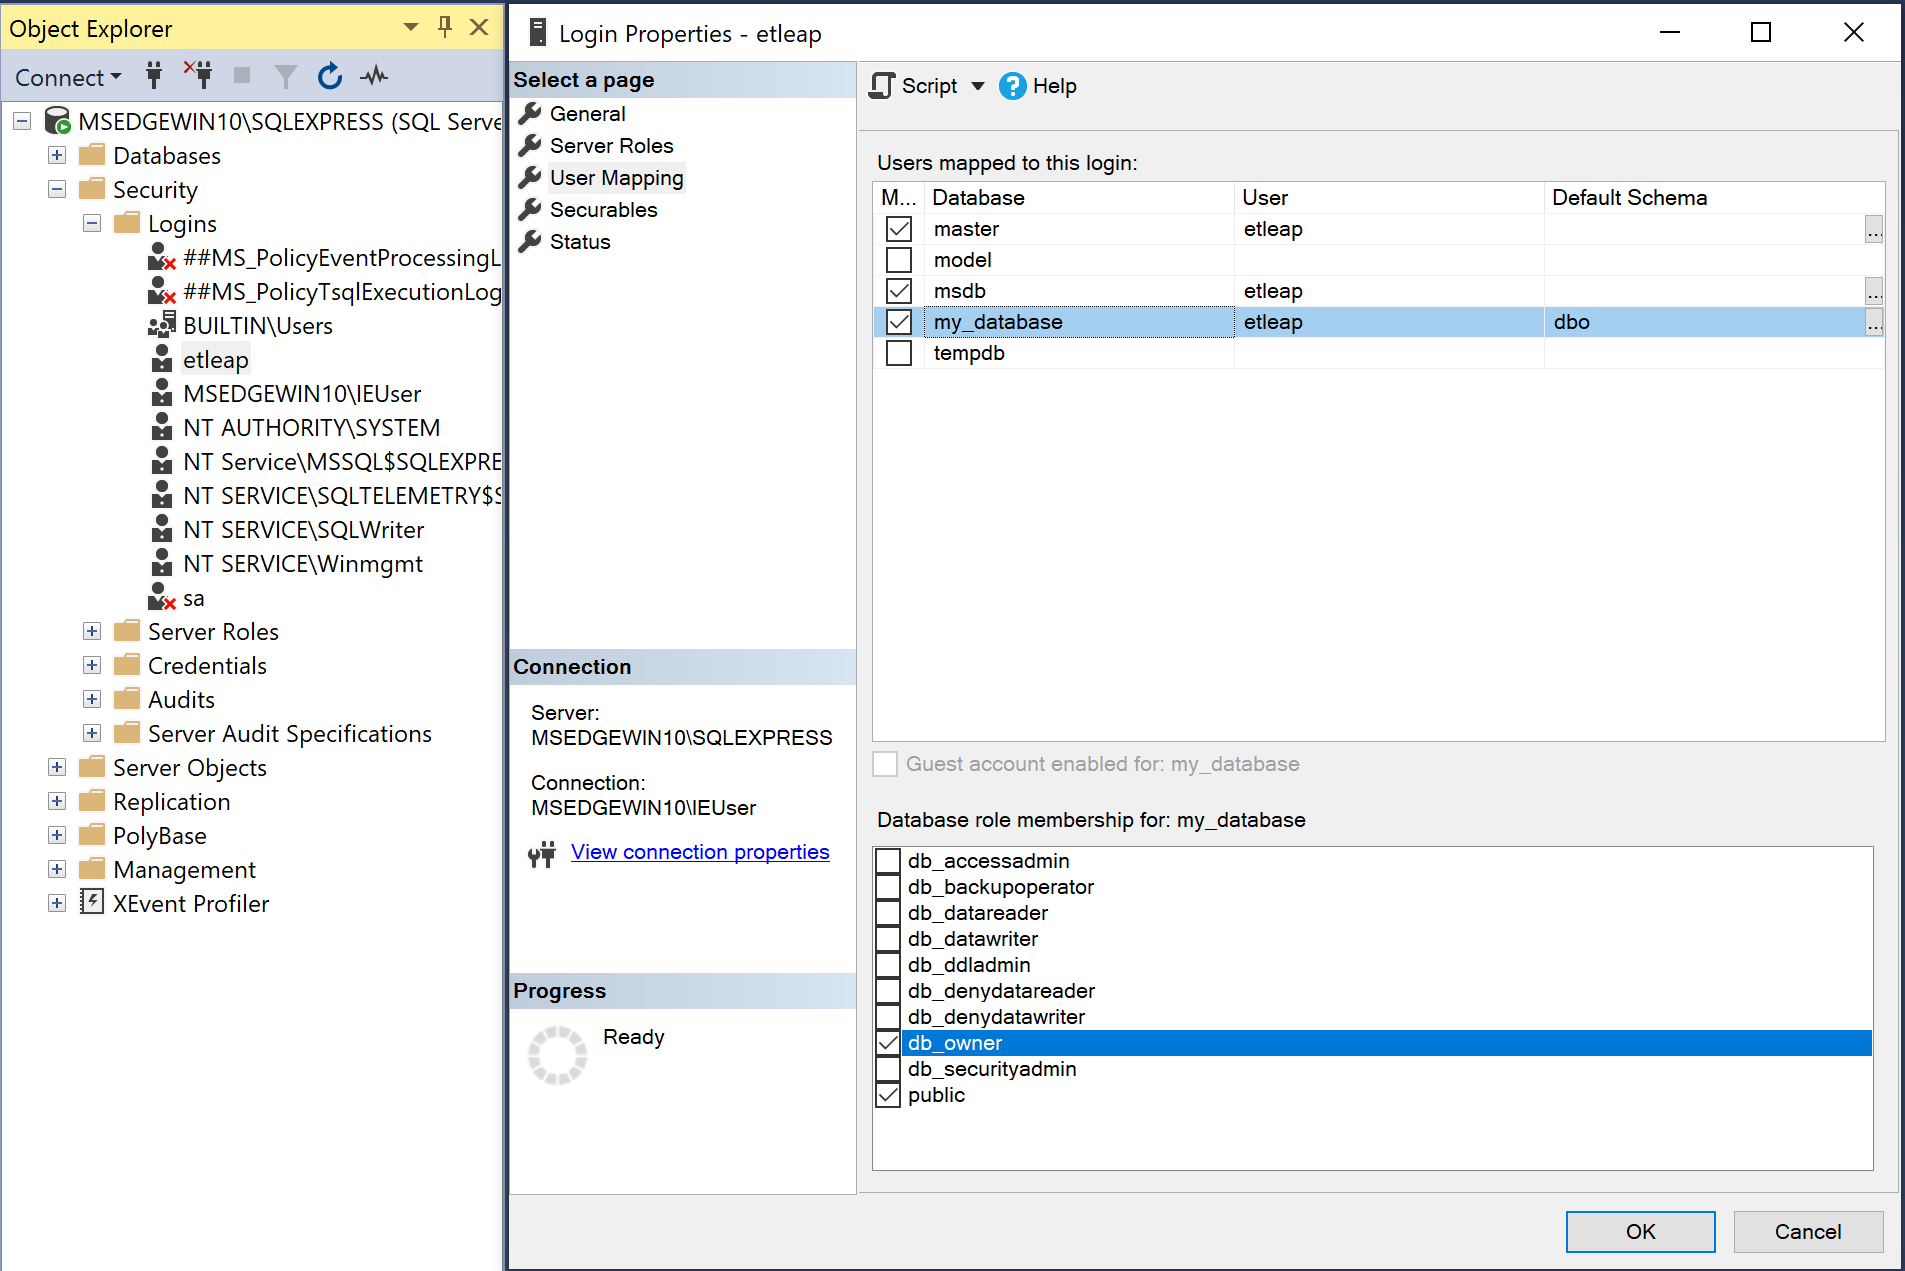
- In the SQL Server Management Studio, open Object Explorer.
- Right-click on <instance_name> → Security → Logins → <etleap user>, and select Properties.
- On the User Mapping page, select the database to replicate and assign the
publicanddb_ownerroles.
Configure the Database for CDC
For self-managed SQL Server instances, two types of replication are available: MS-Replication, which should be used for tables with primary keys; and MS-CDC, which should be used for tables without primary keys.
undefined
Step 1. Set the Database Recovery Model and Backup
-
In the SQL Server Management Studio, open Object Explorer.
-
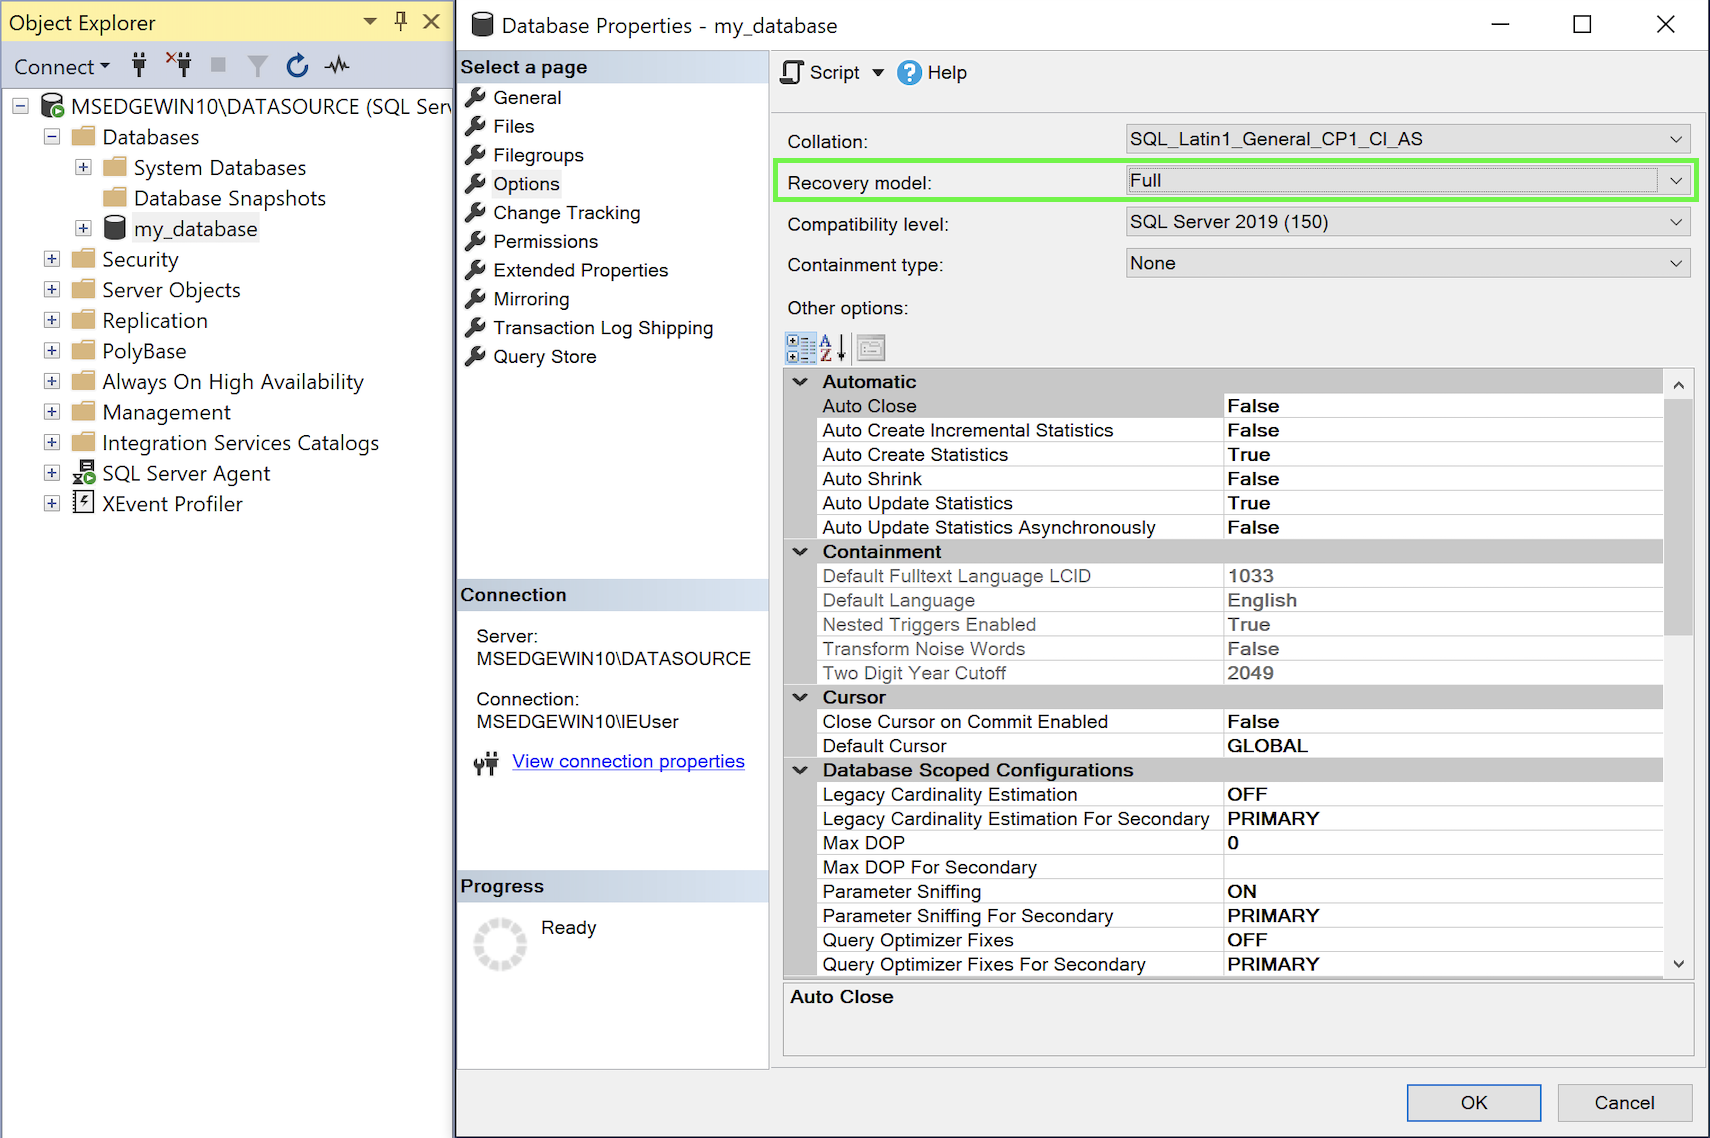
Right-click on Databases → <database to replicate>, and click Properties.
-
On the Options page, make sure the Recovery model for the publication has been set to
Bulk loggedorFull:
Configure the Recovery Model for the publication -
Click OK.
-
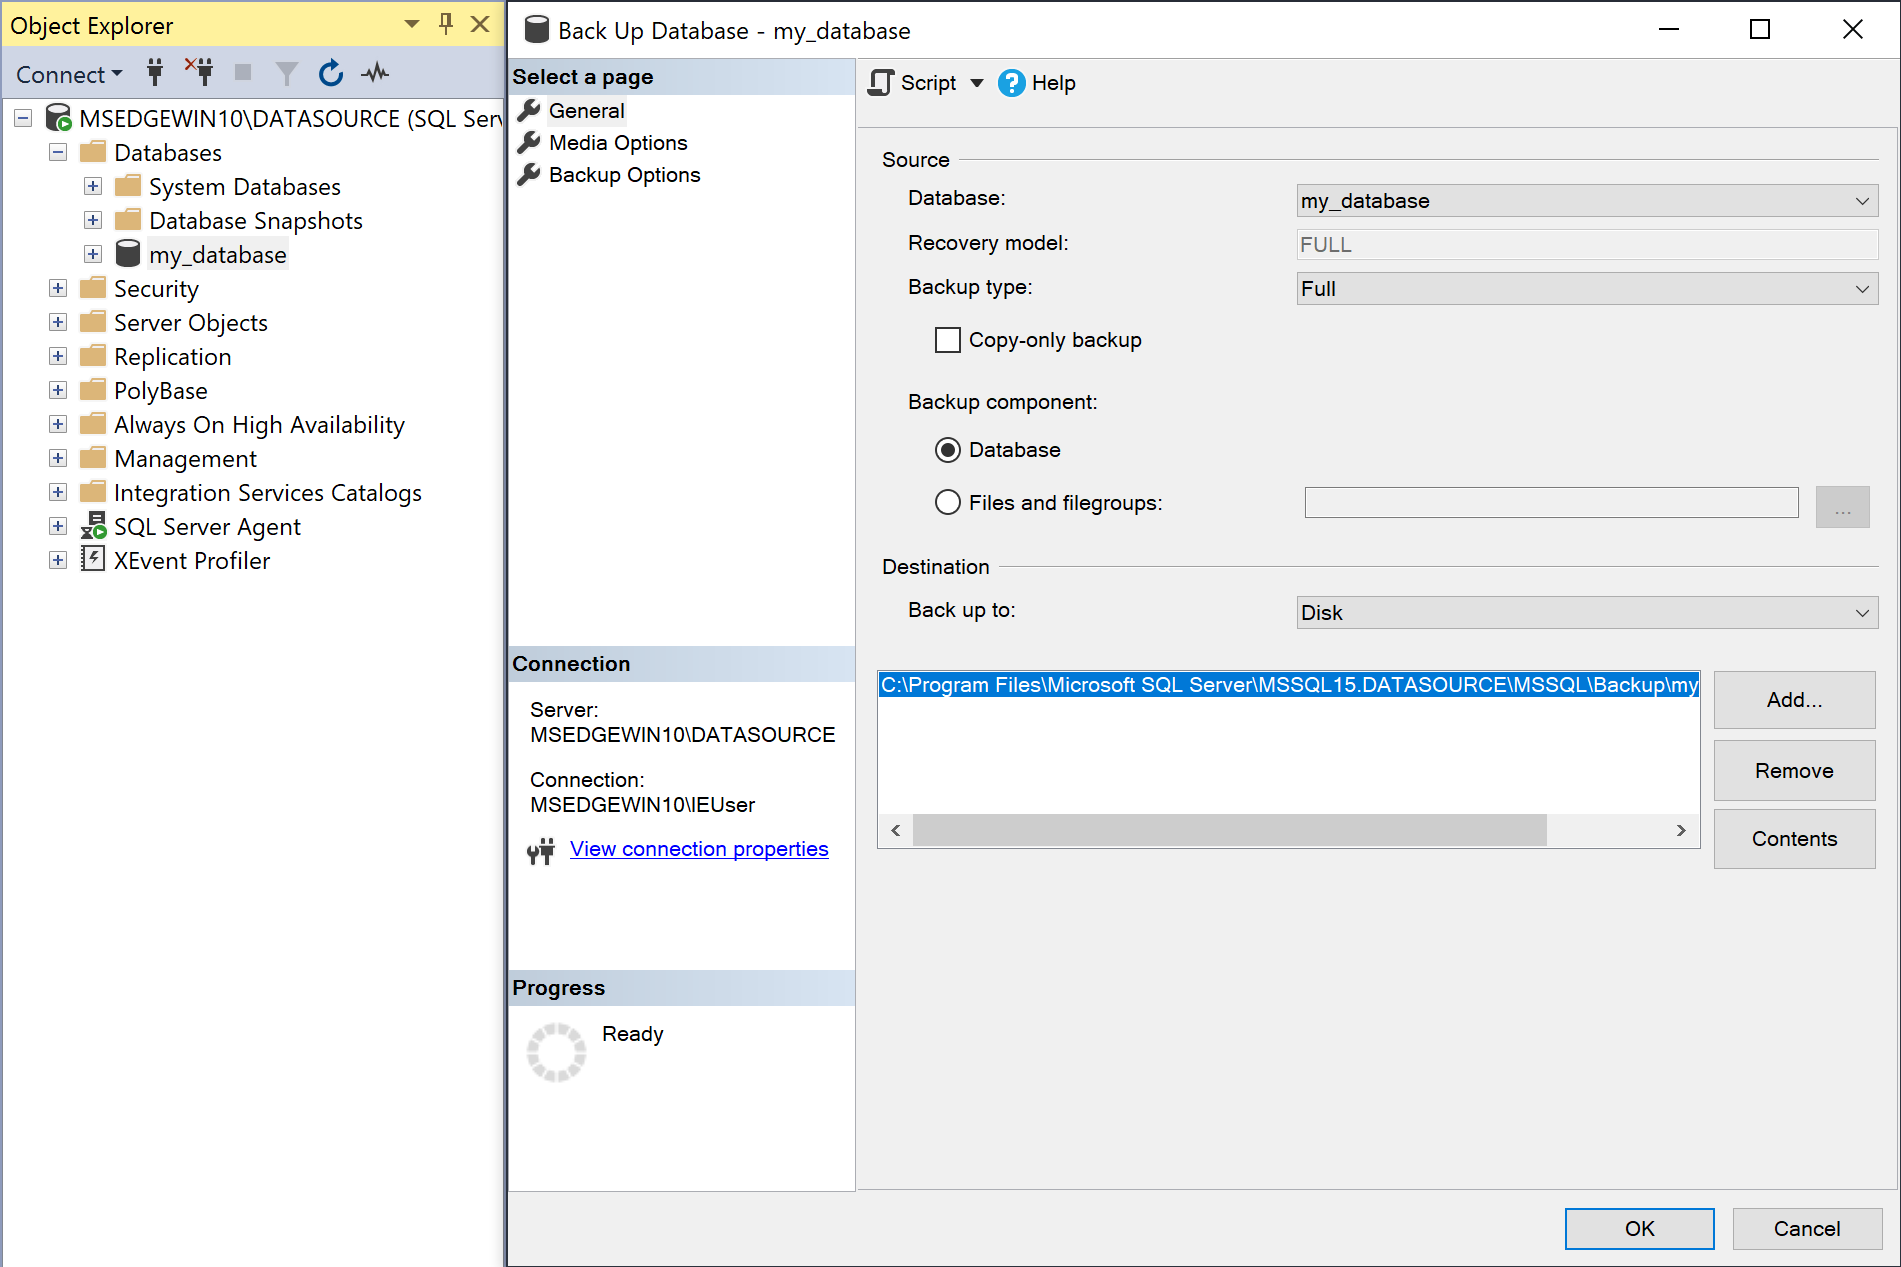
A full backup must be performed before enabling the database for replication.
-
Right-click on Databases → <database to replicate>, and click Tasks → Back Up.
-
The Backup type dropdown should be set to
Fulland Destination → Back up to should be set toDisk.
Step 2. Configure Distribution and Backup Access
- In the SQL Server Management Studio, open Object Explorer.
- Right-click on <instance_name> → Security → Logins → <etleap user>, and select Properties.
- On the User Mapping page, select the
msdbandmasterdatabases, and check thepublicrole.
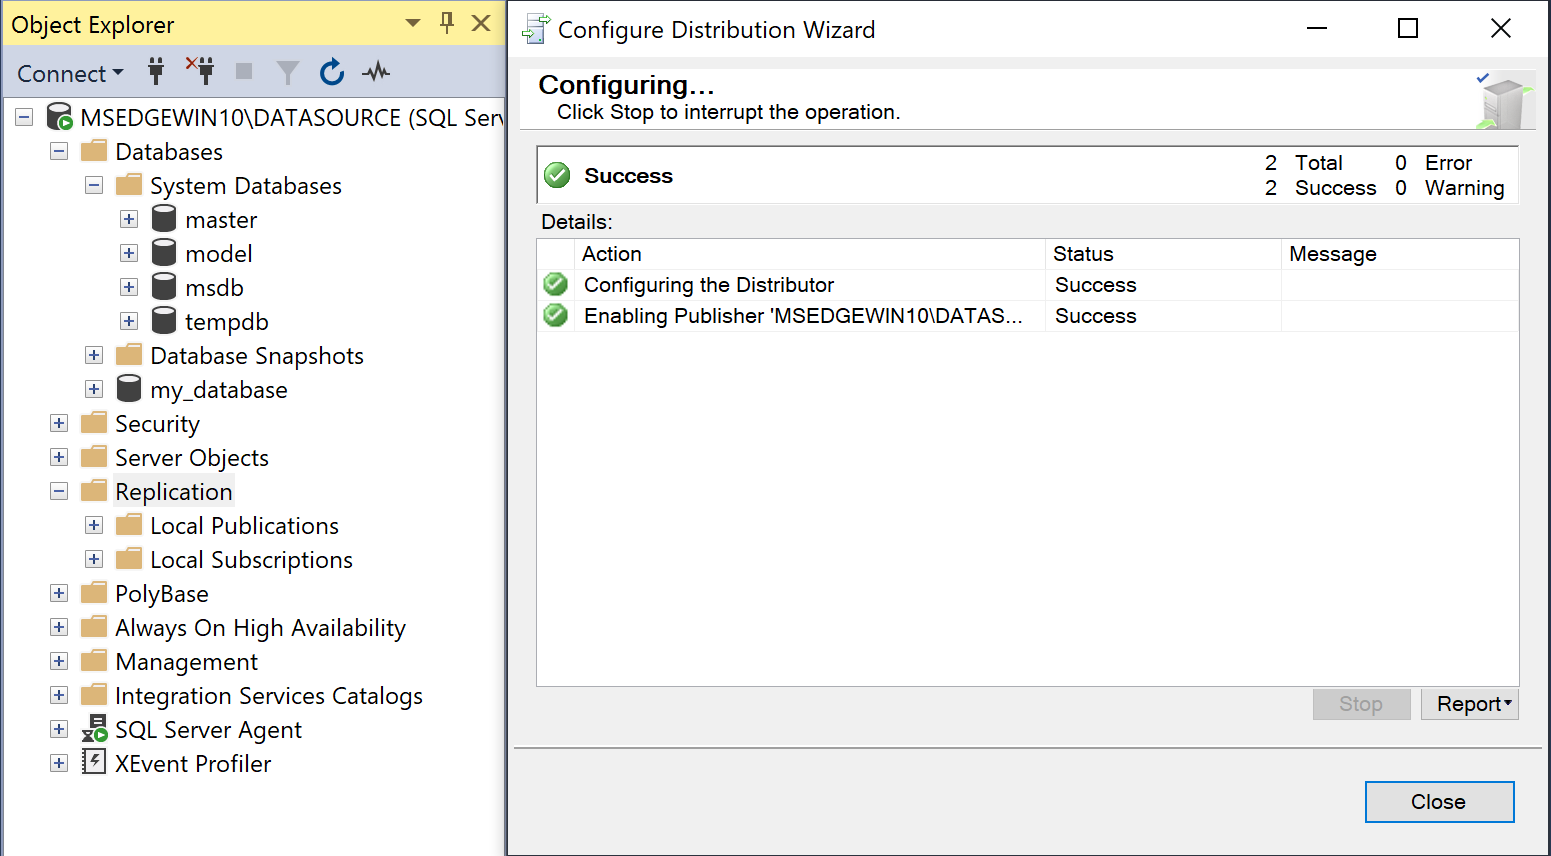
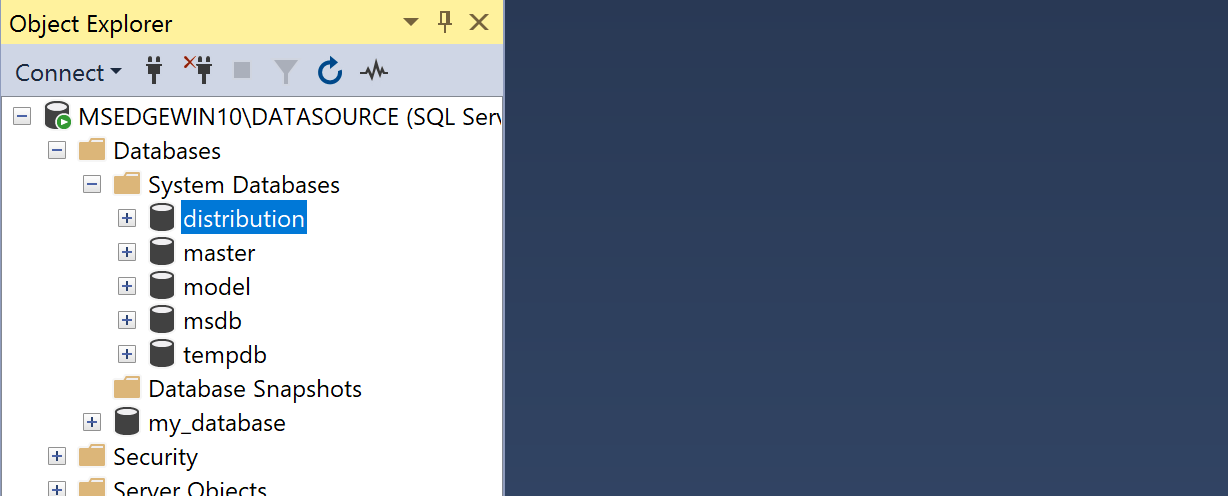
- Right-click on the Replication folder, and then choose Configure Distribution.
If you do not see the Configure Distribution option, ensure that SQL Server Replication has been installed for the source instance.
- On the Distributor step, select Server will act as its own Distributor. Remote distributors are not supported by DMS.
- Complete the Configure Distribution wizard.
- Follow the relevant steps here to grant the minimal required permissions for the user.
Replace
DMS_userwith the user specified in your Etleap connection.
Step 3. Create a Publication
Follow the steps below to create a publication for each table that you would like to extract data from.
- Log in to SSMS using the
SYSADMINuser account. - Start a new query with File → New → Query with Current Connection.
- Run the following query to get the DBID for the database you want to replicate in Etleap.
SELECT DB_ID('<database_name>');- Expand the Replication folder in the Object Explorer.
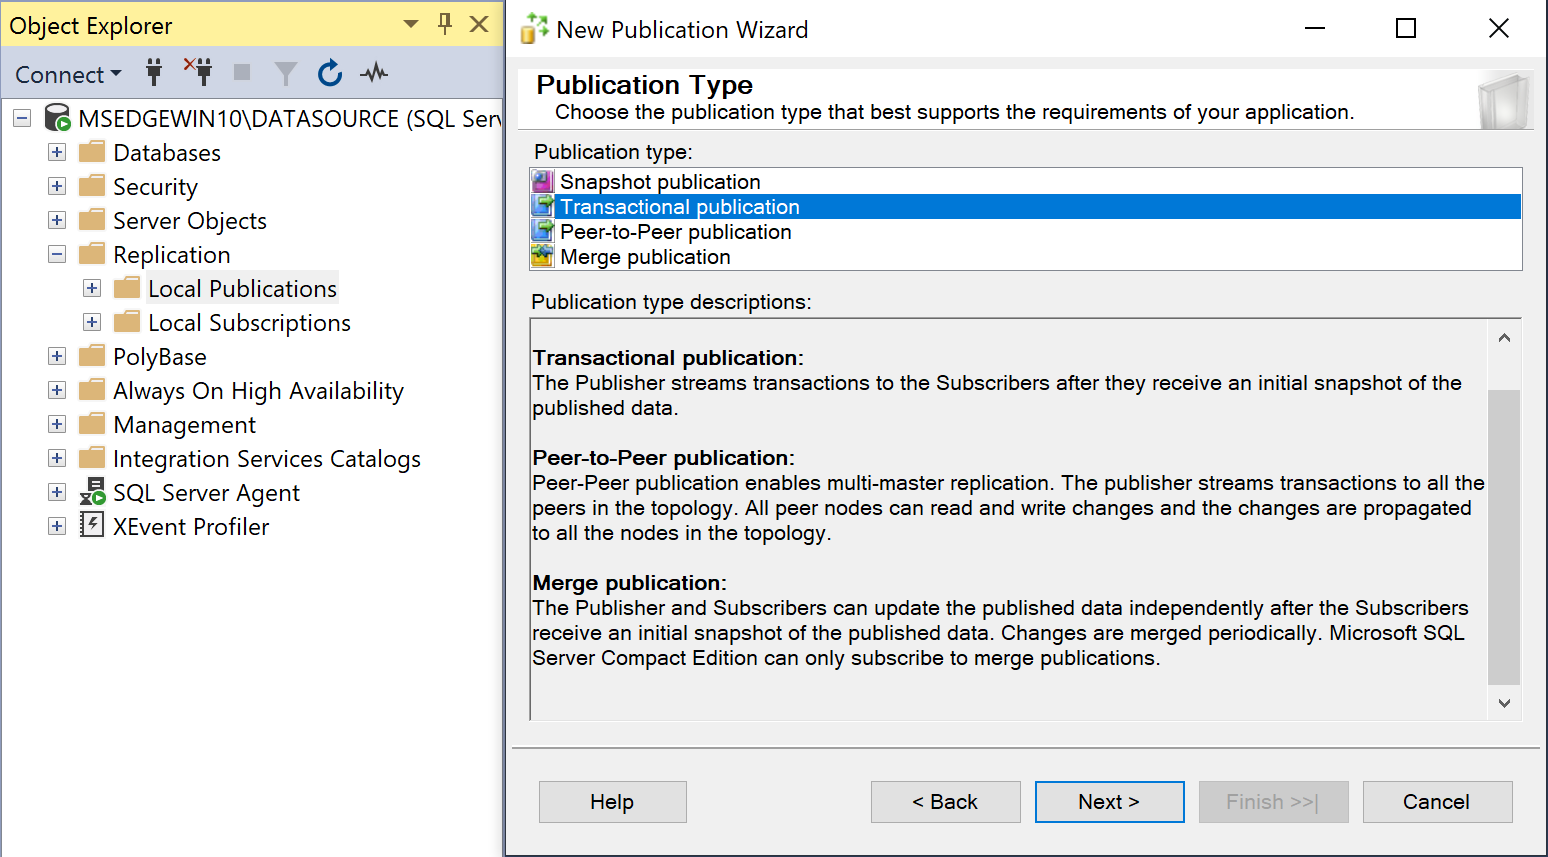
- Right-click the Local Publications folder, and choose New Publication.
- In the New Publication Wizard, click Next.
- Choose the database where you want to create the publication.
- Choose Transactional Publication, and then click Next.
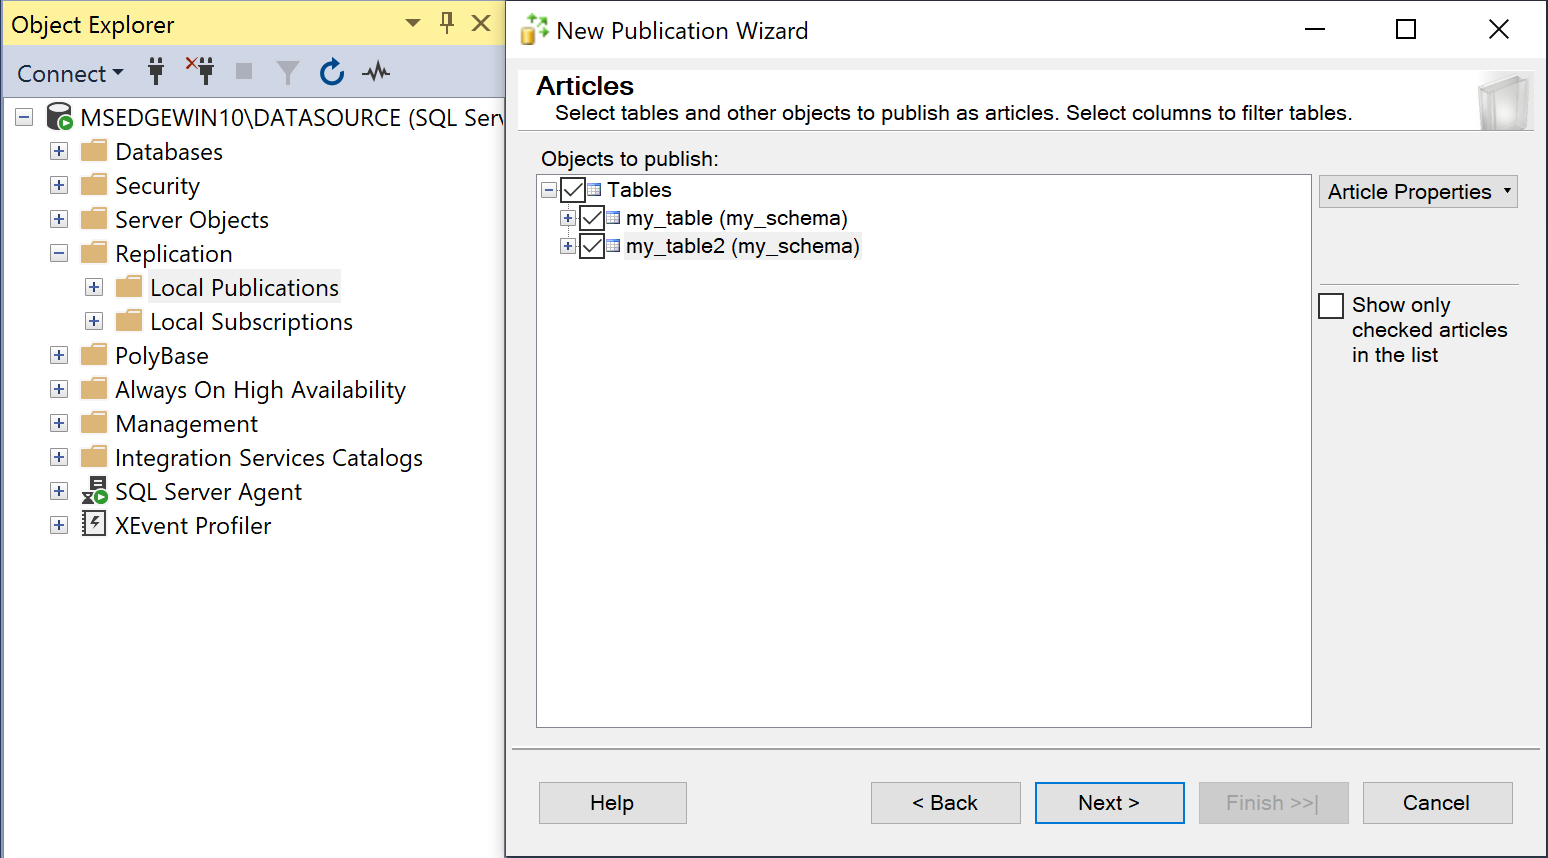
- Expand Tables, choose the tables you want to replicate, and click Next.
Only tables that have primary keys can be replicated.
-
Click Next to skip filter creation as it is not required.
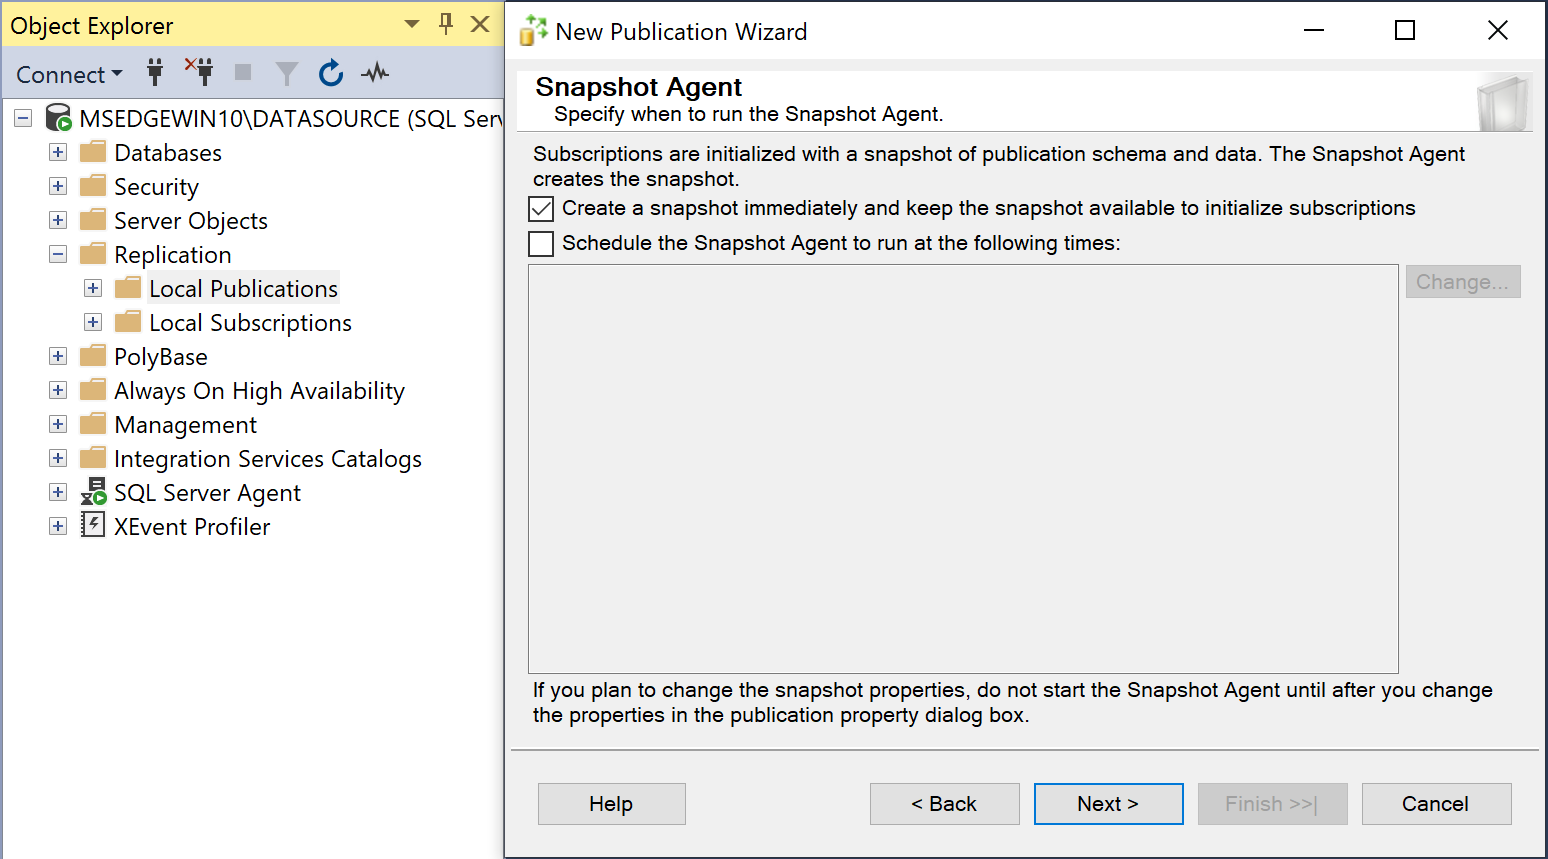
-
In the Snapshot Agent step, select the Create a snapshot immediately and keep the snapshot available to initialize subscriptions option.
-
Click Next.
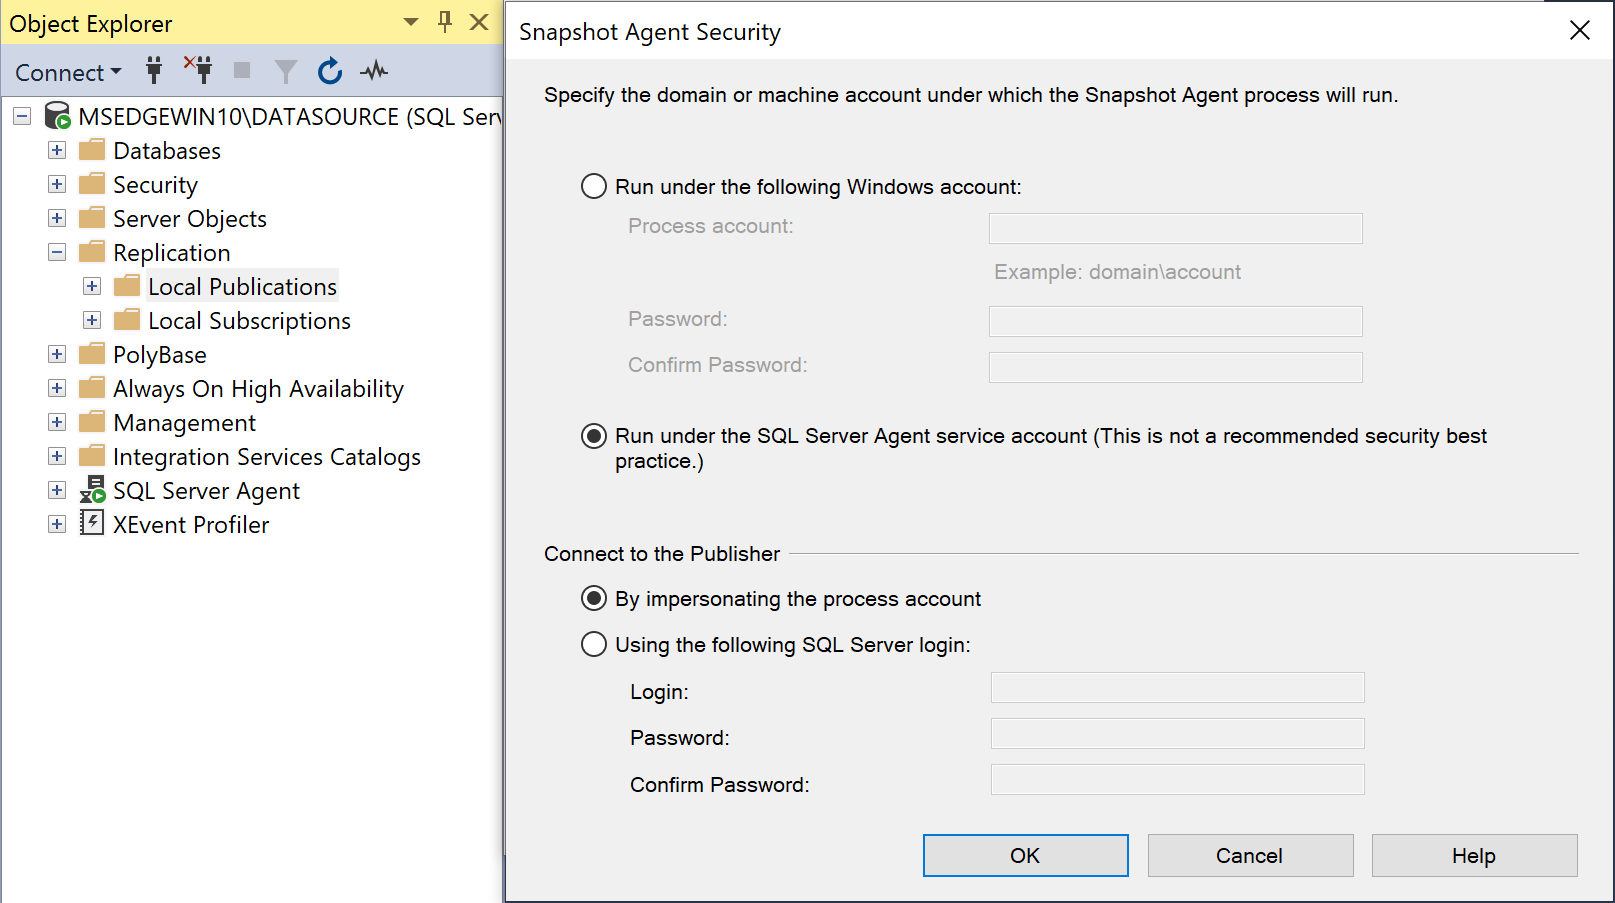
-
On the Security step, click the Security Settings button.
-
Select the Run under the SQL Server Agent service account and By impersonating the process account option.
-
Click OK.
-
Click Next.
-
Select Create the publication.
-
Provide a name of the publication in the format
AR_PUBLICATION_000XXwhereXXis the DBID from step 3. For example:- If your DBID is less than 10, you need to name the publication
AR_PUBLICATION_0000X(4 zeros). - If your DBID is greater than or equal to 10, you need to name the publication
AR_PUBLICATION_000XX(3 zeros).
- If your DBID is less than 10, you need to name the publication
-
Click Finish.
-
Right-click on Replication → Local Publications and click Launch Replication Monitor.
-
Select the publication you just created and open the Agents tab.
-
The Snapshot Agent job should have completed successfully and the Log Reader Agent job should be running.
-
Right-click the Log Reader Agent job and open the Agent Profile.
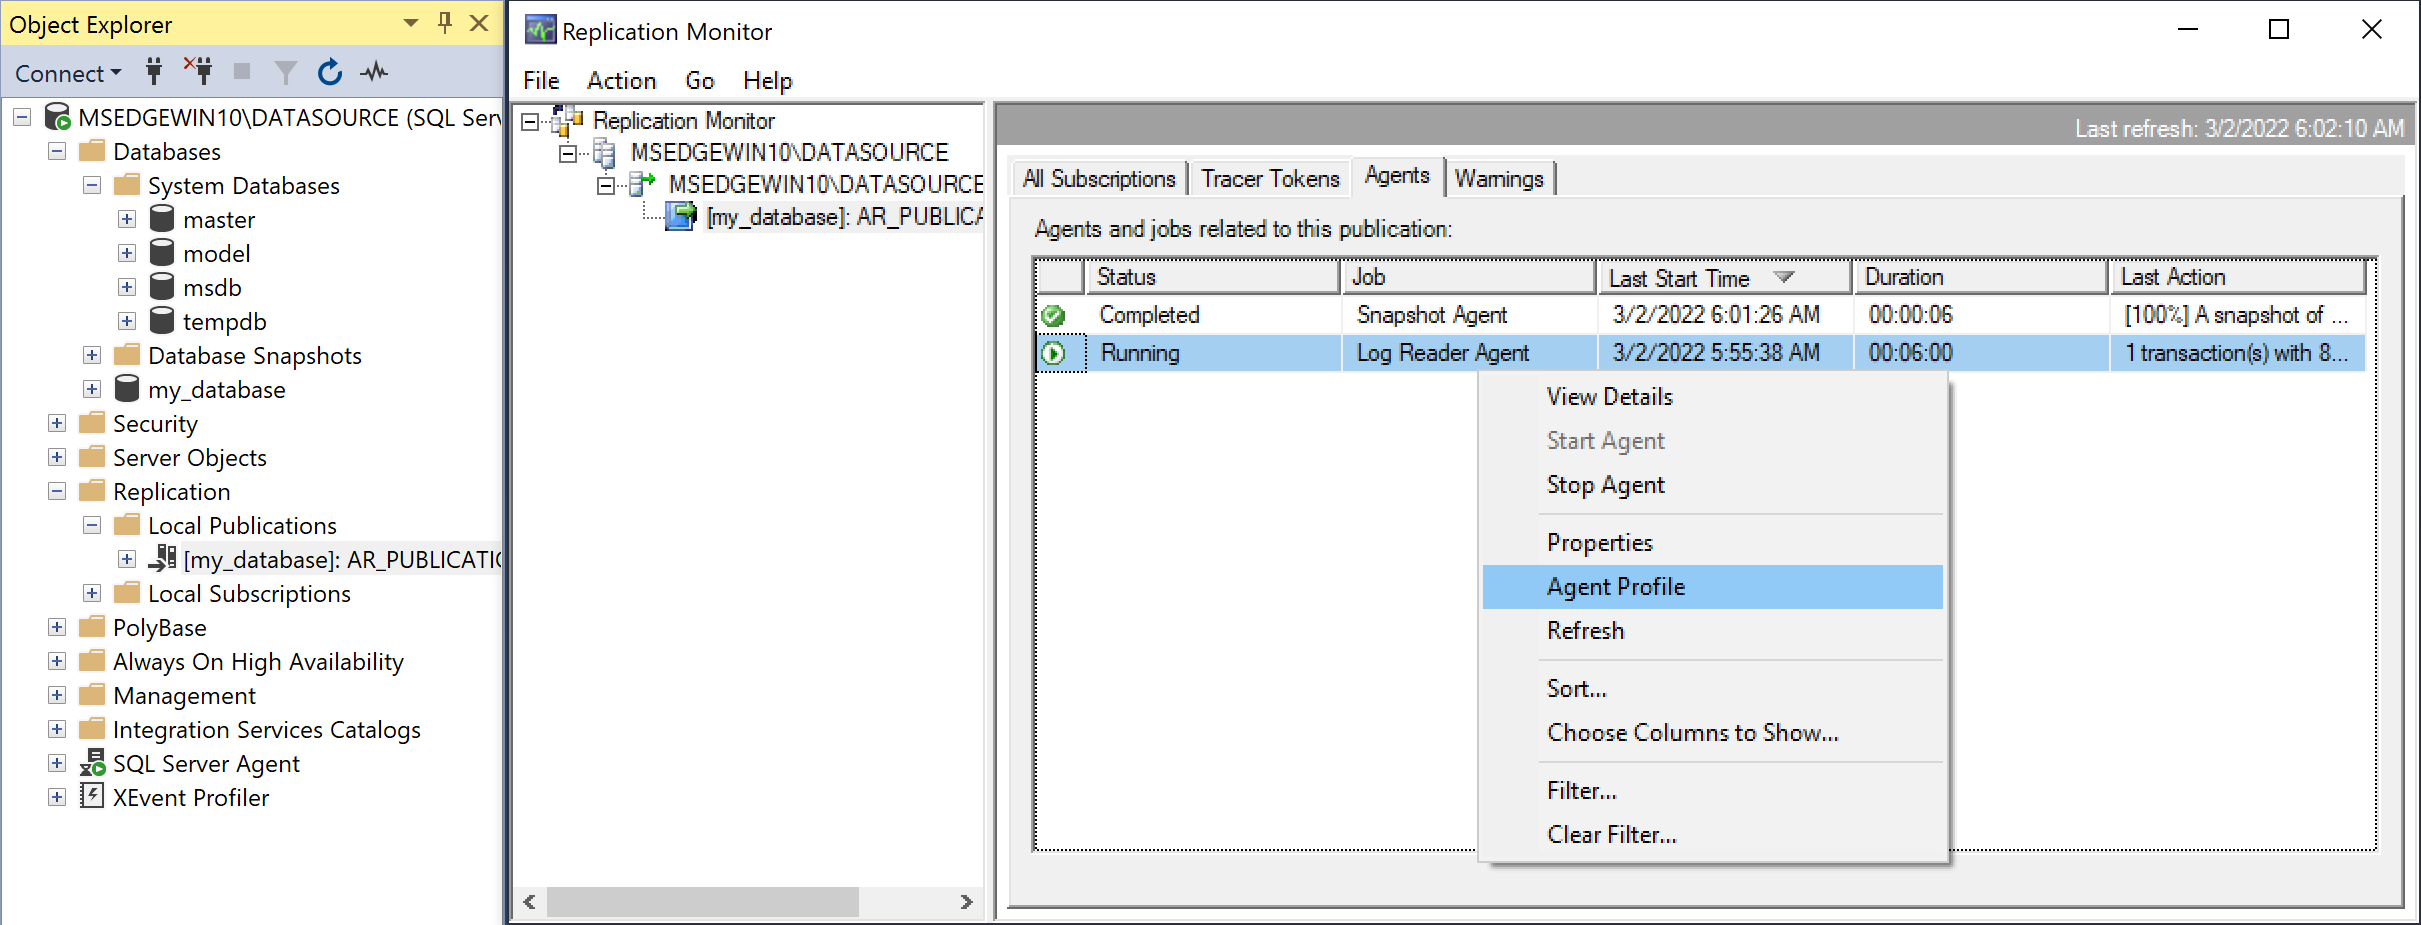
Open the Agent Profile for the Log Reader Agent -
Click New and select the
Default agent profileto initialize the new profile from. -
Edit the
pollingintervalto86399, which configures unread changed to be purged after a day.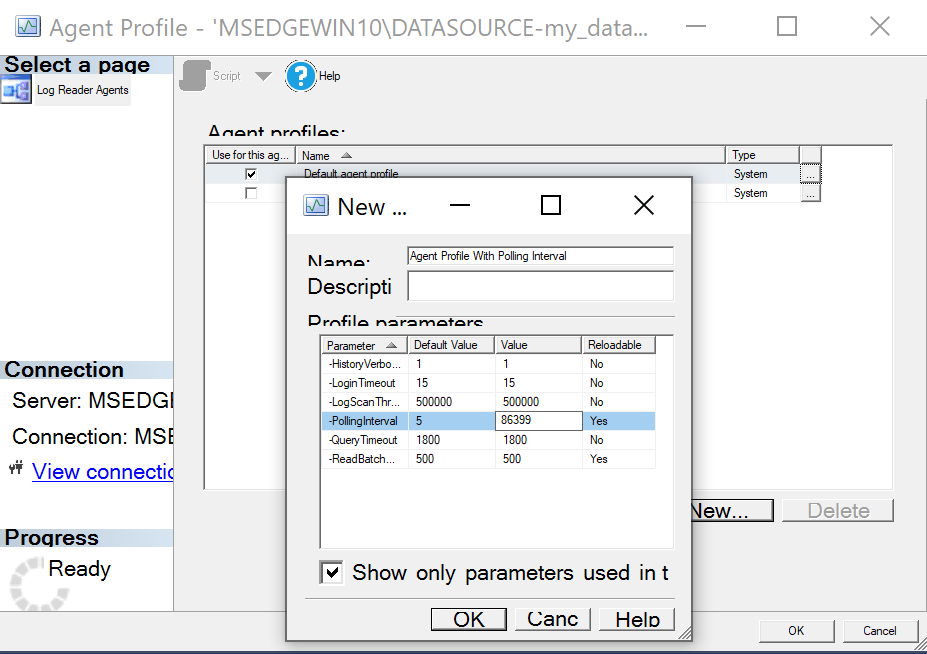
Configure a higher polling interval than the default -
Select the new agent profile and click OK.
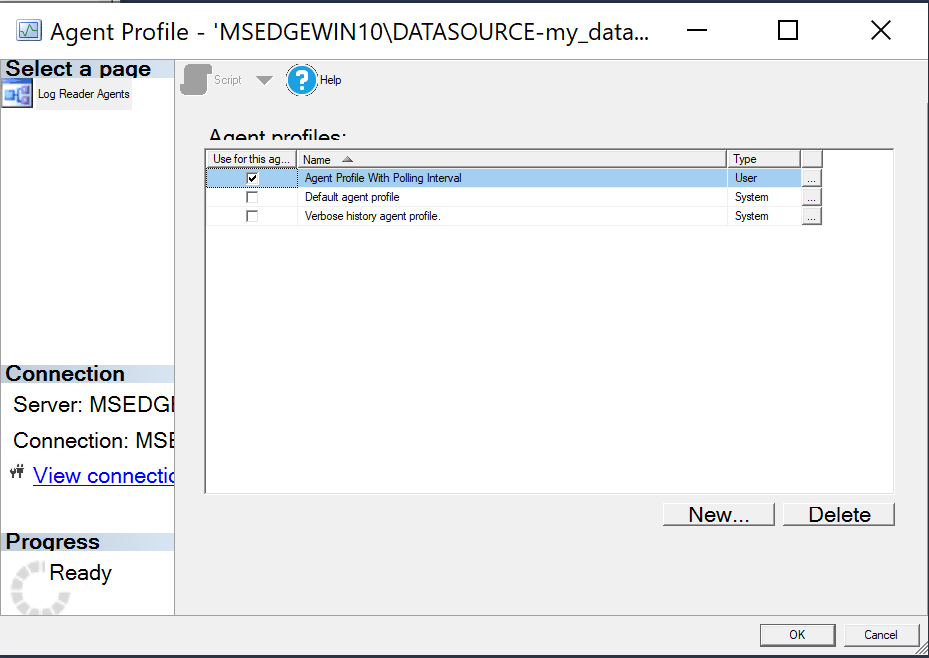
Enable the new Agent Profile
With some versions of SQL Server, if the value of pollinginterval is set to more than 3599 seconds, the value resets to the default five seconds.
When this happens, T-Log entries are purged before the log reader can read them. To determine which SQL Server versions are affected by this known issue, see this Microsoft KB article .


CDC Limitations
Server Limitations
- Instances hosted on UNIX systems are not supported.
- The SQL Server version must support TLS 1.2 or higher.
Database and Table Limitations
- Windows Authentication isn’t supported, the user must have a password for Etleap to be able to authenticate.
- Replicating from a Secondary SQL Server database isn’t supported as a source database.
- Replicating sparse tables is not supported.
- Temporal Tables aren’t supported.
- Tables with column-level encryption aren’t supported.
- Replicating data from indexed views isn’t supported.
- Memory-optimized tables using In-Memory OLTP aren’t supported.
- Delayed transaction durability isn’t supported.
IDENTITYcolumns are not replicated.- Geometry columns are not supported.
Data Manipulation Language (DML) and Data Definition Language (DDL) Limitations
- Changes to computed columns aren’t replicated.
- SQL Server partition switching isn’t supported.
- When using the
WRITETEXTandUPDATETEXTutilities, the resulting changes aren’t captured. - The following DML pattern isn’t supported:
SELECT * INTO new_table FROM existing_table - Renaming tables and columns using sp_rename isn’t supported.
TRUNCATE TABLEevents aren’t captured.- Changes to default column values and column nullability are not captured.
Backup Transaction Log Limitations
- Encrypted backups aren’t supported.
- Compressed backups aren’t supported.
- Backups stored at a URL or on Microsoft Azure aren’t supported.
- SQL Server backup to multiple disks isn’t supported. If the backup is configured to be written to multiple files over different disks, the replication task will fail.
- Backups in a striped media set are not supported.
Backup Transaction Log File Limitations
- The backup transaction logs must reside in a shared folder with the appropriate permissions and access rights.
- Active transaction logs are accessed through the Microsoft SQL Server API, and not at file-level.
CDC Error Guides
- SQL Server: Configure Transaction Log Retention
- SQL Server: Truncate the Transaction Log
- The database password must not contain any of the following invalid characters :
, ;.